Fall Garden Cleanup: What to Do (and What to Leave)
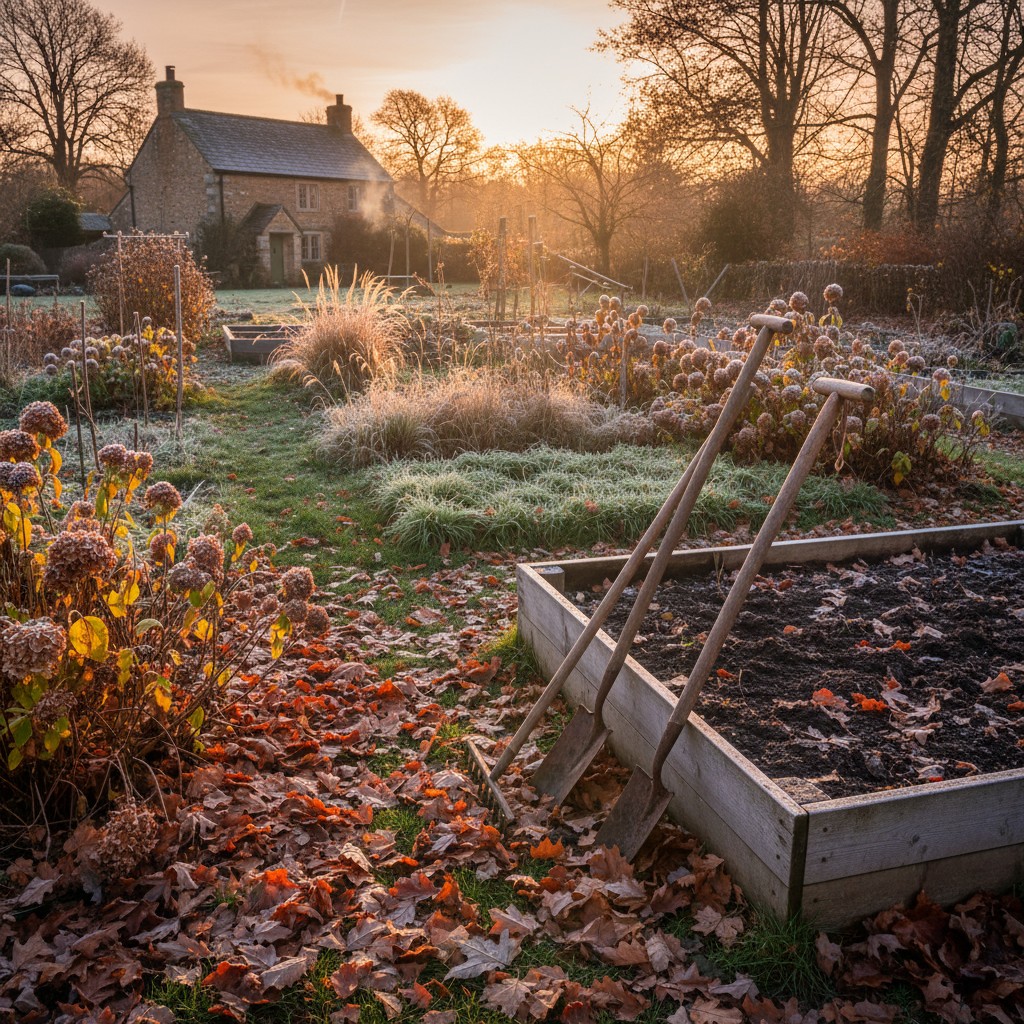
For the first several years I raked every bed down to bare dirt each October, proud of how neat it looked. Then I noticed the coneflowers and black-eyed Susans I had left standing one year because I ran out of weekend, were covered in goldfinches all November and December. The kids noticed it too, and now leaving the seedheads standing is the part of fall cleanup we actually look forward to.
Every autumn the urge hits: rake it clean, cut it down, haul it away. For generations that was the gold standard of good gardening. But a body of research from entomologists, soil ecologists, and pollinator conservationists has quietly rewritten the rulebook. The new guidance isn’t “do less”, it’s “do the right things and skip the rest.”
This guide walks through exactly what to pull, what to protect, and what to plant before the ground freezes.
Why the “Clean Garden” Myth Hurts More Than It Helps
The impulse to strip every stem and bag every leaf feels productive, but it removes the overwintering habitat that roughly 30% of North American native bee species depend on. The Xerces Society for Invertebrate Conservation, the leading authority on pollinator habitat, documents that many native bees overwinter inside hollow or pithy plant stems (think Joe-Pye weed, coneflower, and ornamental grasses), inside leaf litter, or in the top inch or two of undisturbed soil. Cutting stems to the ground and vacuuming up every leaf effectively eliminates those populations from your property.
Beyond insects, research from the Cornell Lab of Ornithology shows that standing seedheads from coneflowers, black-eyed Susans, rudbeckia, and native grasses provide critical caloric fuel for migrating and resident songbirds from October through February, food that doesn’t exist in a tidied bed.
The tradeoff isn’t aesthetics vs. Ecology. A thoughtfully “messy” garden, with structure left standing, leaf layers tucked under shrubs, and a few brush piles in corners, reads as intentional and wild-beautiful while doing meaningful conservation work.
“Leaving hollow and pithy stems standing through winter provides nesting sites for tunnel-nesting native bees. Even a modest patch of stems can support dozens of species.”, Xerces Society, Leaving Stems and Stalks
What to Remove: The Real Targets for Fall Cleanup
Selective removal is smarter than blanket clearance. Focus your energy on things that will cause problems if they stay, and skip everything else.
Diseased Foliage and Infected Plants
This is the non-negotiable category. Powdery mildew on squash, black spot on roses, fire blight on fruit trees, early blight on tomatoes, all of these overwinter in plant tissue and soil debris. Leaving infected material in the garden guarantees a heavier disease load next spring. Pull it, bag it (not compost), and remove it from the property entirely. The same logic applies to any plant that showed signs of root rot or crown disease: take it out now rather than let pathogens build in the soil over winter.
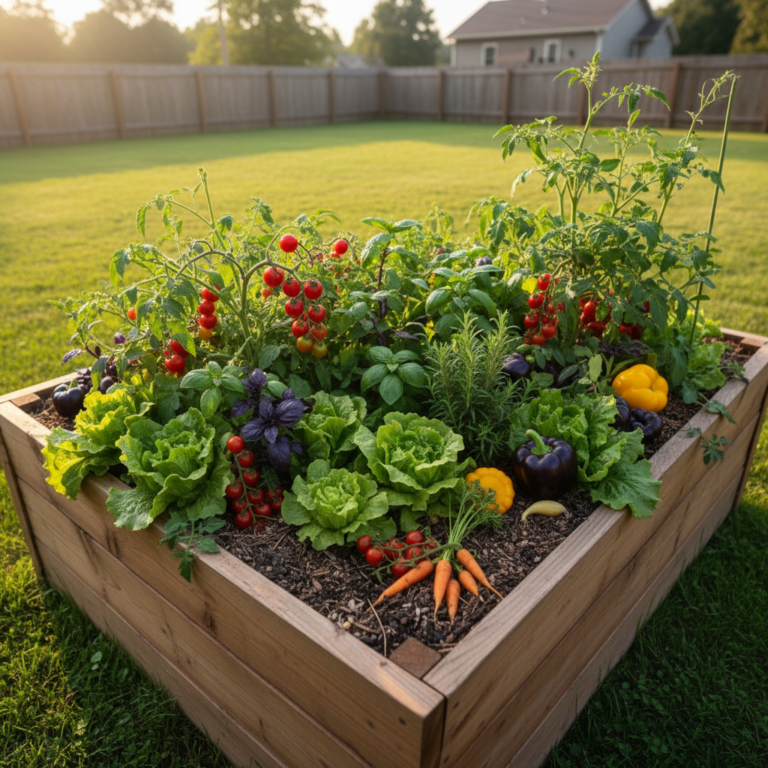
Spent Annuals
Annual vegetables and flowers complete their life cycle in a single season and have nothing left to offer once frost kills them. Tomato vines, pepper plants, squash, cucumbers, and zinnias can all come out. If the plants were healthy, chop the stems coarsely and add them to your compost pile, they’ll break down quickly and return nutrients to the garden. If diseased, dispose of them in yard waste or municipal green bins, not home compost.
Invasive or Weedy Seedheads
Burdock, garlic mustard, bindweed, and other invasive plants should be pulled before they drop seed. One burdock plant can produce 400 seeds; letting it stand “for the birds” is a net loss. Know your plants, native thistles support goldfinches and should stay, but non-native invasives need to go.
Dense Debris That Harbors Slugs and Voles
Thick, matted grass clippings piled against plant crowns, old cardboard that didn’t break down, and wooden boards left on bare soil all create ideal overwintering conditions for slugs, voles, and fungal pathogens. Clear these specific debris types rather than all organic matter.
What to Leave: Intentional Structure Through Winter
These are the things your garden, and the wildlife depending on it, needs you to leave alone until temperatures reliably reach 50°F in spring.
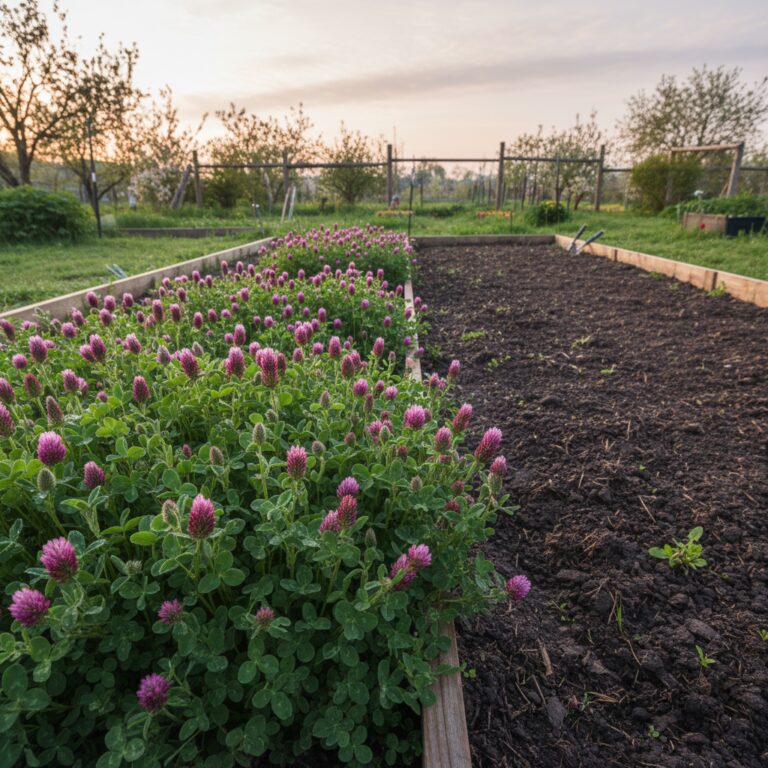
Hollow and Pithy Stems
Native bees including mason bees, leafcutter bees, and small carpenter bees lay eggs inside hollow stems. The eggs hatch, the larvae develop over winter, and adults emerge in spring. Echinacea (coneflower), rudbeckia, sunflowers, Joe-Pye weed, goldenrod, and most ornamental grasses all provide this habitat. Leave stems at 12–18 inches rather than cutting to the ground. If you must cut, bundle the stems and leave the bundles lying horizontally in a sheltered spot, it’s almost as effective.
Standing Seedheads for Birds
Finches, chickadees, nuthatches, and sparrows forage heavily on standing seedheads through winter. Coneflower, black-eyed Susan, rudbeckia, liatris, anise hyssop, and most ornamental grasses provide reliable seed sources. The Cornell Lab of Ornithology’s Project FeederWatch data consistently shows that native plantings reduce dependence on supplemental feeders while supporting higher bird diversity. Leave these standing as long as possible. January or February is fine.
Leaf Litter Under Shrubs and in Garden Beds
A 2–3 inch layer of fallen leaves under shrubs, around perennials, and at the base of trees acts as insulation (moderating freeze-thaw cycles that heave plant roots), moisture retention, and habitat. Luna moths, swallowtail butterflies, and fireflies overwinter in leaf litter as pupae or eggs. The leaves also feed earthworms and soil fungi that support plant health all season long. You don’t need to leave leaves across the entire lawn, just concentrate them where they do the most good: under shrubs, in perennial beds, around tree bases.
Perennial Plant Crowns Intact
Hostas, daylilies, ornamental grasses, and most herbaceous perennials die back naturally and regrow from the root crown. Leave the dead top growth intact through winter, it acts as insulation for the crown and signals to you and wildlife exactly where plants are. Cut it back in late March or early April when you see new growth beginning to push through.
Composting Fall Garden Waste the Right Way
Fall generates a mountain of organic material, leaves, spent vegetable plants, straw mulch, and pruned branches. All of it can become finished compost by spring or summer if you manage it correctly now.

The biggest fall composting mistake is dumping whole leaves in a pile and walking away. Whole leaves mat together, exclude oxygen, and take 2–3 years to break down. Instead, run a lawn mower over leaf piles before adding them, or shred them in a leaf blower set to vacuum mode. Shredded leaves break down in a single season and make exceptional leaf mold, one of the best soil conditioners available.
Build a fall pile with alternating layers: 2–3 parts brown (shredded leaves, straw, dry plant stalks) to 1 part green (fresh plant material, kitchen scraps, coffee grounds). Water it well before a hard freeze. A well-built pile will continue to break down internally even when the exterior freezes. For a deeper look at building an effective system, see Composting 101.
Leave diseased plant material out of the pile entirely unless your compost regularly reaches 140–160°F in the active phase, most backyard piles don’t get hot enough to reliably kill pathogens.
“Autumn leaves are too valuable to send to the landfill. Shredded and composted, they improve soil structure, suppress weeds, and feed soil organisms.”, USDA Natural Resources Conservation Service, Composting Guide
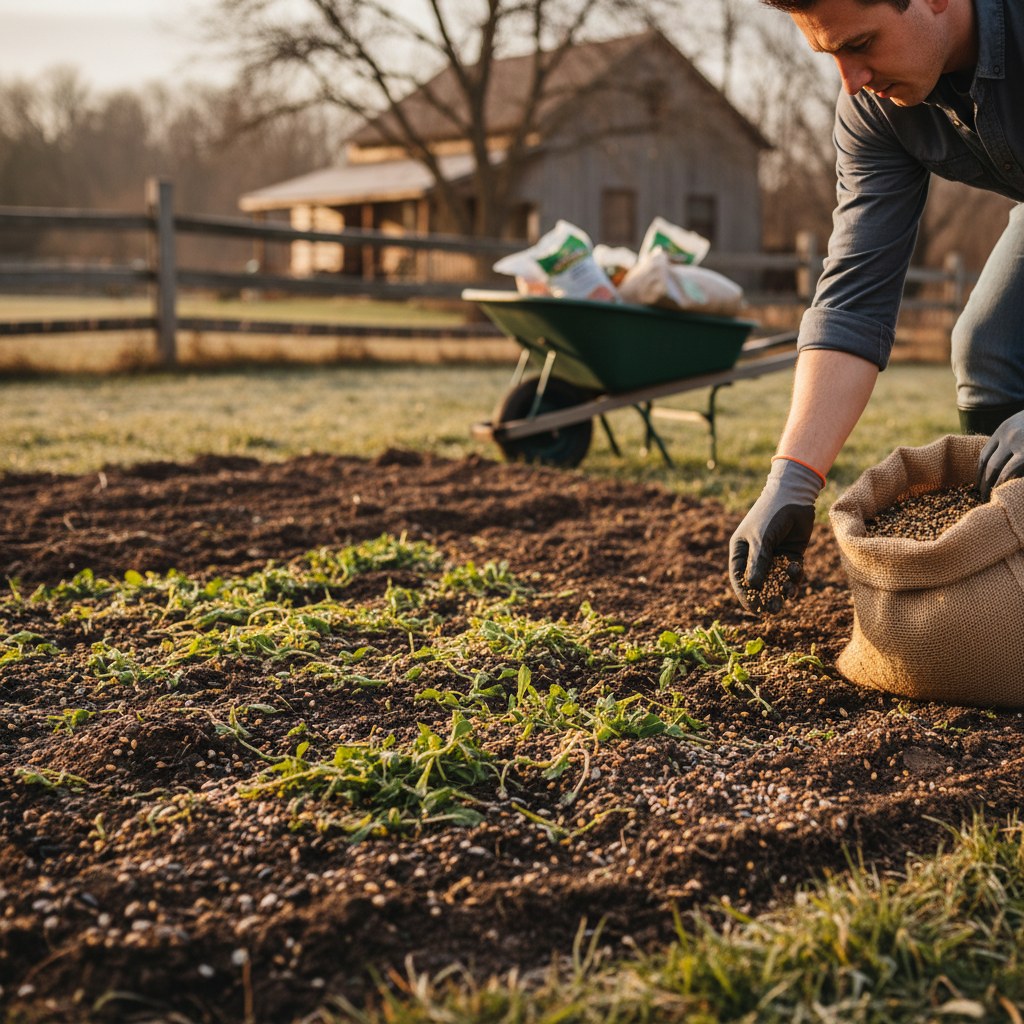
Planting Cover Crops Before the Ground Freezes
Cover crops are one of the highest-ROI fall tasks available to a home gardener. A cleared vegetable bed left bare over winter loses topsoil to erosion, allows weed seeds to establish, and lets the soil food web go dormant without a carbon source. A cover crop does the opposite on all three counts.
The planting window matters. Most cover crop seeds need at least 4–6 weeks of growth before a hard freeze to establish well. In USDA zones 5–7, that typically means seeding by mid-October. In zones 3–4, aim for mid-September.
Good options for home gardens:
- Winter rye: The most cold-hardy option, germinates in near-freezing soil, grows all winter in mild zones and resumes in spring. Adds bulk organic matter when tilled or mowed under.
- Hairy vetch: A nitrogen-fixing legume, plants pull nitrogen from the air and fix it in root nodules. Excellent before a heavy-feeding crop like corn or squash.
- Crimson clover: Fixes nitrogen, flowers early in spring feeding pollinators, and mow-kills easily. Good in zones 6–9.
- Oats or field peas: “Winter-kill” covers, they germinate, grow, then die back in hard frost. The dead biomass becomes a natural mulch layer that suppresses weeds and protects soil without needing to be tilled under in spring. Easiest for beginners.
Cover crops align directly with no-till principles, you’re feeding the soil rather than disturbing it. For the broader logic behind this, see No-Till Gardening: How to Grow More by Digging Less.
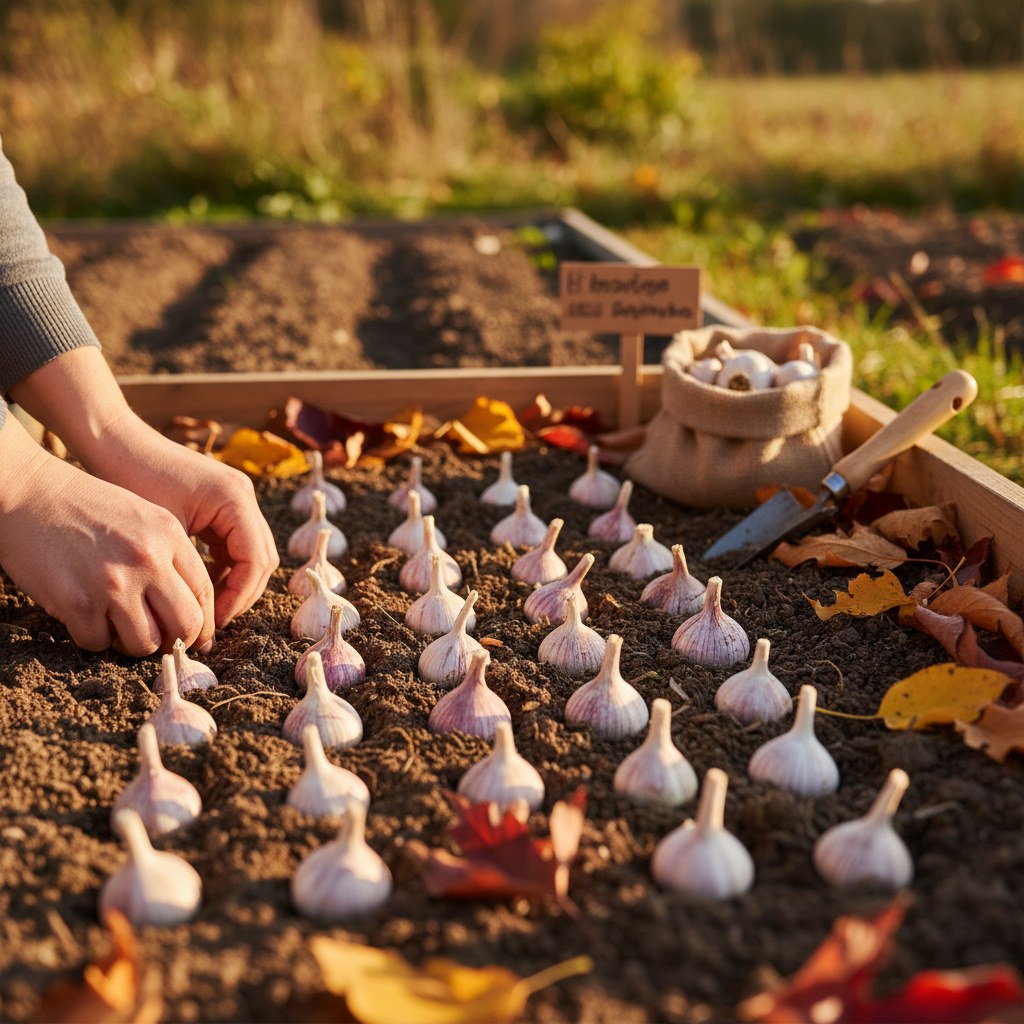
Fall Garlic Planting: Don’t Miss the Window
Garlic is among the most rewarding fall tasks and among the most time-sensitive. Hardneck garlic (the best-tasting, best-storing types: Rocambole, Purple Stripe, Porcelain) requires a cold vernalization period to develop properly, it needs to experience 40–50°F temperatures for 6–8 weeks before it can form bulbs. That means fall planting isn’t optional; it’s how garlic works.
Planting timing: 4–6 weeks before your average first hard freeze. In most of the US, that’s October into early November. In zones 3–5, aim for early October. In zones 7–8, late October to mid-November.
How to plant:
- Break bulbs into individual cloves the day of planting.
- Plant pointy end up, 2 inches deep, 6 inches apart.
- Cover with 3–4 inches of straw mulch after planting, this insulates roots through freeze-thaw cycles and is arguably more important than timing.
- Green shoots may appear before hard frost, that’s fine. They’ll die back and resume growth in spring.
Harvest is in July of the following year, making garlic the longest-running crop in the garden and one with zero in-season maintenance.
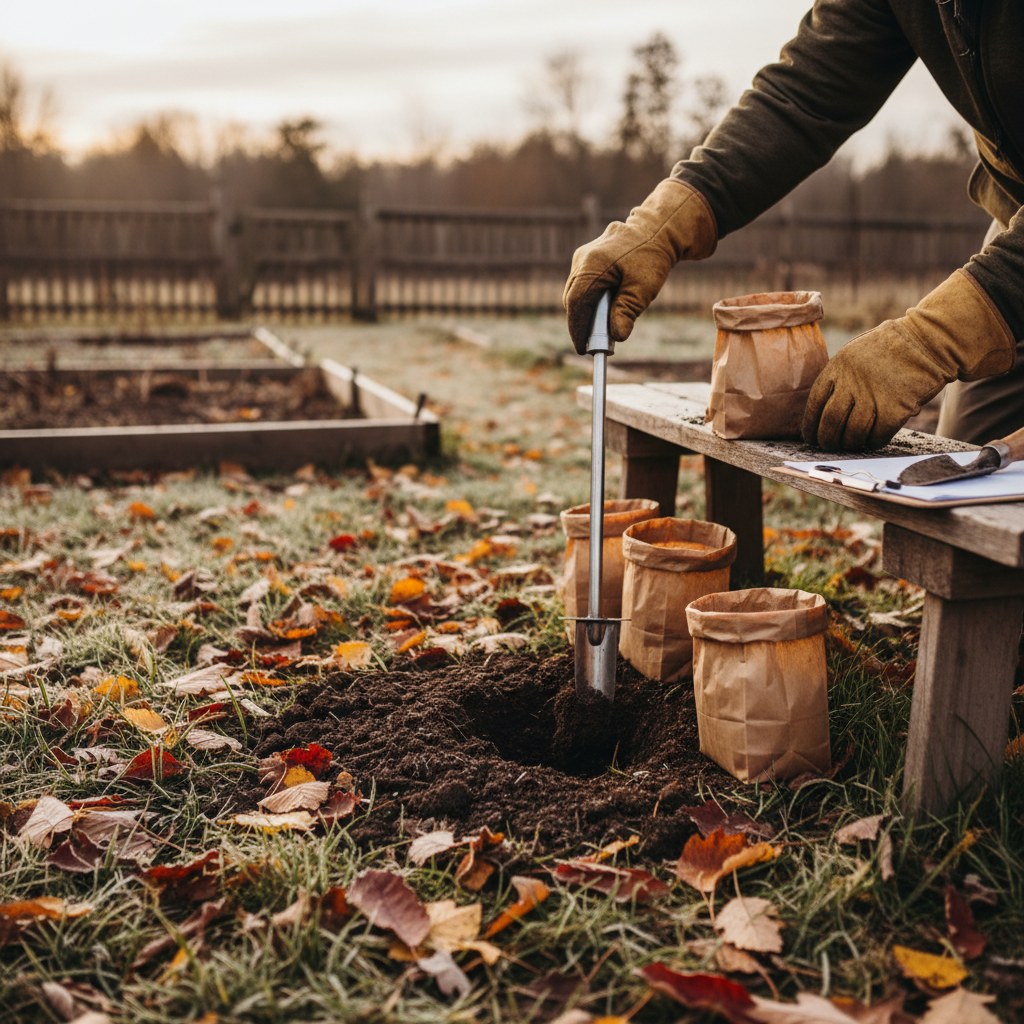
Soil Testing Before Winter: The One Task Most Gardeners Skip
Fall is the ideal time for a soil test, better than spring, when you’re in a rush to plant and any amendments you add won’t have time to incorporate. A fall test gives you all winter to source and apply what your soil needs.
University extension labs (Penn State, UMass, Cornell, NC State, and most land-grant universities) offer soil testing kits for $15–25. They return results with specific lime and fertilizer recommendations calibrated to your goals (vegetables, fruit trees, lawns). Basic tests cover pH, phosphorus, potassium, and organic matter; more detailed panels add calcium, magnesium, sulfur, and micronutrients.
The most common finding in home garden soil is low pH, most vegetables perform best at 6.0–7.0, and many home soils drift acidic, especially in high-rainfall regions or heavily composted beds. Lime raises pH but takes 3–6 months to fully react in soil, making fall the only realistic window for correcting a spring planting bed.
“Fall is the best time to test soil because lime applied now has winter to incorporate and react before spring planting begins.”, Penn State Extension, Soil Testing for Home Gardeners
Tool Maintenance: The 20-Minute Job That Protects a Season
Garden tools left dirty over winter rust, dull, and crack handles. Twenty minutes of maintenance in November saves hours of frustration next April.
For hand tools (trowels, hand forks, pruners, loppers):
- Scrub off soil with a stiff brush and water.
- Dry completely: rust begins in moisture.
- Wipe metal parts with a lightly oiled rag (any food-safe oil works: linseed, mineral, vegetable).
- Sharpen blades. A whetstone or diamond file on hoe edges, shovel edges, and pruner blades makes a noticeable difference. Sharp tools cut cleanly; dull tools tear and fatigue the user.
For long-handled tools (shovels, rakes, hoes, forks):
- Check handles for cracks or splinters and sand smooth. Cracked handles fail under load, replace before they fail in use.
- Store vertically or on a wall rack with heads off the floor. Prolonged floor contact traps moisture.
For power tools (tillers, mowers):
- Drain gasoline or add fuel stabilizer if leaving fuel in the tank.
- Change the oil.
- Remove and sharpen or replace mower blades.
- Clean air filters.
Mulching Perennial Beds for Winter Protection
Perennials that are established in your climate zone don’t need mulching to survive winter, they’re adapted to it. But mulching still earns its place for three reasons: it moderates freeze-thaw cycles (the physical heaving that breaks roots), retains soil moisture through late-season drought, and suppresses early spring weed germination.
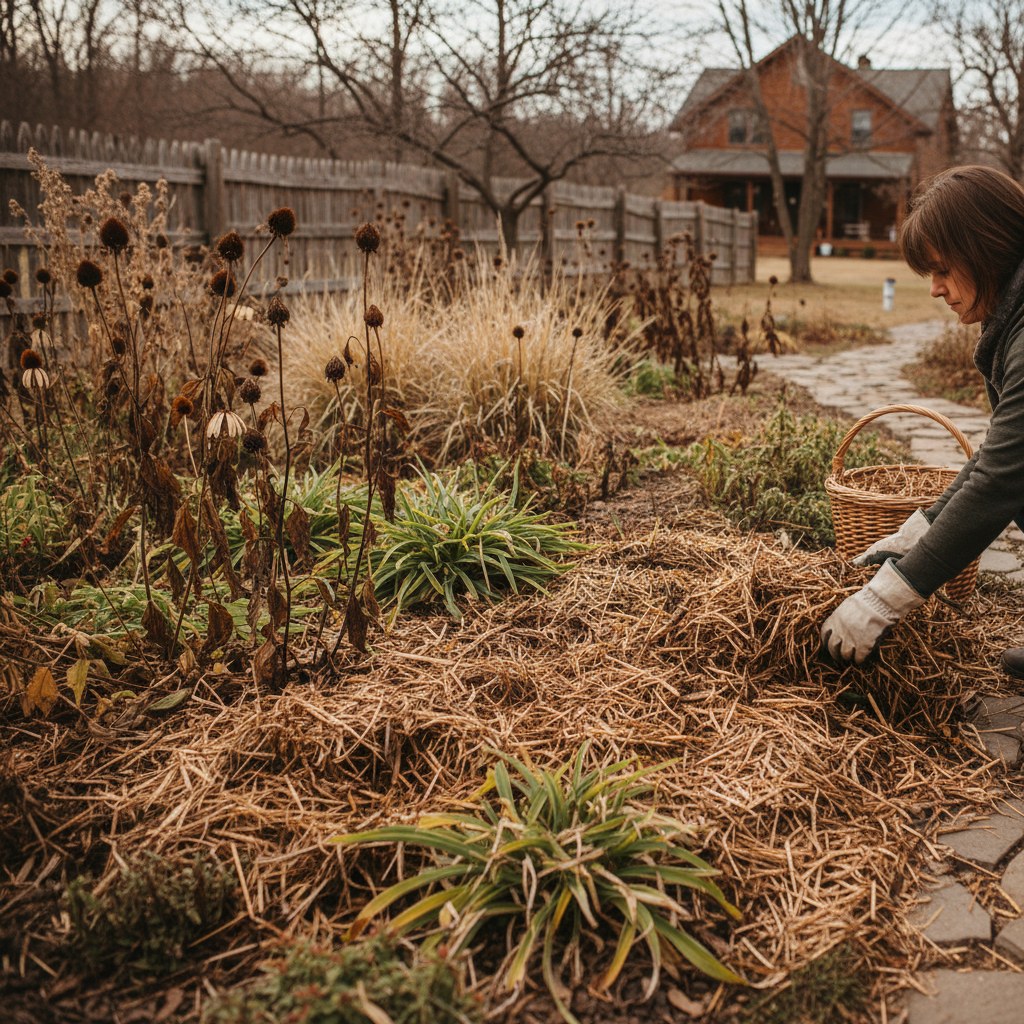
Apply 2–3 inches of mulch, straw, shredded leaves, or wood chips, after the ground has cooled but before it freezes hard. In most zones that’s mid to late November. Applying too early (when the ground is still warm) can keep soil too warm and delay the plant’s hardening-off process, or invite rodents to nest in warm mulch against plant crowns.
Keep mulch a few inches away from plant crowns and tree trunks. Crown rot is the main mulch-related injury, caused by mulch piled directly against stems, trapping moisture and preventing airflow.
New plantings: anything planted this past spring or summer, benefit more from mulching than established ones. Their root systems are smaller and shallower, making them more vulnerable to frost heave.
Frequently Asked Questions
When is it safe to cut back perennials in fall?
Wait until after a hard frost has killed the foliage and ideally until late winter or early spring. Many perennials provide winter interest, food for wildlife, and habitat for beneficial insects when left standing. If you must cut back in fall for aesthetic reasons, leave stems at 12–18 inches rather than cutting to the ground, and do it no earlier than late October.
Should I add fall leaves to my vegetable garden beds?
Yes: shredded leaves are excellent. Whole leaves can mat and form a barrier that repels water, so run a mower over them first. A 2–3 inch layer of shredded leaves on empty vegetable beds suppresses weeds, feeds soil organisms, and improves soil structure. They’ll mostly break down by spring planting time.
Do I need to till my garden beds in fall?
No, and there are good reasons not to. Tilling disrupts the fungal networks and soil structure that took all season to develop, exposes weed seeds to light (triggering germination), and accelerates the breakdown of organic matter. Cover cropping or mulching accomplishes the same winter-protection goals without the downsides. See our guide to no-till gardening for the full case.
What’s the best mulch for overwintering garlic?
Straw is the traditional choice and works well, it insulates without matting, allows some airflow, and is easy to push aside in spring. Shredded leaves work nearly as well. Avoid whole leaves (they mat) and fresh wood chips (they can tie up nitrogen as they decompose, competing with the garlic). Apply 3–4 inches right after planting.
Can I compost plants that had powdery mildew?
Home compost piles rarely reach the sustained temperatures (140–160°F) needed to kill powdery mildew spores. The safe call is to bag infected plant material and put it in municipal green waste, where it goes to a commercial composting facility that does reach those temperatures. If your pile is actively hot and you can verify temperatures with a compost thermometer, the risk is lower, but for most backyard piles, it’s not worth it.