Vegetable Garden Layout Plans for Any Yard
Key Takeaways
- Layout determines whether your garden thrives or limps through summer, sun exposure, access paths, and plant placement matter more than which varieties you choose.
- A single 4×8 raised bed, planted thoughtfully with companions and successions, can keep a family in salads from April through October without replanting the whole bed.
- Paths need to be at least 18 inches wide, 24 inches if you wheel a cart through. Narrow paths are the most common beginner mistake and the hardest to fix mid-season.
- Vertical space is free real estate. Trellised cucumbers, beans, and tomatoes can double the yield per square foot without adding a single inch of bed space.
- Your frost dates are the master calendar. Every layout decision, from what to plant where to when to succession sow, flows from that one number.
Most first-time gardeners plant randomly. They pick up a six-pack of tomatoes, a few pepper plants, a cucumber start, toss some lettuce seeds in the gaps, and call it a garden. It grows: sort of. By July the tomatoes are shading everything, the cucumbers are crawling over the lettuce, and you can’t reach the center of the bed without stepping on something. The harvest is fine. The second year could be so much better.
I gardened that way for two seasons before I sat down with graph paper and actually drew a plan. The difference was immediate and humbling. We got more food from the same footprint, less disease from better airflow, and I stopped losing a quarter of the harvest because I couldn’t physically reach it. Layout isn’t just garden aesthetics, it’s function, and function is everything when you’re trying to feed your family.
What follows are three complete layout plans at different scales, the logic behind each decision, and how to adapt them to wherever you live.
Why Does Layout Matter More Than What You Plant?
You can plant the best tomato variety in the world in the wrong spot and get a mediocre harvest. Plant a mediocre variety in a thoughtfully designed bed with good sun, strong companions, and room to grow, and it will outperform the fancy variety almost every time.
Here’s what layout controls that you can’t fix after the season starts:
Sun Exposure and Bed Orientation
Vegetables need at least six hours of direct sun per day, most warm-season crops want eight or more. Orient rectangular beds with the long axis running north to south whenever possible. This gives both sides of the bed roughly equal sun exposure as the sun tracks east to west across the sky. If your beds run east to west, the north side ends up in permanent shade from anything taller than twelve inches, and you’ve wasted half your bed for tall crops.
Within a bed, plant your tallest crops on the north end so they don’t shade their shorter neighbors. Corn, trellised tomatoes, pole beans, these go north. Lettuce, spinach, carrots, beets, south. In a north-south oriented bed this matters less, but in an east-west bed it’s critical.
Companion Planting
Certain plants genuinely help each other when grown in proximity, and others actively compete. The classic Three Sisters planting, corn, beans, and squash together, works because the corn provides a trellis for beans, the beans fix nitrogen that feeds the corn, and the squash leaves shade the soil to retain moisture and suppress weeds. Each plant does something for the others.
Basil planted with tomatoes improves flavor (anecdotally, based on generations of gardeners) and may deter aphids and thrips. Marigolds: especially ‘Lemon Gem’ and ‘Tangerine Gem’ varieties, planted at bed edges attract beneficial insects and can deter aphids and thrips. Note: nematode suppression requires marigolds grown as a dense cover crop for 2+ months before planting, then tilled in, simply edge-planting marigolds will not suppress nematodes. Nasturtiums act as trap crops for aphids, pulling them away from your vegetables. These aren’t superstitions, they’re observed patterns that seasoned gardeners rely on. Our full companion planting guide covers the combinations in detail.
Access Paths
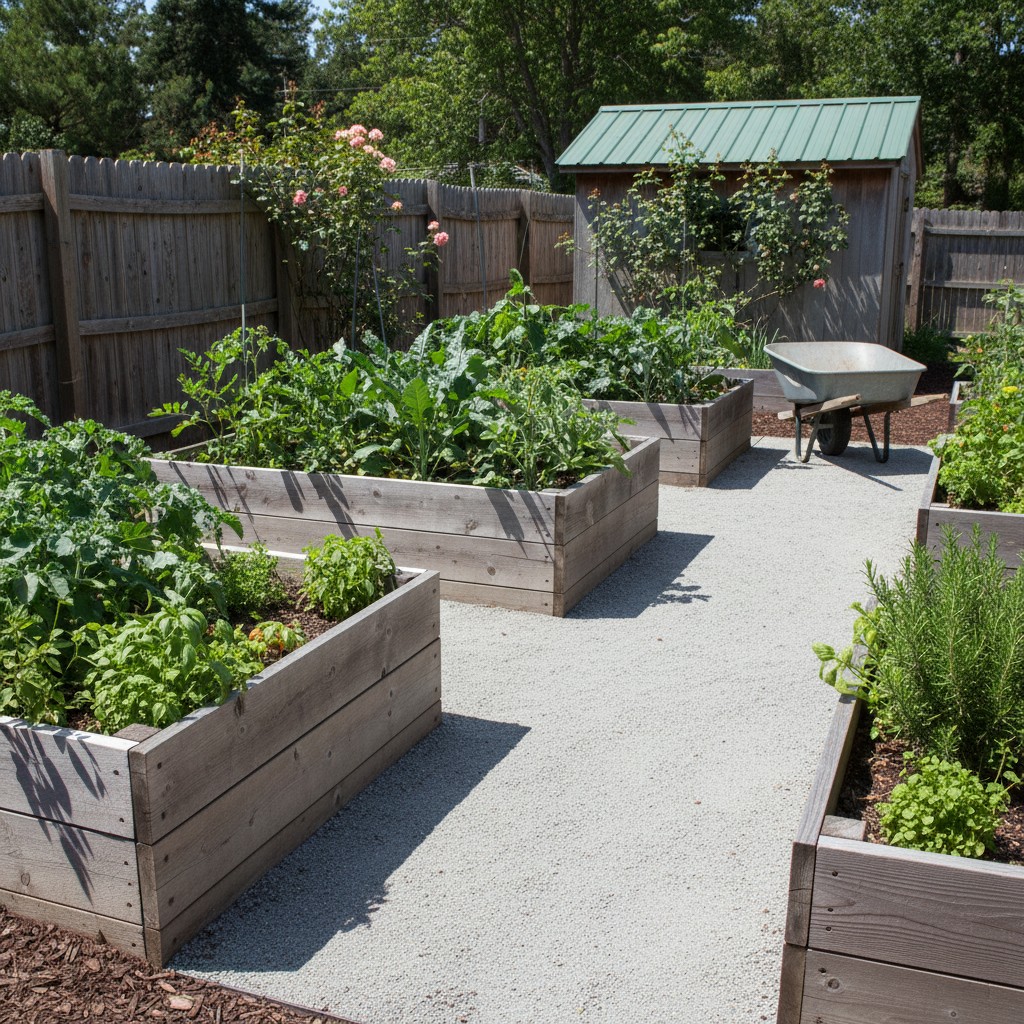
The rule I wish someone had told me on day one: never build a bed wider than you can comfortably reach to the center from both sides. For most adults, that’s 4 feet. Children and shorter adults should think 3 feet. Wide beds with no paths through them require you to lean, stretch, and eventually step inside, which compacts the soil you spent time building. Once you compact it, you’ve undone weeks of work.
Paths between beds need to be workable, not just walkable. 18 inches gets a body through. 24 inches lets you kneel, turn around, and wheel a loaded garden cart. If your paths are narrower than 18 inches, you will hate your garden by July.
Succession Planting
A layout that ignores succession planting wastes half its potential. Succession planting, sowing new seeds every two to three weeks in the space vacated by finished crops, turns a one-season bed into a continuous producer. Radishes are done in 30 days; that space can immediately go to a late-summer lettuce planting. Your first round of peas finishes in July; that trellis space is ready for a fall crop of snap beans.
Planning for succession means knowing what you’ll plant where before the first frost-free date. Our guide to succession planting for a full-season harvest walks through the timing in detail.
What Is the Best Layout for a 4×8 Raised Bed?
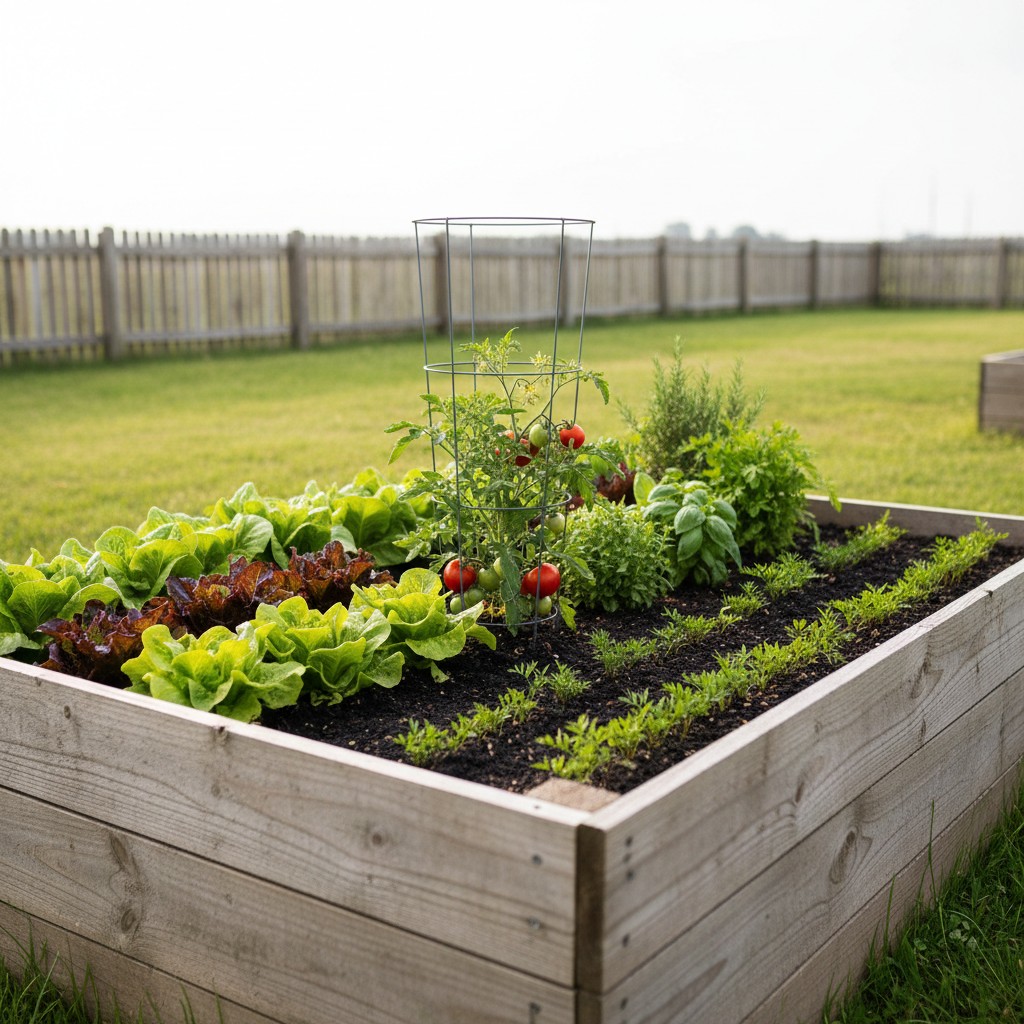
A 4×8 raised bed is the most common starting point, and for good reason: it’s the size of a standard sheet of lumber, it’s manageable, and you can reach every inch of it from the sides. The 32 square feet of growing space, used well, can keep two to four people in salad greens and a rotating mix of vegetables from April through the first frost.
the trick is treating the bed as a grid of eight 2×4-foot zones, which maps cleanly onto square foot gardening spacing principles without being rigid about it.
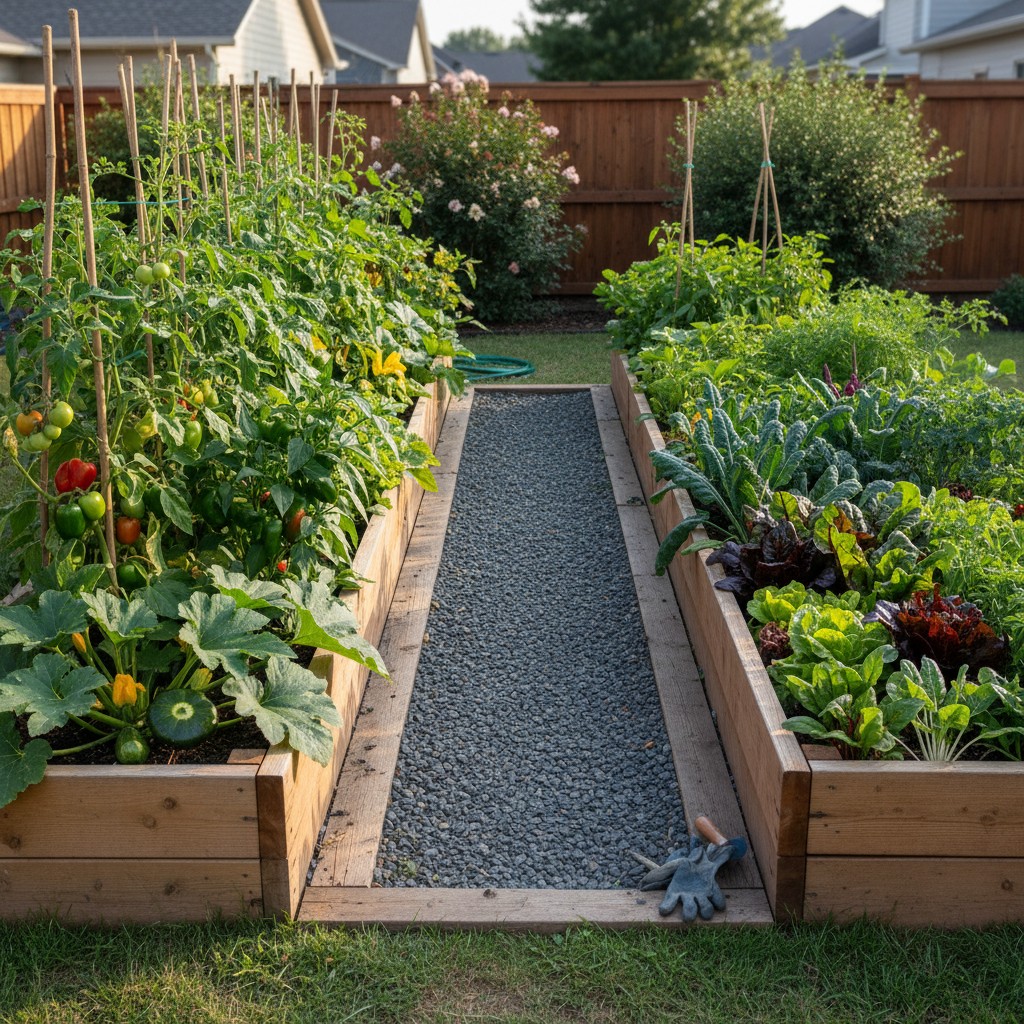
The Salad and Staples 4×8 Plan
This layout assumes a north-south orientation (long sides face east and west). Tall plants go on the north end, short plants south.
| Zone (from North) | Plant | Spacing | Notes |
|---|---|---|---|
| North end (2×4 ft) | 1 indeterminate tomato (Sungold or Black Krim) | 1 plant, caged | Plant basil at its feet, 2–3 plants |
| Zone 2 (2×4 ft) | 1 summer squash (Patio Star or Bush Baby) + 1 cucumber on a trellis (Spacemaster) | 1 squash, 1 cucumber | Trellis the cucumber on the north-side bed wall |
| Zone 3 (2×4 ft) | Lettuce mix (looseleaf: Black Seeded Simpson, Red Sails, Oak Leaf) | 4 inches apart, broadcast-sown | Cut-and-come-again. Resow every 3 weeks. |
| Zone 4 (2×4 ft) | Radishes + carrots interplanted (Danvers 126 or Scarlet Nantes) | Radish 2 in., carrot 3 in. | Radishes are up in 30 days. Pull them; carrots fill in. |
| South edge (full width) | ‘Lemon Gem’ marigolds | 6 inches apart | Pest deterrent, pollinator attractor, edible garnish |
Soil depth note: The spacing recommendations above assume a minimum 12-inch soil depth. For shallow beds (6–8 inches), skip deep-rooted crops like carrots and parsnips, they will fork and stunt in compacted soil below the bed floor. Substitute radishes, beets, or salad turnips, which root in the top 6 inches.
This layout covers every base category: a fruiting crop, a vining crop, salad greens, roots, and a beneficial border plant. The tomato produces all summer. The squash and cucumber keep going until frost. The lettuce zone gets successively resown when plants bolt, switching from heat-sensitive varieties to heat-tolerant ones (Jericho, Nevada, and Concept are all bolt-resistant) as summer arrives.
If you want to build this bed first, our beginner’s guide to building a raised bed has the full construction walkthrough.
🌱 From Our Homestead
Our first 4×8 bed is the one I’m most proud of redesigning. The original version had four tomato plants in it, just tomatoes, taking up the whole bed, because I thought more plants meant more tomatoes. What I got was a jungle I couldn’t walk through, tomatoes competing with each other for nutrients, and zero airflow that led to early blight by August.
I ripped out three of the four tomatoes the next year, added a cage-trained Sungold cherry tomato in the north corner, tucked in a squash and a trellised Spacemaster cucumber on the bed’s northern wall, and filled the south end with cut-and-come-again lettuce varieties. We got more tomatoes than the four-plant bed produced, salad greens from April to June and again in September, and cucumbers into October. Same 32 square feet. Completely different result.
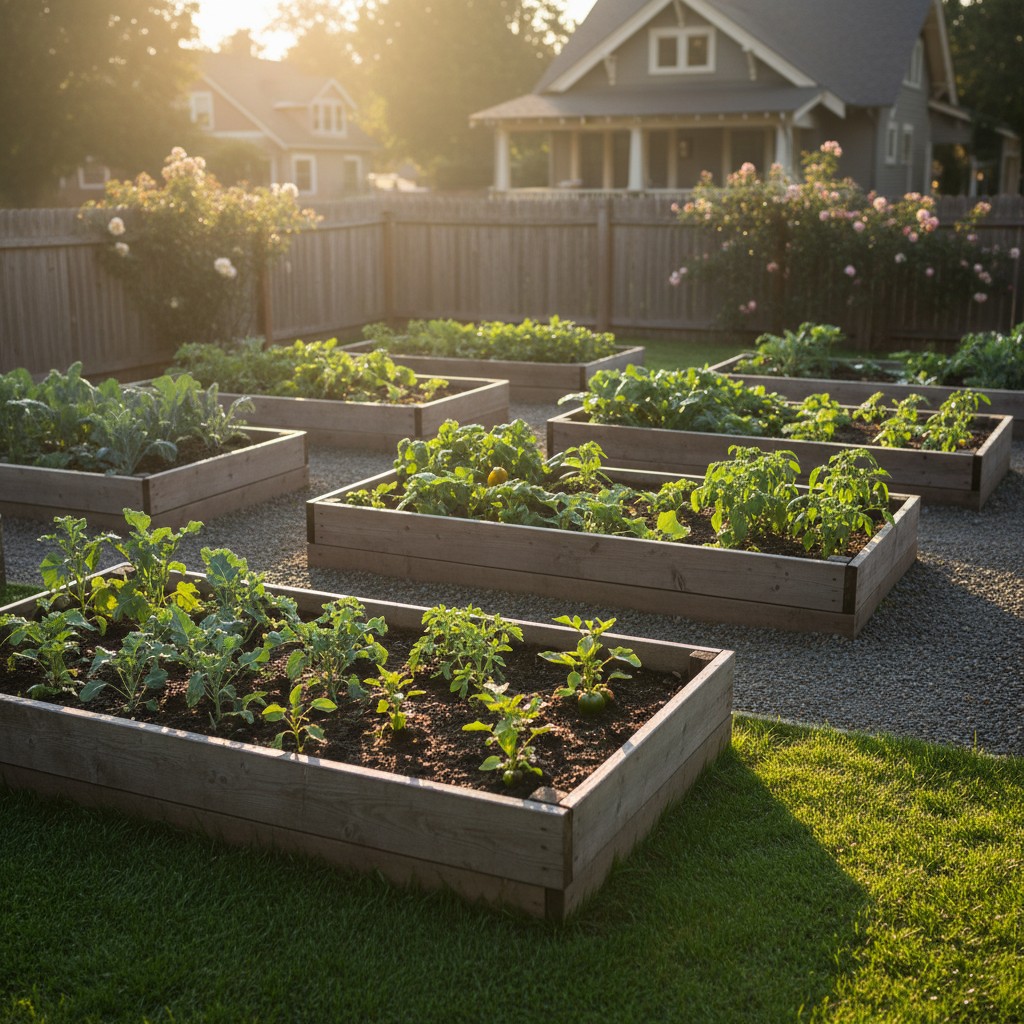
How Do You Plan a 4×16 Double Bed Layout?
Two 4×8 beds running parallel with a 24-inch path between them give you 64 square feet of growing space and the opportunity for a true two-bed system: one devoted to warm-season crops and one to cool-season crops. This is where succession planting becomes a real engine for continuous harvest.
Bed One: The Warm-Season Bed
This bed doesn’t go in the ground until after your last frost date. Its whole purpose is producing the crops that need heat: tomatoes, peppers, eggplant, beans, cucumbers, squash, and melons.
- North half (2×8 ft): One indeterminate tomato (Brandywine or Cherokee Purple for slicers; Juliet or Sungold for prolific snacking), one bell pepper (California Wonder or Ace), one hot pepper (Jalapeño or Serrano). Stake or cage all three.
- Middle section (2×8 ft): Two bush bean rows (Provider or Dragon Tongue), direct sow after frost. Resow the same rows every 3 weeks for continuous harvest until late summer.
- South section (2×8 ft): One small watermelon (Sugar Baby or Blacktail Mountain) or one muskmelon (Collective Farm Woman) if your season is long enough. Train the vine out of the bed along the south path edge.
Bed Two: The Cool-Season and Succession Bed
This bed goes in as soon as soil can be worked, often 4–6 weeks before last frost. It’s built around crops that grow in cold weather and transition to different crops as the season shifts.
- Spring planting (April–early June): Two rows of spinach (Space or Tyee), one row of peas (Sugar Snap or Oregon Sugar Pod II) on a trellis at the north end, one row of beets (Detroit Dark Red), one row of Swiss chard (Bright Lights).
- Summer transition (June–July): As spinach and peas finish, pull them. Plant basil, summer savory, and two succession rows of beans or a row of edamame.
- Fall return (August–September): Direct sow kale (Lacinato/Dinosaur), arugula, more spinach, and a final round of radishes and turnips. These will produce until hard freezes and often beyond if you throw a row cover over them.
Succession Timeline for the Double Bed
| Month | Bed One (Warm) | Bed Two (Cool/Succession) |
|---|---|---|
| April | Empty (too early) | Peas, spinach, beets, chard |
| May | Transplant tomatoes, peppers after frost date. Direct sow beans. | Harvesting spinach, peas coming in. Add lettuce succession. |
| June | Beans producing. Tomatoes and peppers sizing up. | Peas finishing. Pull and replant with basil and summer savory. |
| July | Tomatoes in full production. Plant melon transplant. | Spinach bolting. Transition to heat-tolerant greens. |
| August | Peak harvest: tomatoes, peppers, beans (third succession). Melons ripening. | Sow fall kale, arugula, spinach, turnips. |
| September–October | Season winding down. Green tomatoes for fried or ripening indoors. | Fall greens in prime production. Cover with row cover after first frost. |
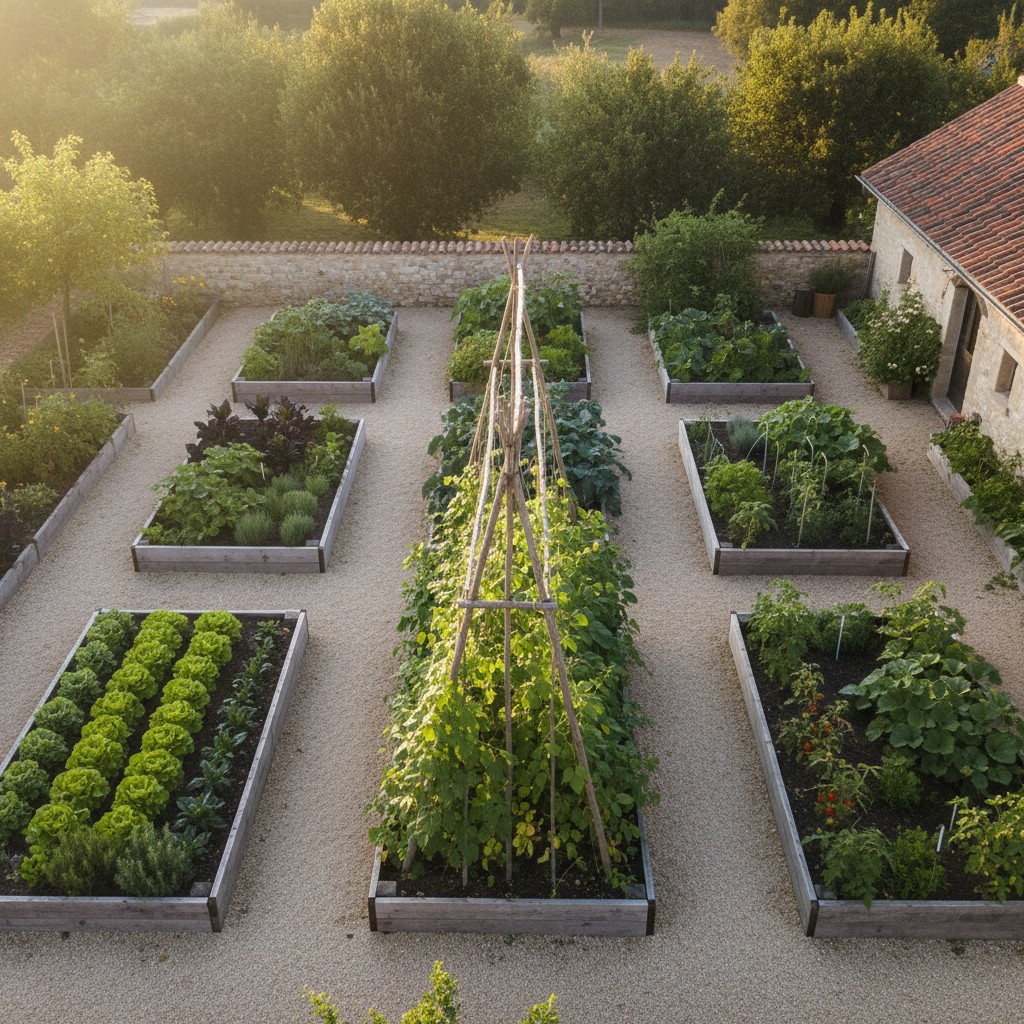
How Do You Design a 10×20 Backyard Kitchen Garden?
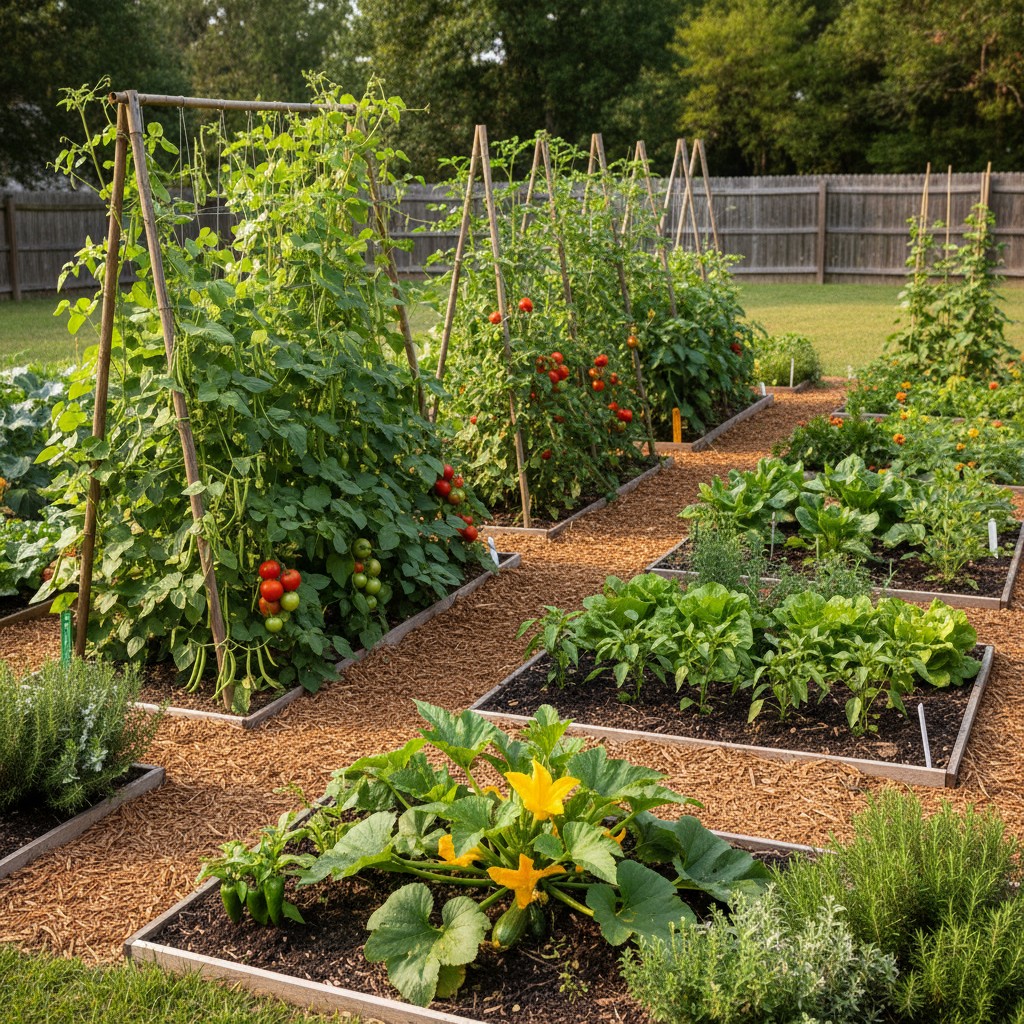
A 10×20 foot plot, 200 square feet, is the entry point for a serious kitchen garden. Done right, this footprint can supply the majority of vegetables for a family of four through the main growing season, with enough surplus to preserve. But it also introduces problems that smaller beds don’t have: paths, perennial infrastructure, and the trellising zones that multiply your usable space without expanding your footprint.
The Layout Structure
Divide the 10×20 space into three functional areas running east to west across the plot:
- North perennial border (10×3 ft): The crops that don’t move. Asparagus (Jersey Knight or Purple Passion, planted 18 inches apart in a trench), rhubarb (Victoria, 1–2 plants for a family), and a band of perennial herbs: thyme, oregano, chives, lovage, and lemon balm. These go in once and stay for years.
- Main annual beds (10×14 ft, split into two 4×14 beds with a 2-ft center path): The workhouse of the garden. Two beds, each 4 feet wide, running north to south with a 2-foot path between them and 18-inch paths on the outer sides. That gives you four path edges to work from and beds you can reach entirely without stepping inside.
- South trellising zone (10×3 ft): The vertical garden. A permanent trellis structure (cattle panel arches, T-posts with wire, or a cedar frame) runs across the full width. This zone handles all your climbing crops: pole beans, indeterminate tomatoes, cucumbers, winter squash, and vining flowers like morning glories that attract pollinators.
Plan your irrigation before planting, see our Simple Drip Irrigation for Raised Beds guide for a $50 setup that covers a full 4×8 bed and runs on a mechanical timer.
Path Standards
In a garden this size, paths are infrastructure. Use these minimums:
- Main access path (center between beds): 24 inches minimum. 30 inches if you use a wheelbarrow regularly.
- Side paths (bed edges to fence or border): 18 inches minimum. Cover with wood chips, gravel, or landscape fabric over cardboard to suppress weeds permanently.
- Path between annual beds and perennial border: 18 inches. This path also doubles as access to the asparagus for harvesting.
Annual Bed Planting (the Two 4×14 Beds)
West bed: heavy feeders and fruiting crops:
- North half: Tomatoes (3 plants, one slicing, one paste, one cherry) caged or staked against a wire run
- Middle: Peppers (3–4 plants) and one eggplant (Ichiban or Black Beauty)
- South half, adjacent to trellis zone: Summer squash (one bush variety) and a transition row for fall plantings
East bed: light feeders, roots, and greens:
- North section: Beets (3 rows, succession sown), carrots (Danvers 126 or Napoli), and parsnips if you have a long season
- Middle: Chard (3–4 plants, cut-and-come-again all season), kale (Lacinato), and collards in warmer zones
- South section: Salad greens rotation, lettuce, arugula, spinach, and a dedicated row for radishes and turnips
Trellising zone crops:
- Pole beans (Blue Lake or Kentucky Wonder) on the full east half of the trellis, direct sow after frost, succession sow every 3 weeks
- Cucumbers (Straight Eight or Marketmore 76) across the center trellis section
- Winter squash (Butternut or Delicata) trained up the west half of the trellis and over if you’re ambitious
The trellis zone on the south end is positioned there deliberately: it’s the lowest-sun location (afternoon shade from the trellis falls north, not south), and climbing crops grow up toward maximum sun exposure rather than shading the beds behind them.
Perennial Border Details
The north perennial border may feel like wasted space in years one and two. It isn’t. Asparagus takes three years to produce, but once it does, you’ll harvest 6–8 weeks of fresh spears every spring for 20 years without doing anything except mulching and waiting. Plant Jersey Knight for disease resistance, or Purple Passion if you want the sweetest, most tender spears you’ve ever tasted.
Herbs in this border should be chosen for perennial staying power in your zone: thyme, oregano, chives, lovage (tastes like celery, grows 4–5 feet tall, give it its own corner), and lemon balm. Basil is annual and goes in the beds near tomatoes, not in the perennial border.
How Do You Adapt These Plans for Your Climate Zone?
These plans are starting frameworks, not rigid prescriptions. Where you live changes what goes in, when it goes in, and how the succession schedule runs. The single most important piece of information is your USDA hardiness zone and, more practically, your average last frost date in spring and first frost date in fall.
Look up your frost dates at the National Weather Service or your state’s cooperative extension service. The gap between your last spring frost and first fall frost is your frost-free growing window. In zone 5 (northern Illinois, Denver, Boston), that window is roughly 140–160 days depending on your specific location within the zone. In zone 8 (coastal Pacific Northwest, Atlanta, Dallas), it extends to 200–250 days. In zone 10 (Southern California, South Florida), there is no window, it’s year-round.
See our complete zone-by-zone planting guide for crop-specific timing.
Zone-Specific Adjustments

Zones 3–4 (Northern Minnesota, Montana, high-elevation West): Your frost-free window may be only 90–120 days. Prioritize fast-maturing varieties. Look for tomatoes with “days to maturity” under 75 (Glacier, Siletz, Legend). Skip long-season crops like parsnips and winter squash unless you start them very early indoors. Use row covers aggressively in spring to extend your window by two to three weeks on each end.
Zones 5–6 (most of the Midwest and Northeast, mid-Atlantic): These plans work largely as written. You have a solid 150–180 day window. Start tomatoes and peppers indoors 6–8 weeks before your last frost. Pull cool-season crops when they bolt in July heat, then replant for fall harvest in August.
Zones 7–8 (upper South, Pacific Northwest coast, mid-Atlantic coast): Your cool season is the growing season. Spring arrives earlier, last frost may be late February or early March, and fall stretches well into November. Add a fall/winter garden emphasis to these plans: kale, collards, mustard greens, Asian brassicas, and root vegetables planted in September will produce through December or beyond.
Zones 9–10 (Southern California, Gulf Coast, South Florida): Flip the model. Cool-season crops grow in winter. October through April, and summer is the gap season where almost nothing except heat-lovers survives. Design your layout around a October–April growing window, then decide what you’re willing to battle the heat for (okra, sweet potatoes, and Southern peas are built for this climate).
Shade Considerations
If your yard has significant afternoon shade, from trees, a fence, or a neighboring structure, map the shade pattern before you build beds. Morning shade (east side) is less damaging than afternoon shade (west side), because afternoon sun is the most intense. If a spot gets less than five hours of direct sun, it’s not viable for fruiting crops, but it can work for leafy greens and some herbs. Place lettuce, spinach, and parsley in these spots rather than fighting shade with tomatoes that will give you nothing.
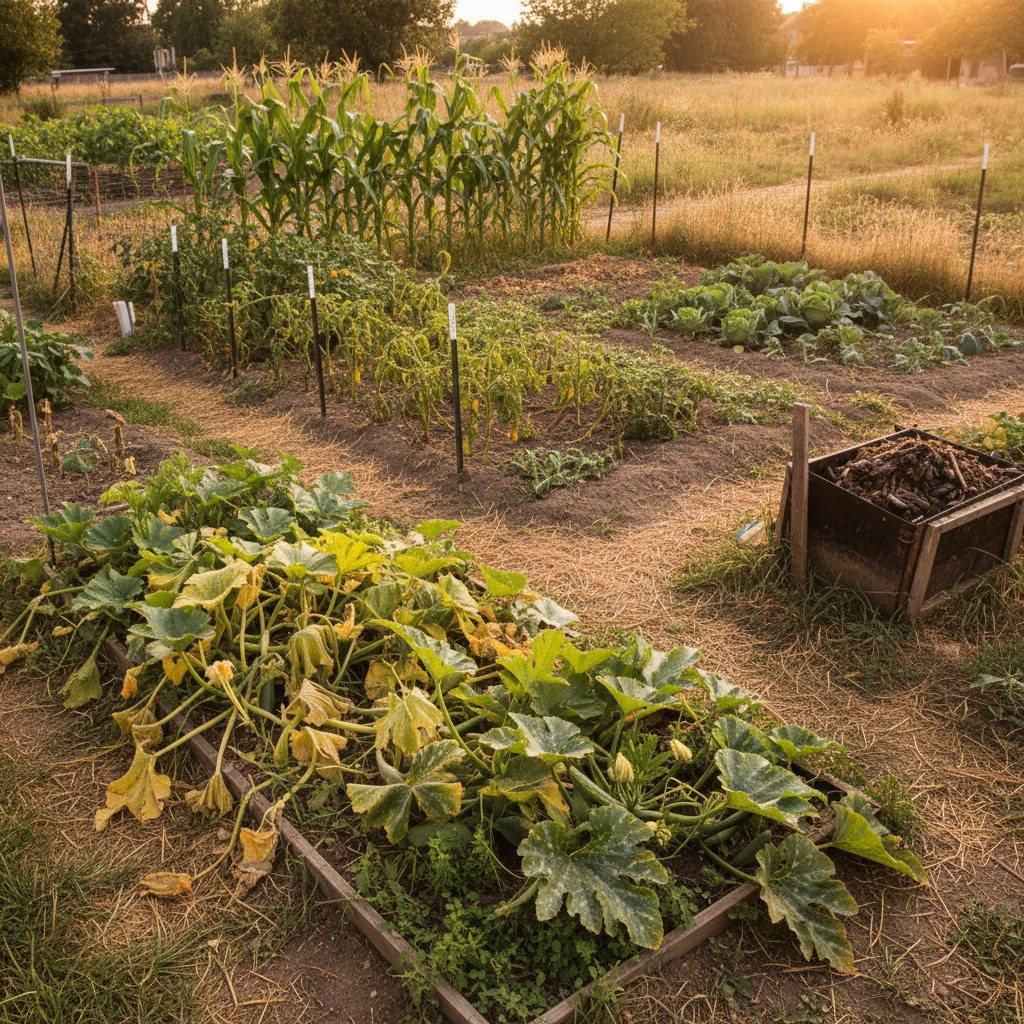
What Are the Most Common Vegetable Garden Layout Mistakes?
After years of making these mistakes myself and watching others make them, I can tell you that the same problems show up in almost every first and second-year garden.
Paths That Are Too Narrow
I said 18 inches minimum. Many beginners squeeze paths to 12 inches to “save space.” Those inches don’t save anything, they just make the paths unusable by July when plants have flopped over the edges. You’ll avoid the garden, which means you’ll miss harvests, miss pest problems, and miss watering. Make the paths wider than you think you need.
Beds Too Wide to Reach the Center
A 5-foot-wide bed looks efficient on paper. Try reaching the center of it without kneeling in the bed. Now add a tomato cage, a squash vine, and the fact that you’ll be doing this several times a week in all conditions. Four feet is the maximum for beds accessed from both sides. Three feet if you access from one side only (against a fence or wall).
Ignoring Sun Angles Across the Season
The sun tracks differently in April than in June than in August. A spot that gets full sun in early spring may be partially shaded by a fence or tree by midsummer when the sun angle is higher. Spend a day in your yard in late May (close to peak solar angle) tracking where shade falls at 9am, noon, and 4pm. Those are your real growing conditions for your main season crops.
Forgetting Vertical Space
A 10×20 garden without any trellising is a 200 square foot garden. Add an 8-foot trellis along one 10-foot end, plant it with pole beans, cucumbers, and a climbing squash, and you’ve added the equivalent of another 80 square feet of growing surface. Vertical space is free, it improves airflow, and it makes harvesting easier than anything sprawling on the ground.
Planting Everything at Once
New gardeners sow or transplant their entire garden in one weekend. By August, half the garden has finished and gone to seed, and the other half is producing faster than they can eat it. Stagger plantings. Your lettuce zone should get new seeds every two to three weeks. Your bean rows should get a new planting every three weeks from frost-free date through midsummer. This small habit produces continuous harvest instead of feast-and-famine cycles.
No Rotation Plan
Growing the same family of vegetables in the same spot year after year builds up soil-borne diseases and depletes specific nutrients. Tomatoes, peppers, and eggplant (all Solanaceae) share diseases, never follow one with another. Move your brassicas (cabbage, kale, broccoli) to a new bed each year. A simple four-year rotation, roots, legumes, brassicas, fruiting crops, keeps soil healthy without requiring a spreadsheet.
Free Printable Garden Layout Templates
Download our free printable garden layout templates for all three plans above, the 4×8 single bed, 4×16 double bed, and 10×20 kitchen garden. Each template includes grid paper sized to the plan, a companion planting quick-reference chart, and a succession planting calendar you can fill in with your own frost dates.
Sign up for the Wild Hearth Life newsletter and get the full template pack sent to your inbox, along with our seasonal planting reminders and homestead updates.
Frequently Asked Questions About Vegetable Garden Layouts
At minimum, 18 inches. Twenty-four inches is better if you ever need to kneel, turn around, or wheel a cart through. If your beds are along a wall or fence on one side, the path on the open side should be at least 24 inches to compensate. Paths that seem spacious in April feel impossibly narrow by July when plants overhang the edges.
Absolutely. The planting arrangements, companion groupings, and succession schedules are the same whether you’re working in a raised bed or a tilled-in-ground plot. The primary difference is drainage and soil warmth, raised beds drain faster and warm up earlier in spring, which matters most in zones 4–6. In clay-heavy soils, in-ground beds may need drainage amendments before they perform comparably.
No. Companion planting is a tool, not a rule. The well-documented combinations, tomatoes with basil, carrots with onions, the Three Sisters grouping, have a long track record. Others are more anecdotal. Use the combinations with strong evidence and don’t stress over the rest. Getting sun, spacing, and watering right will do more for your harvest than any companion chart.
For fresh eating (not preservation), the commonly cited estimate is 100–200 square feet per person for a diverse diet of vegetables. That number assumes well-planned succession planting and good yields. A 200-square-foot garden like the 10×20 plan above, managed attentively, will realistically supply the majority of fresh vegetables for two adults and two children through the main growing season. Preservation: canning, freezing, fermenting, requires significantly more space per crop.
Start with what your family actually eats. Then narrow it to the crops with the best return on effort: cherry tomatoes (nearly foolproof), summer squash (so prolific it’ll make you wonder why you planted so much), snap beans, and cut-and-come-again lettuce. These four will fill your table, succeed with basic care, and teach you the rhythms of a garden season without overwhelming you. Add complexity in year two once you know how your specific yard grows. Our zone-by-zone planting guide can help you narrow down the right varieties for where you live.