Raised Bed Gardening for Beginners: Build Your First Bed This Weekend
If you’ve ever tried to grow vegetables in heavy clay or rocky ground and come away with a handful of sad, stunted plants, raised bed gardening will feel like a revelation. You control the soil, the drainage, and the depth, and because you never step inside the bed, it stays loose and alive season after season.
This guide walks you through building and planting your first raised bed from start to finish. No prior experience needed. No fancy tools. Just a free Saturday and a willingness to get your hands dirty.
Step 1: Assemble the Raised Bed Frame
Build a 4×8-foot frame from 2×10 or 2×12 untreated lumber, that size gives you reach from both sides without ever stepping in.
Don’t. Pressure-treated lumber is cheap and rot-resistant, which is exactly why beginners reach for it, but the older formulas contained arsenic compounds and even the newer ACQ-treated wood uses copper that can leach into soil around edibles at low levels. The USDA’s National Organic Program recommends against it in certified organic production. Stick with untreated pine, cedar, redwood, or black locust instead.
- Cedar and redwood naturally resist rot, beds can last 10–15 years.
- Untreated pine is the budget option, expect 5–7 years before it needs replacing.
- Black locust is the longest-lasting option if you can source it locally.
Cut two 8-foot boards and two 4-foot boards per bed, or have the lumber yard do it. Pre-drill first. Skipping pilot holes in dry lumber is the fastest way to split a board straight through the corner joint. Screw them together with 3-inch exterior screws, four per corner, and if you’re using 2×12s add a center brace on each long side, soil pressure will bow them outward.
A 4×8 bed holds roughly 20–24 cubic feet of soil mix depending on board width. That’s a meaningful weight, once filled, it won’t be moving, so get placement right before you fill it.
Step 2: Level the Ground and Place the Frame
Set the frame on level ground, a slope of more than a few degrees will cause uneven watering and your soil will slowly migrate to the downhill end.
Choose a spot with at least 6–8 hours of direct sun. Most vegetables are sun-hungry; less than 6 hours and you’ll be limited to leafy greens and herbs. South or southeast-facing exposures are ideal in the northern hemisphere.
Clear the area of grass and weeds, no digging required. Scalp them to the ground with a hoe or just mow them short, then lay the frame in position. Check it with a level. If one corner sits lower, shim it up with a flat stone or dig down slightly on the high side. A bed that’s off by an inch or two over 8 feet won’t cause catastrophic problems, but a level surface makes irrigation far more consistent because water spreads evenly across the soil rather than pooling at the low end.
Keep at least 18–24 inches of walking space around all sides. You’ll thank yourself at harvest time when you’re carrying a full trug and need to maneuver.
Step 3: Line the Bottom (Optional)
Lining the bottom is optional, but a layer of cardboard or hardware cloth solves two different problems, and which one you use depends on your situation.
Cardboard: A single layer of uncoated cardboard, no glossy inserts, no heavy tape, laid directly on the ground will smother existing grass and weeds completely. It breaks down. By the end of the first season the cardboard is gone, earthworms are moving freely between your bed and the native soil below, and the University of California Cooperative Extension recommends this sheet mulching method as an effective, low-cost way to suppress weeds while building soil biology over time.
Hardware cloth (1/4-inch mesh): If you have voles, gophers, or moles, and you’ll know if you do, staple hardware cloth across the entire bottom before placing the frame. Use galvanized 1/4-inch mesh. Chicken wire has openings too large for small rodents and rusts out within a few years. Hardware cloth is a one-time investment that saves you from losing entire root crops to underground raiders.
If you have neither a weed problem nor a rodent problem, you can skip lining entirely. The soil contact with native ground actually encourages earthworms to travel up into your bed.
Step 4: Prepare and Fill with Soil Mix
Fill the bed with a 60/30/10 mix: 60% topsoil, 30% compost, 10% perlite or coarse sand for drainage.
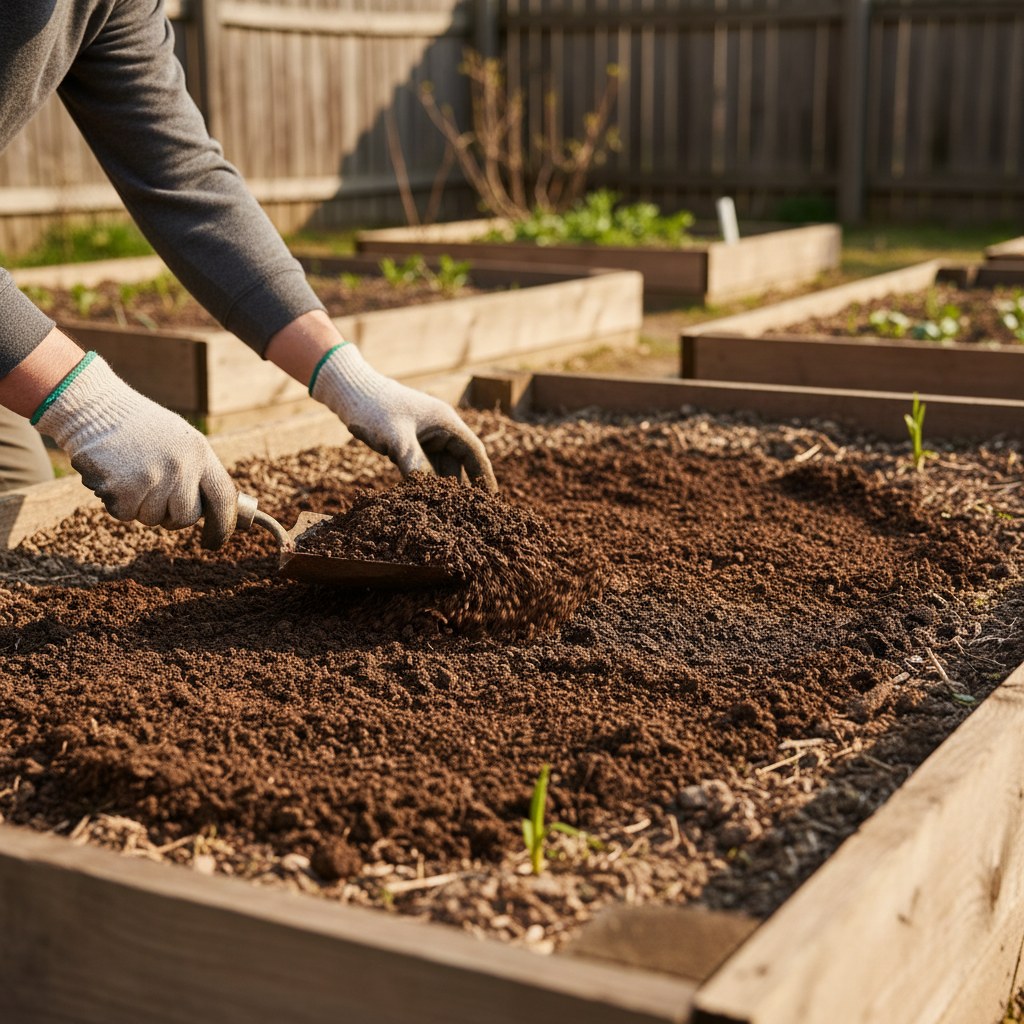
Do not use straight garden soil from your yard. It compacts badly in a confined bed, drains poorly, and likely has weed seeds. Do not use straight bagged potting mix, it’s too light, dries out fast, and is expensive to use in volume.
The classic “Mel’s Mix” formula from Square Foot Gardening, 1/3 blended compost, 1/3 peat moss or coconut coir, 1/3 coarse vermiculite, is excellent but costs more. The 60/30/10 blend above gives you 90% of the benefit at lower cost.
Where to get the components:
- Topsoil: Order by the cubic yard from a local landscape supplier, far cheaper than bags. For a 4×8×10-inch bed, you need about 22 cubic feet, or just under 1 cubic yard.
- Compost: Buy bagged or, better, use your own. If you’re not already composting kitchen and garden scraps, see our guide to composting 101, it’s easier than you think and dramatically reduces what you send to the landfill.
- Perlite: Available at any garden center. A 4-cubic-foot bag is usually enough for one 4×8 bed.
Mix the components together before filling if you can, a wheelbarrow and a garden fork do the job. Fill to within an inch of the top rim. The soil will settle several inches over the first season; top it up with compost in the spring.
Before planting, it’s worth doing a quick pH check. Most vegetables prefer a pH of 6.0–7.0. If you’re unsure what you’re working with, our guide to testing and amending your soil walks you through both inexpensive test kits and what to do with the results.
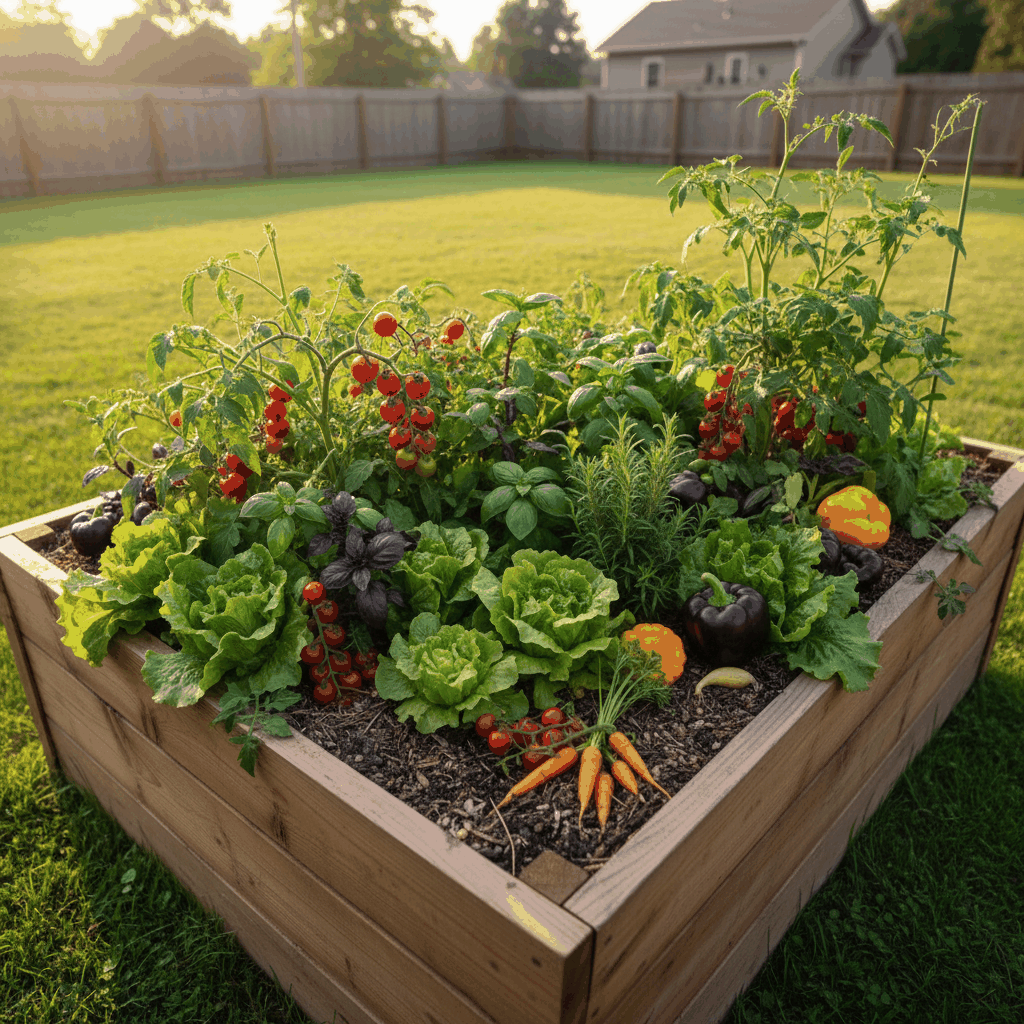
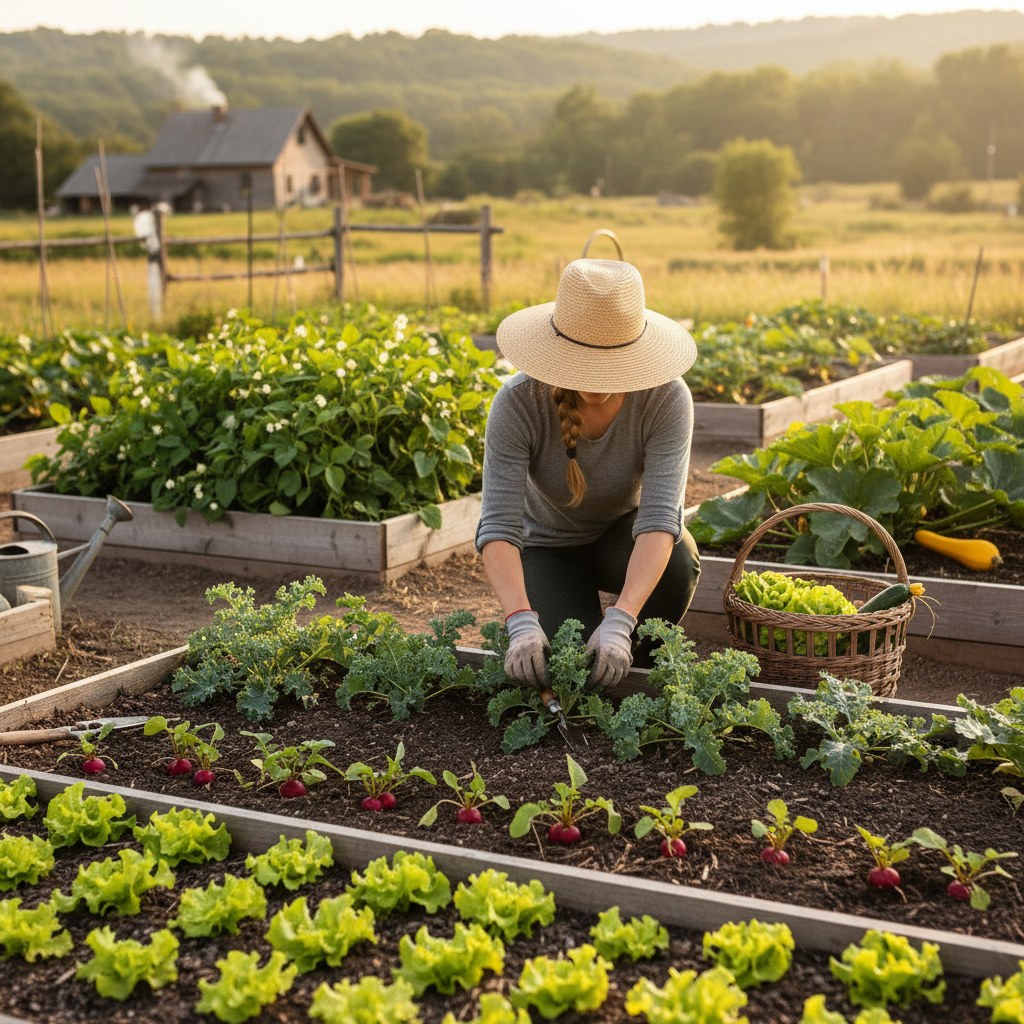
Step 5: Plant Easy-to-Grow Crops
Start with crops that reward beginners fast: lettuce, radishes, kale, bush beans, and zucchini are nearly foolproof in a raised bed.
Radishes are the classic “confidence crop”, they germinate in 3–5 days and are harvestable in as little as 22 days. Nothing gets a new gardener hooked on growing food faster than pulling their first radish three weeks after planting. Sow them thickly in a band and thin to 2 inches apart once the seedlings are up.
Lettuce and kale can be direct-seeded or transplanted. Both tolerate light frost, so you can plant them early in spring and again in late summer for a fall harvest. Succession plant lettuce every 2–3 weeks to avoid a glut.
Bush beans are easy from seed, fix their own nitrogen, and produce prolifically. Avoid pole beans for your first season, they need trellising and take more management.
Spacing matters more in raised beds than in row gardening. Because your soil is loose and fertile, you can plant closer than the seed packet suggests, typically 75–80% of recommended spacing. The NC State Extension Service notes that intensive planting in raised beds can increase yields per square foot by 1.5–2× compared to traditional row spacing, while also shading out weeds as leaves close the canopy.
When planning what goes next to what, companion planting can make a real difference. Some plants actively help each other; others compete. Our companion planting guide covers the most useful pairings for a small raised bed garden.
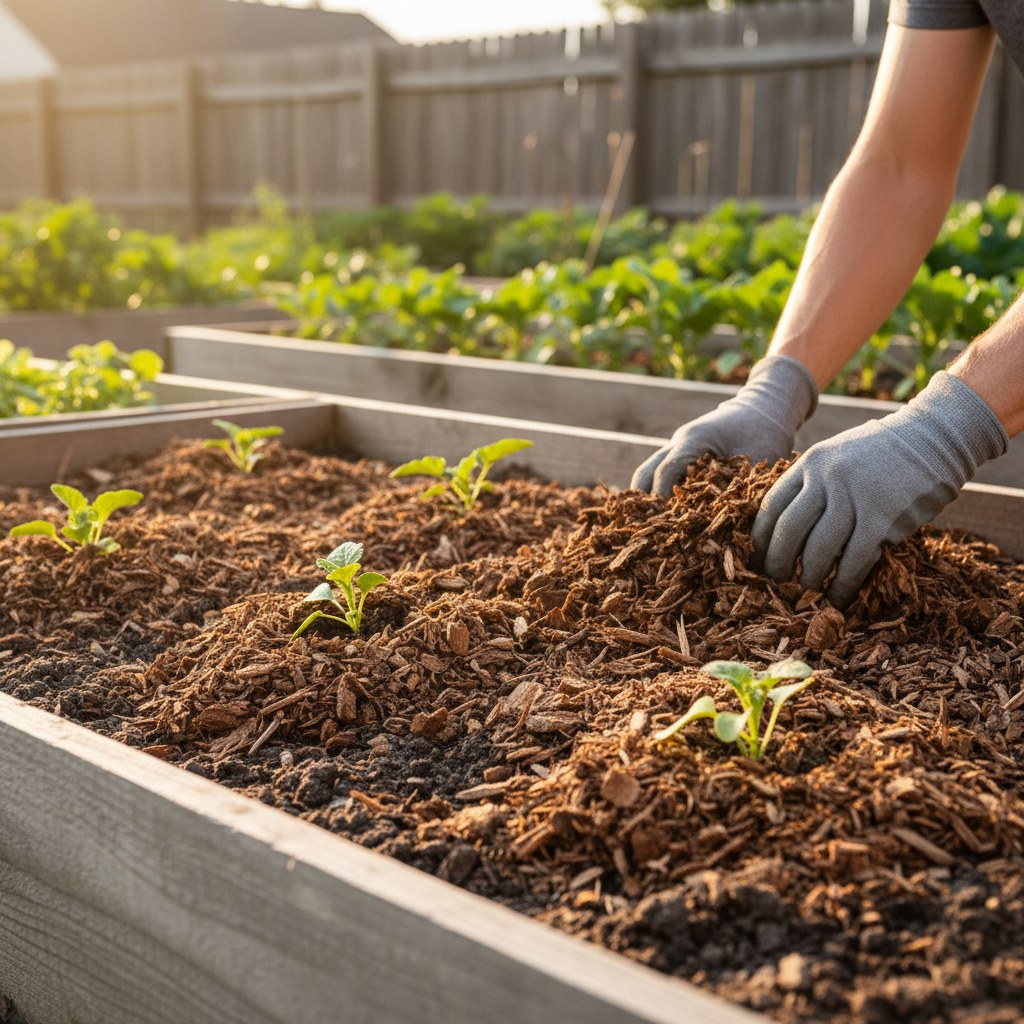
Step 6: Mulch Generously
Apply 2–3 inches of organic mulch over the entire soil surface after planting, keeping it a half-inch away from plant stems.
Mulch does four things at once: it retains moisture, moderates soil temperature, suppresses weeds, and breaks down slowly to feed soil biology. In a raised bed, where the soil surface area is small and exposed on all sides, mulch makes a particularly large difference to how often you need to water.
Good mulch options for a vegetable bed:
- Straw (not hay, hay has seeds): light, easy to work around plants, breaks down in one season.
- Shredded leaves: free if you have trees, excellent for soil biology.
- Wood chip fines: longer-lasting, good for pathways and around perennial vegetables.
Avoid dyed mulches and fresh wood chips directly around annual vegetables, they can temporarily tie up nitrogen as they break down, which will yellow your plants.
Reapply mulch mid-season when it thins out, and always top up before the first hard frost to protect soil biology through winter.
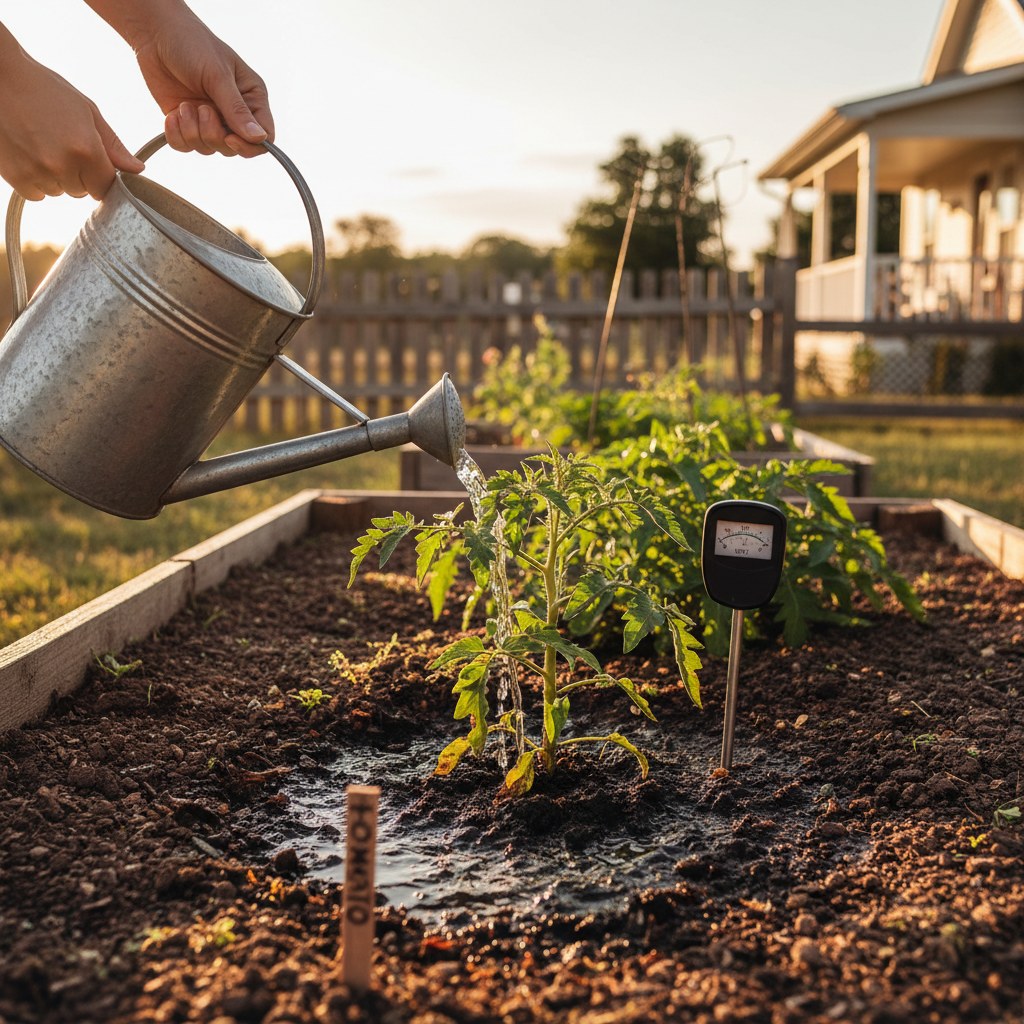
Step 7: Water Deeply and Less Often
Water until moisture penetrates 6 inches into the soil, then let the surface dry before watering again, typically every 2–3 days in summer, less in spring and fall.
Frequent shallow watering trains roots to stay near the surface where they’re vulnerable to heat and drought stress. Deep, infrequent watering encourages roots to go down where the soil stays consistently moist.
Simple test: push your finger 2 inches in. Dry? Water. If the soil feels damp at that depth, give it another day before you water again; a wooden skewer or moisture meter confirms the same thing.
Drip irrigation or soaker hoses are worth the small investment for a raised bed. Keeping foliage dry reduces fungal disease, and drip systems deliver water exactly where it’s needed with very little waste. The USDA Natural Resources Conservation Service estimates that drip irrigation uses 30–50% less water than overhead sprinklers for vegetable production.
In hot weather, water in the morning. Evening watering leaves foliage wet overnight, which promotes powdery mildew and other fungal issues. Morning watering gives plants the moisture they need for peak photosynthesis hours and allows leaves to dry before temperatures drop.
Step 8: Top-Dress with Compost Annually
Every spring, before planting, spread 1–2 inches of finished compost across the entire bed surface and work it lightly into the top few inches of soil.
Raised beds do not need to be dug or tilled, that’s one of their great advantages. Tilling disrupts the fungal networks and invertebrate populations that make healthy soil work. But the soil level does drop over time as organic matter breaks down, and annual compost top-dressing is how you replenish it.
Good compost also restores nutrients that crops removed the previous season. A 4×8 bed planted heavily with vegetables will draw down nitrogen, phosphorus, and trace minerals. Compost is a slow-release, balanced resupply that doesn’t risk the nutrient burn that synthetic fertilizers can cause.
If your bed soil looks dark, crumbly, and smells earthy after a few seasons of this practice, you’re doing it right. That smell: called petrichor when you associate it with rain, actually comes from actinomycetes bacteria, which are a sign of a thriving soil ecosystem.
Step 9: Rotate Crops Yearly
Move each plant family to a different section of your bed (or a different bed) each season, never plant the same crop family in the same spot two years in a row.
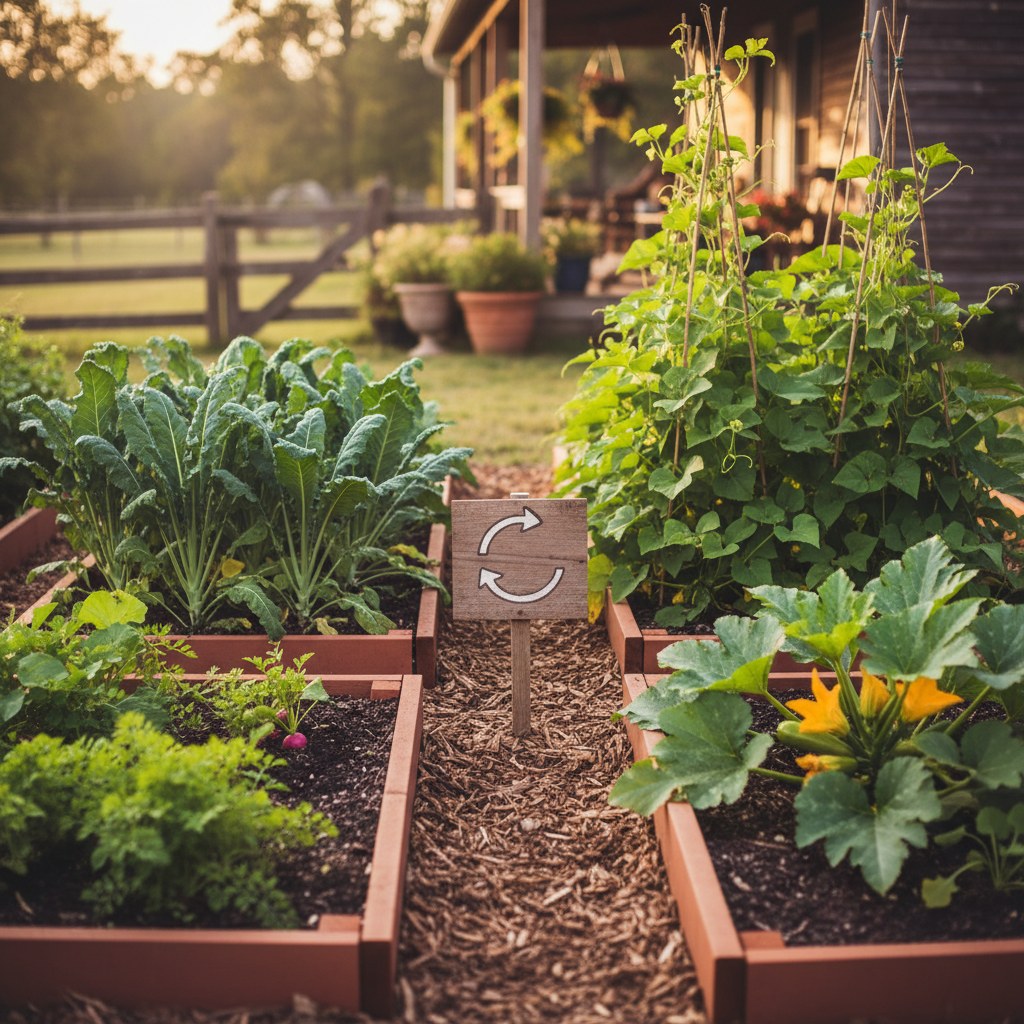
Crop rotation breaks pest and disease cycles. Many soil-borne pathogens and insect larvae are host-specific, they winter over in the soil expecting the same crop to return. When you rotate, the pest starves out or moves on. The main plant families to track:
- Solanaceae: tomatoes, peppers, eggplant, potatoes
- Brassicaceae: cabbage, kale, broccoli, radishes, arugula
- Cucurbitaceae: cucumbers, zucchini, melons, squash
- Fabaceae: beans, peas
- Apiaceae: carrots, parsley, dill, fennel
In a small 4×8 bed, perfect rotation is hard, you don’t have acres to work with. The practical approach: keep a simple sketch or notebook entry each season showing what grew where. Even partial rotation, moving tomatoes to the other end of the bed, breaks many common cycles.
Rotation also improves soil chemistry over time. Legumes (beans, peas) fix atmospheric nitrogen and leave the soil richer than they found it. Planting a heavy feeder like corn or squash after a season of beans takes advantage of that nitrogen bank.
Step 10: Avoid Walking in the Beds
Never step inside the bed, keep all soil contact with your feet outside the frame, always.
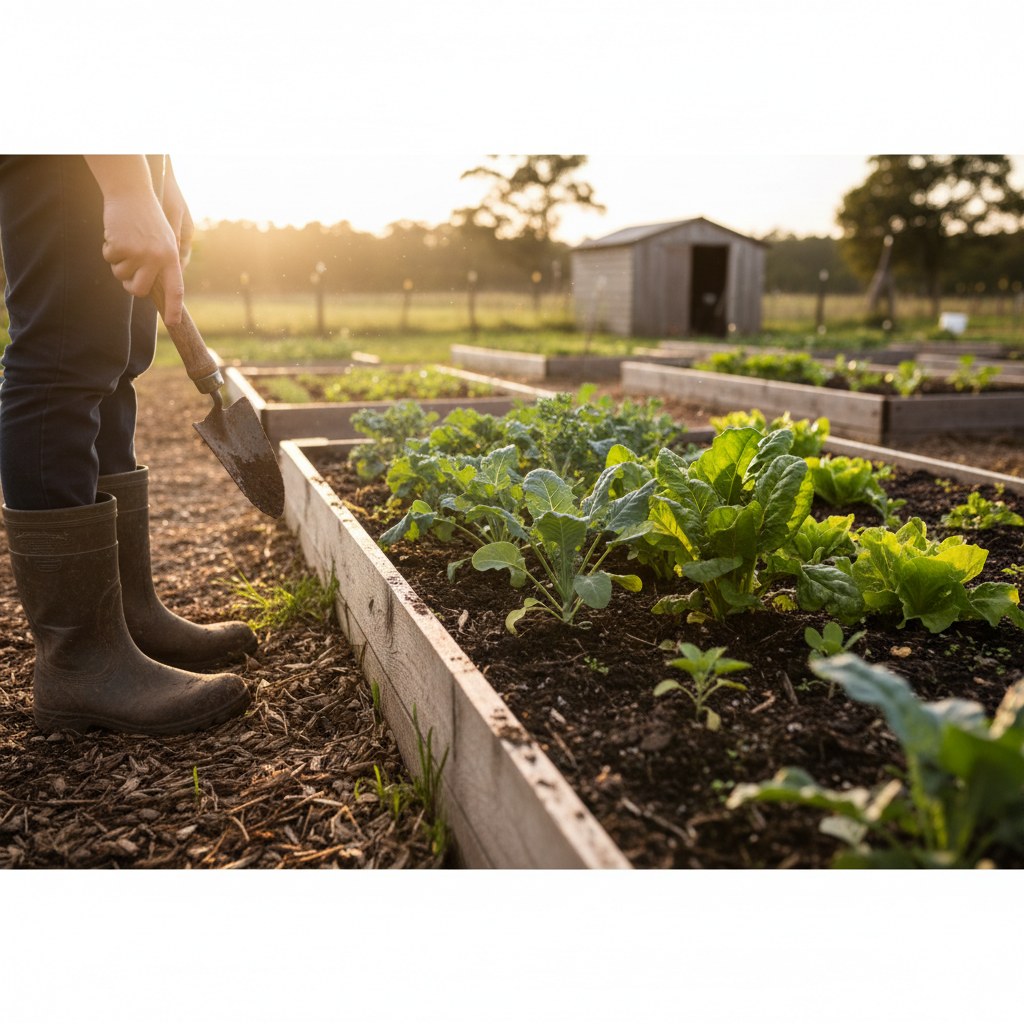
This is the single most important maintenance rule in raised bed gardening, and it’s easy to forget when you’re leaning in to harvest that one zucchini at the back. Human foot traffic compacts soil surprisingly fast. Even one person’s weight, applied repeatedly, can compress the loose, aerated soil structure you worked to create.
Compacted soil has fewer air pockets, which means less oxygen to roots and less space for beneficial organisms. Penn State Extension research shows that a single pass from a person walking on garden soil can reduce pore space by up to 30%, and compacted soil takes years to fully recover without active amendment.
Design your beds so you can reach the center from both sides: 4 feet wide is the standard because most adults can comfortably reach 2 feet. If you’re building beds against a fence or wall (reachable from one side only), keep the width at 24 inches.
If you need to work deep in a bed, transplanting, turning compost, installing stakes, use a wide board laid across the bed to distribute your weight. Even this temporary measure dramatically reduces compaction versus stepping directly on soil.
Frequently Asked Questions
How deep does a raised bed need to be?
For most vegetables, 10–12 inches is the practical minimum. Root vegetables like carrots and parsnips prefer 18 inches. Shallow-rooted crops like lettuce and herbs do fine in 6 inches, but a deeper bed retains moisture better and gives you more room before roots hit native soil. If you’re placing a bed on concrete or a hard surface, go at least 18 inches deep.
What’s the difference between a raised bed and a container garden?
A raised bed sits on native ground and has an open bottom, roots can eventually penetrate into the soil below, earthworms can move freely in and out, and the bed connects to the broader soil ecosystem. A container is fully enclosed with drainage holes. Raised beds are generally lower maintenance for vegetables because the soil volume is larger, temperature swings are less extreme, and they dry out more slowly than containers.
Can I build a raised bed directly on grass?
Yes: that’s one of the easiest setups. Lay cardboard over the grass first, then set your frame on top of the cardboard, then fill. The cardboard smothers the grass without chemicals, and by the end of the season it’s broken down completely. If your grass is very vigorous (bermuda, for example), use two layers of cardboard and consider adding hardware cloth underneath as extra insurance.
Do I need to fertilize in addition to compost?
In the first season, a high-quality soil mix with 30% compost usually supplies enough nutrition for most crops without additional fertilizer. In subsequent seasons, the annual compost top-dress typically handles slow-release feeding. Heavy feeders: tomatoes, corn, squash, may benefit from a side-dress of balanced organic fertilizer at planting and again at first fruit set. Watch your plants: yellowing older leaves usually signals nitrogen deficiency; purple leaves are often phosphorus.
How do I know if my bed needs more water?
The two most reliable methods: the finger test (push a finger 2 inches into the soil, if it feels dry, water; if damp, wait) and watching your plants in early morning. Wilting at midday in heat is normal and not a reliable indicator. Wilting at 7am before temperatures climb means the plant is genuinely water-stressed and needs a thorough soak. A basic soil moisture meter costs under $15 and removes all guesswork if you prefer a tool to finger-testing.