How to Sharpen and Maintain Garden Tools
Key Takeaways
- A sharp hoe cuts weeding time in half compared to a dull one — most garden tools should be sharpened at least twice per growing season.
- A 10-inch mill bastard file is the single most versatile tool-sharpening implement you can own and costs under $15.
- Clean, oil, and store tools after every use to prevent rust and extend their lifespan by years or even decades.
- Replacing a broken wooden handle costs $5-15 and takes 20 minutes — far cheaper than buying a new tool.
- Proper winter storage means clean, oiled blades and dry handles stored off the ground in a sheltered location.
The Case for Sharp, Well-Maintained Tools
There’s a particular kind of misery that comes from trying to prune a branch with dull bypass pruners. You squeeze, the branch bends, the bark tears instead of cutting cleanly, and you end up with a ragged wound that invites disease into the plant. Multiply that frustration across every tool in your shed — dull shovels that bounce off roots, hoes that slide over weeds instead of slicing them, mower blades that shred grass instead of cutting it — and you start to understand why maintaining your tools might be the single highest-return investment of time you can make as a gardener.
Sharp tools work faster. They require less physical effort. They make cleaner cuts that are healthier for plants. And they last decades when properly maintained. The rusty, wobbly shovel in the corner of the garage? It was a good tool once. It can be again.
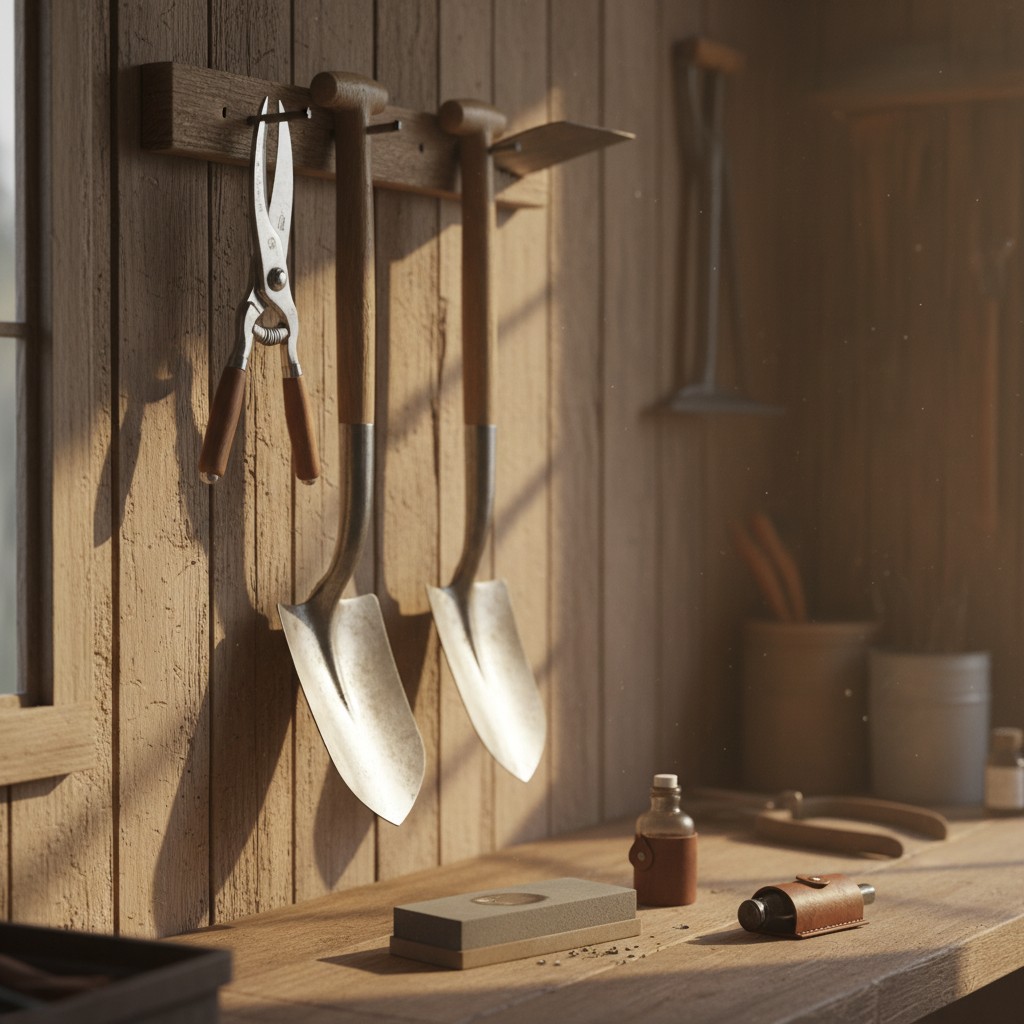
What You Need: The Sharpening and Maintenance Kit
You don’t need a workshop full of specialized equipment. Here’s the essential kit:
- 10-inch mill bastard file: The workhorse. This flat file handles shovels, hoes, axes, and lawn mower blades. $8-15.
- Diamond sharpening stone or whetstone: For pruners, loppers, and knives. A dual-grit stone (coarse/fine) is most versatile. $15-30.
- Wire brush: For removing rust and dried soil before sharpening. $3-5.
- Camellia oil or boiled linseed oil: For oiling blades and handles. Any machine oil works for blades; linseed oil is best for wooden handles. $5-10.
- Coarse sandpaper (80-120 grit): For smoothing handles and removing light rust. $3-5.
- Work gloves: You’re handling sharp edges. Leather gloves are best.
Total investment: $35-70. That kit will maintain every tool you own for years.
Sharpening Your Pruners and Loppers
Pruners (both bypass and anvil types) and loppers are your most precision-dependent tools. A clean, sharp cut heals faster and reduces disease risk in the plant.
Step-by-Step: Bypass Pruners
- Disassemble if possible. Most quality bypass pruners have a center bolt that allows you to separate the two blades. This makes sharpening much easier. If your pruners don’t disassemble, just work carefully around the pivot point.
- Clean the blade. Wipe off sap and dirt with a rag dampened with rubbing alcohol or WD-40. For heavy sap buildup, soak in warm soapy water for 10 minutes, then scrub.
- Sharpen only the beveled edge. On bypass pruners, only one blade has a bevel (the cutting blade). The flat blade acts as an anvil and should not be sharpened. Hold your diamond stone or whetstone flat against the bevel angle (usually about 20 degrees) and draw it along the edge in smooth strokes, moving from the base of the blade to the tip. Ten to fifteen strokes is usually enough.
- Remove the burr. After sharpening the beveled side, lay the stone flat against the back (flat) side of the blade and make one or two light passes to remove the metal burr that forms along the edge.
- Oil the pivot and blade. A drop of oil on the pivot point and a light wipe of oil on the blade prevents rust and keeps the action smooth.
- Reassemble and test. The pruners should cut a piece of paper cleanly. If they tear instead of cutting, sharpen a few more strokes.
Loppers
Same process as pruners, just on a larger scale. Most loppers have the same bypass or anvil mechanism. The bigger blade means more sharpening strokes, but the technique is identical. Pay attention to any nicks in the blade — a few firm strokes with the coarse side of your whetstone will smooth out small nicks before you finish with the fine side.
Sharpening Shovels, Hoes, and Spades
This is where the mill bastard file earns its keep. These larger tools don’t need a razor edge — they need a working edge that slices through soil and roots efficiently.
Shovels and Spades
- Secure the tool. Clamp the shovel in a vise, or stand on the handle with the blade pointing up and braced against something solid.
- Clean the blade. Wire-brush any rust and caked soil off the edge.
- File the bevel. Most shovels have a factory bevel on the top side of the blade’s edge. Hold the file at that bevel angle (roughly 45 degrees for shovels) and push it along the edge in smooth, one-directional strokes — away from you, base to tip. Don’t saw back and forth. Lift the file on the return stroke.
- Work the entire edge. Follow the curve of the shovel, keeping a consistent angle. Ten to fifteen strokes per section is usually sufficient.
- Flip and deburr. One or two light passes on the back side to remove the burr.
A sharp shovel makes an astonishing difference when digging. It slices through roots that a dull shovel just pushes against, and it cuts into compacted soil instead of bouncing off it.
Hoes
A sharp hoe is a revelation. When properly sharpened, a hoe glides just below the soil surface and severs weed roots with a single pass instead of requiring you to hack at each weed.
Sharpen the same way as a shovel — file at the existing bevel angle (usually about 25-30 degrees for hoes). Focus on the front edge. Some hoes, like stirrup hoes, cut on both the push and pull strokes and need sharpening on both edges.
Hoes need sharpening more often than most tools — every few hours of use during peak weeding season. Keep a file in your back pocket when you’re weeding and touch up the edge periodically. It takes 30 seconds and saves minutes of effort.
Sharpening Lawn Mower Blades
A dull mower blade tears grass instead of cutting it, leaving ragged tips that turn brown and make your lawn look faded. Torn grass blades are also more susceptible to disease.
How to Sharpen
- Remove the blade. Disconnect the spark plug wire (critical for safety), tip the mower on its side (carburetor side up to prevent oil from flooding the air filter), and remove the blade with a socket wrench. Mark the bottom of the blade so you reinstall it correctly.
- Secure the blade in a vise.
- File the cutting edge. Use your mill bastard file at the existing bevel angle (usually about 40-45 degrees). File in one direction only, following the original edge shape. Work evenly — take the same number of strokes on each end to maintain blade balance.
- Check the balance. Hang the blade on a nail through the center hole. If one end drops, file a few more strokes on the heavy side. An unbalanced blade causes vibration that damages the mower’s spindle and bearings.
- Reinstall with the correct side down and reconnect the spark plug.
Sharpen mower blades every 20-25 hours of mowing time, or roughly every 8-10 mows for a typical lawn. Twice a season minimum.
Cleaning and Rust Prevention
Sharpening is only half the maintenance equation. Clean tools resist rust, stay sharper longer, and are safer to handle.
After Every Use
- Knock off soil. Bang the tool against a hard surface or use a putty knife to scrape off caked-on dirt.
- Wipe metal parts. A rag with a thin coat of oil (any machine oil, WD-40, or even vegetable oil in a pinch) prevents rust from forming overnight.
- Store out of the rain. Sounds obvious, but leaving tools leaned against the garden fence is the number one cause of premature rust.
Dealing With Existing Rust
For light surface rust, a wire brush and some elbow grease will clean it right up, followed by a coat of oil. For heavier rust, soak the tool in white vinegar overnight — the acid dissolves rust effectively. Scrub with steel wool, rinse, dry immediately, and oil.
For severely rusted tools, a drill with a wire wheel attachment makes fast work of heavy corrosion. Follow with fine sandpaper to smooth the surface, then oil generously.
Handle Repair and Replacement
A cracked or splintered handle doesn’t mean the tool is done. Replacing a handle is one of the most satisfying and economical repairs you can make.
When to Repair vs. Replace
- Minor splinters: Sand smooth with 80-grit sandpaper and seal with boiled linseed oil. The oil soaks into the wood grain, restores moisture, and prevents future splintering.
- Hairline cracks: Fill with wood glue, clamp until dry, then sand and oil. If the crack is in a stress area (near the head), replace the handle instead — a glued crack can fail catastrophically under load.
- Broken handles: Replace entirely. Ash and hickory replacement handles are available at hardware stores for $5-15 depending on the tool.
How to Replace a Handle
- Remove the old handle. For tools with a wedged handle (axes, hoes, rakes), drill out the old wood and wedge. For tools with a riveted tang (shovels, trowels), drill out the rivets.
- Fit the new handle. New handles usually need slight shaping with a rasp or sandpaper to fit snugly into the tool head. The fit should be tight enough that the head doesn’t wobble.
- Secure it. For eye-socket tools (axes, hoes), drive the handle in from below, then set a wooden and metal wedge from the top. For tang tools (shovels), drill through the socket and handle and secure with a bolt or rivet.
- Seal the handle. Apply two coats of boiled linseed oil, letting each coat dry for 24 hours. This protects the wood from moisture and UV damage.
Seasonal Maintenance and Winter Storage
End-of-Season Routine
Before you put your tools away for winter, give them the full treatment:
- Clean all soil, sap, and plant residue from every tool.
- Sharpen all cutting edges.
- Remove any rust with a wire brush or sandpaper.
- Apply a generous coat of oil to all metal surfaces. Some gardeners use a bucket of sand mixed with motor oil — plunge tool blades into the bucket for storage. The oily sand prevents rust all winter.
- Sand and oil all wooden handles.
- Check for loose heads, cracked handles, and worn parts. Repair or replace now so everything is ready in spring.
Storage
Store tools hanging on a wall rack or standing upright in a dry shed or garage. Metal blades touching a concrete floor will rust faster due to moisture wicking. Hang long-handled tools from hooks or nails through their handles. Small tools like pruners and trowels go in a drawer or box.
Keep tools out of direct sun when possible — UV degrades wooden handles over time, making them brittle.
Frequently Asked Questions
How often should I sharpen my garden tools?
It depends on use. Pruners and loppers should be sharpened every few weeks during heavy pruning season. Hoes benefit from a quick touch-up every few hours of weeding. Shovels and spades need sharpening 2-3 times per season. Mower blades every 8-10 mows. The general rule: if a tool feels like it’s working harder than it should or making rough cuts instead of clean ones, it’s time to sharpen.
Can I use a bench grinder instead of a file?
You can, but proceed carefully. A bench grinder removes metal quickly, and it’s easy to overheat the edge — which changes the steel’s temper and makes the tool softer and unable to hold an edge. If you use a grinder, use a light touch, keep the tool moving, and dip it in water frequently to prevent overheating. A file gives you more control and virtually no risk of ruining the temper. For most homesteaders, a file is the better and safer choice.
Is it worth buying expensive garden tools?
Quality tools from brands like Felco (pruners), Corona, or a good forged steel shovel cost more upfront but last dramatically longer. A $40 pair of Felco pruners, properly maintained, will easily outlast ten pairs of $8 hardware store pruners. The steel holds an edge longer, the parts are replaceable, and the ergonomics reduce hand strain over long sessions. Buy the best you can afford for the tools you use most — pruners, your primary shovel, and your hoe — and go budget on the tools you use rarely.
What’s the best oil for tool maintenance?
For metal blades, any light machine oil works — 3-in-1 oil, camellia oil (traditional for Japanese tools), or even a thin coat of WD-40 as a temporary rust preventive. For wooden handles, boiled linseed oil is the gold standard. It penetrates the wood, hardens as it dries, and provides long-lasting moisture protection. Apply two thin coats, wiping off any excess, and let each coat dry for 24 hours. Raw linseed oil works too but takes much longer to dry. Avoid motor oil on handles — it stays sticky and attracts dirt.