DIY Beeswax Wraps: A Simple, Reusable Alternative to Plastic Wrap
- DIY beeswax wraps cost about $2–3 each to make and replace plastic wrap for most food storage.
- You need three core ingredients: beeswax (FDA-affirmed GRAS under 21 CFR 184.1973), food-grade pine rosin (permitted for food contact under 21 CFR 175.300), and jojoba oil for flexibility.
- Each wrap lasts 6–12 months with proper care and can be refreshed by re-melting the wax.
- Safety limits: Never use beeswax wraps with hot food, raw meat, raw poultry, raw fish, or in the microwave. Beeswax melts at 144–147°F (62–64°C).
- Wash in cool water only, hot water re-melts the coating and ruins the wrap.
- At end of life, 100% cotton beeswax wraps are compostable, truly zero waste.
Why Should You Make Your Own Beeswax Wraps?
Homemade beeswax wraps cost $2–3 vs. $15–20 for store-bought packs, eliminate single-use plastic from your kitchen, and take about 30 minutes to make. When I first started making them, I could not believe how simple the process was, and how much plastic waste they eliminated.
According to the U.S. EPA’s Facts and Figures on Materials, Waste, and Recycling, containers and packaging make up the largest share of municipal solid waste in the United States, and plastic is a leading component within that category. A single well-made beeswax wrap replaces hundreds of feet of plastic wrap over its lifespan, the kind of one-to-one swap that actually moves the needle in a household.
This project pairs perfectly with beekeeping (produce your own beeswax!) and homemade soap making. If you keep bees, a single hive’s annual wax cappings can produce years of wraps, a true closed-loop homestead output.
What Ingredients Do You Need for Beeswax Wraps?
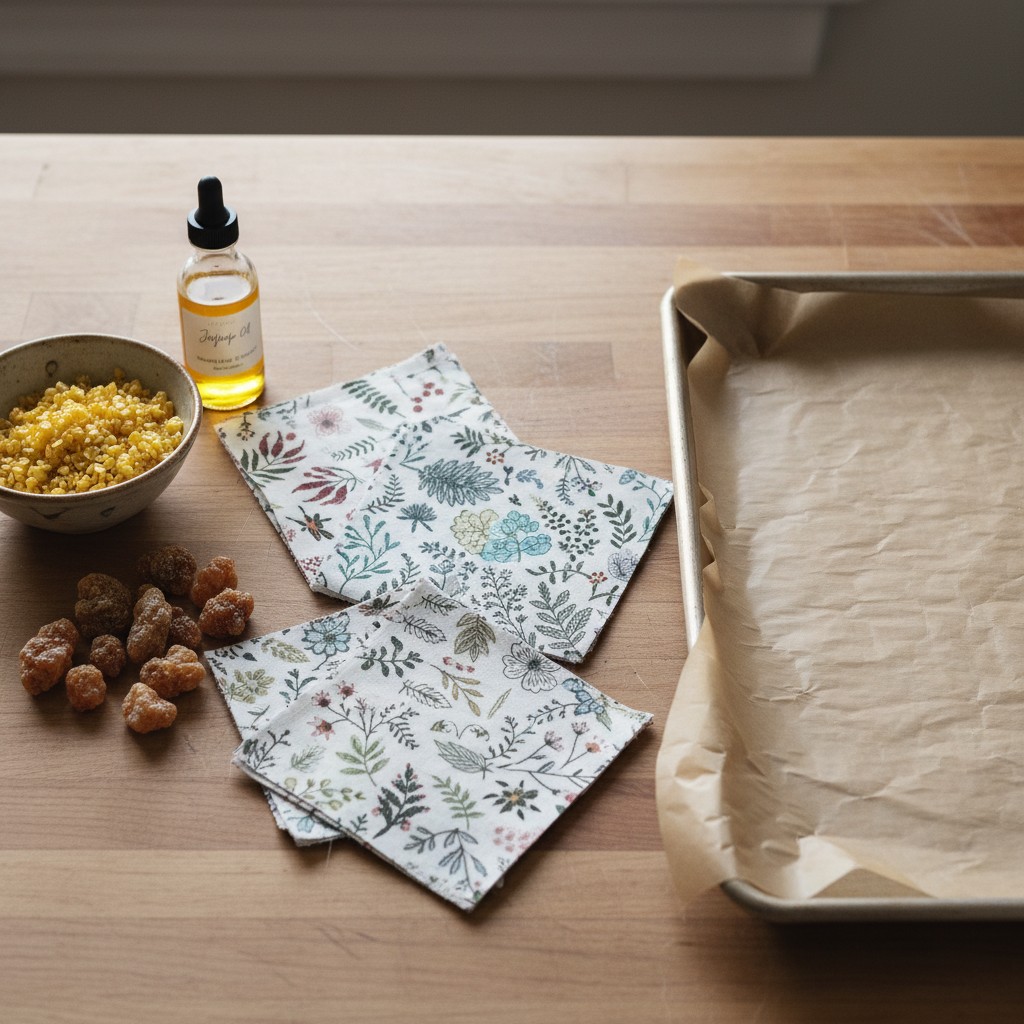
Just three ingredients: beeswax pellets, jojoba oil (for flexibility), and food-grade pine rosin (for tackiness), plus 100% cotton fabric and parchment paper. After trying recipes with and without pine rosin, I strongly recommend including it. Wraps without rosin do not cling properly.
Why these three specifically? Each has a defined food-safety profile that matters if the wrap is going to touch food. Beeswax is affirmed as Generally Recognized As Safe (GRAS) by the FDA as a direct food substance under 21 CFR 184.1973 for uses including surface-finishing. Pine rosin of color grade K or paler is permitted for food-contact surfaces under 21 CFR 175.300. When you buy pine rosin for wraps, look for labeling that explicitly says “food grade” or “for beeswax wraps”, not rosin sold for baseball or violin bows, which may contain additives not intended for food contact.
A note on jojoba oil: Jojoba is widely used in DIY beeswax-wrap recipes as a flexibilizer, and it has a long safety record in topical cosmetic use. However, jojoba is not on the FDA’s direct-food-substance GRAS list. In wraps, jojoba is bound up in a wax matrix that contacts food only as a surface (not ingested), and the small quantity (roughly 1 tablespoon per 4 wraps) is well within typical food-contact usage norms. If you prefer to stay inside the strictest food-ingredient boundary, you can substitute refined coconut oil (FDA-GRAS, slightly stiffer wraps) or simply omit the oil entirely, wraps will be a bit stiffer but still fully functional.
| Ingredient | Amount (per 4 wraps) | Purpose |
|---|---|---|
| Beeswax pellets | 4 oz (113g) | Waterproofing, structure |
| Food-grade pine rosin | 1 oz (28g) | Tackiness and cling |
| Jojoba oil | 1 tablespoon | Flexibility, prevents cracking |
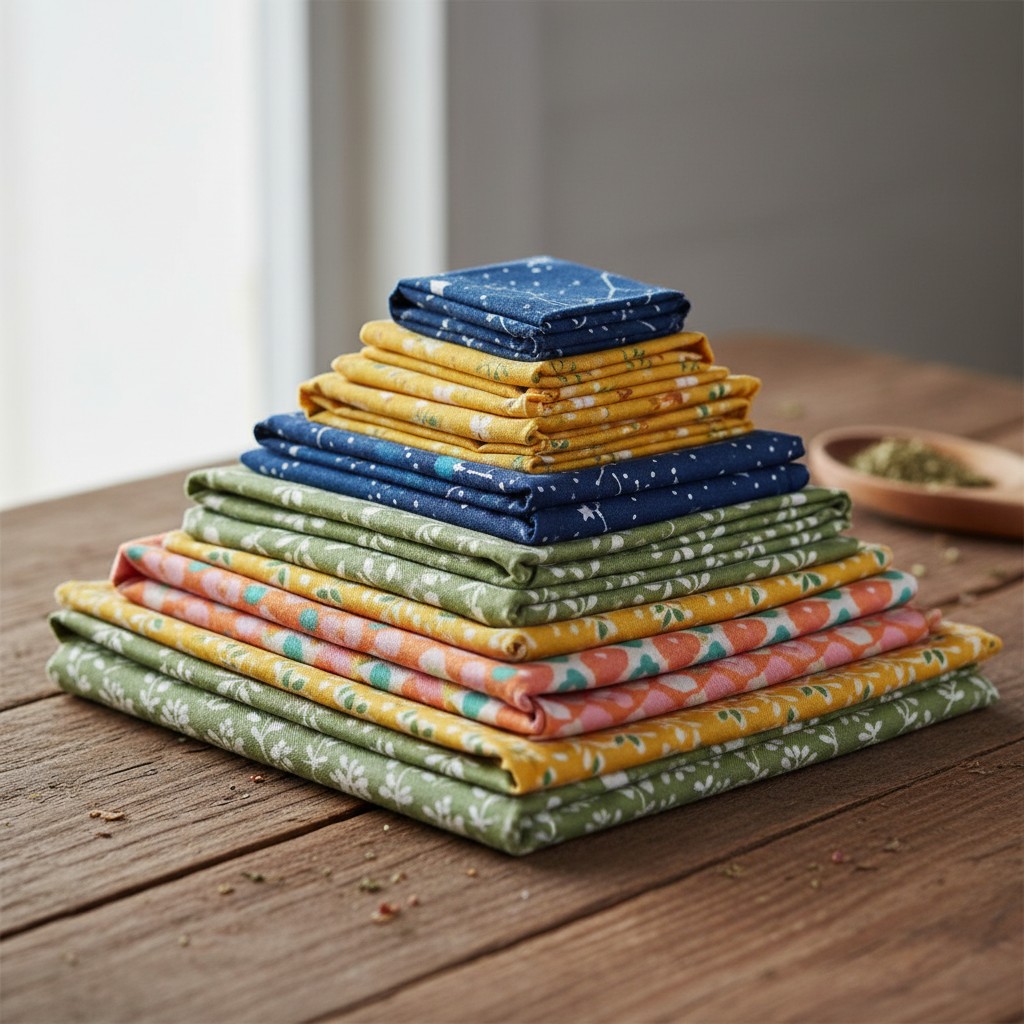
| 100% cotton fabric | 4 pieces in various sizes | The base wrap material |
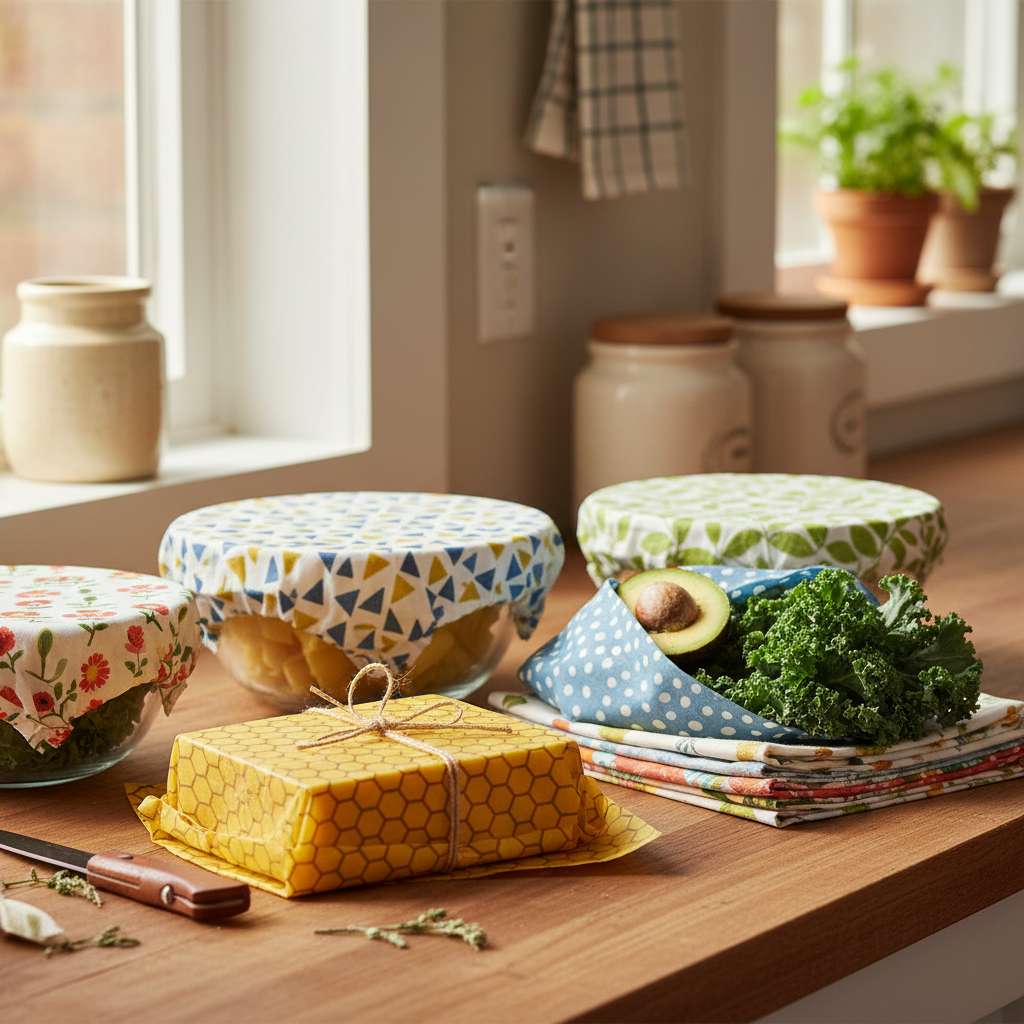
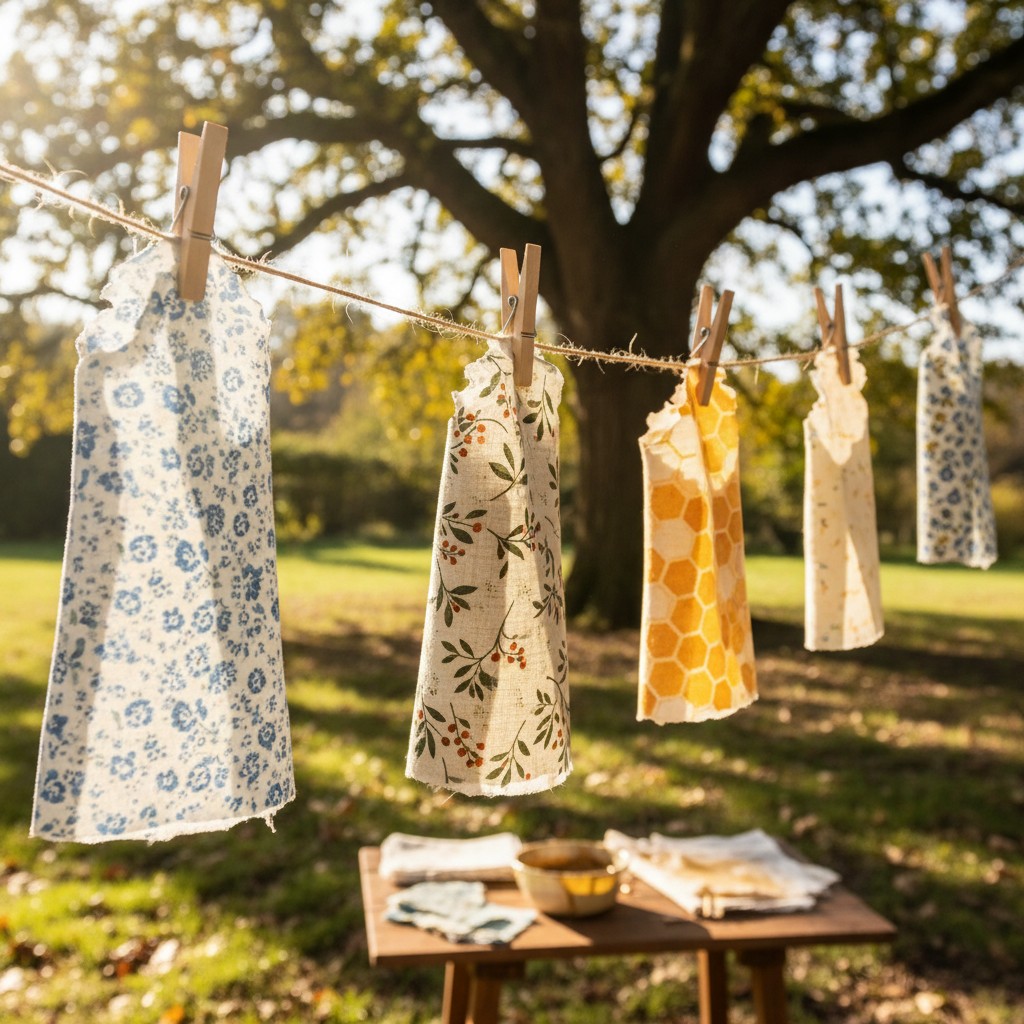
Use 100% cotton fabric, quilting cotton works best. Avoid synthetic blends, because polyester doesn’t absorb wax uniformly and ends up stiff in patches. I recommend cutting wraps in three sizes: small (8×8 inches, for covering half a lemon or a mug), medium (11×11 inches, for cheese and bowls), and large (14×14 inches, for bread loaves and larger platters).
How Do You Make Beeswax Wraps Step by Step?
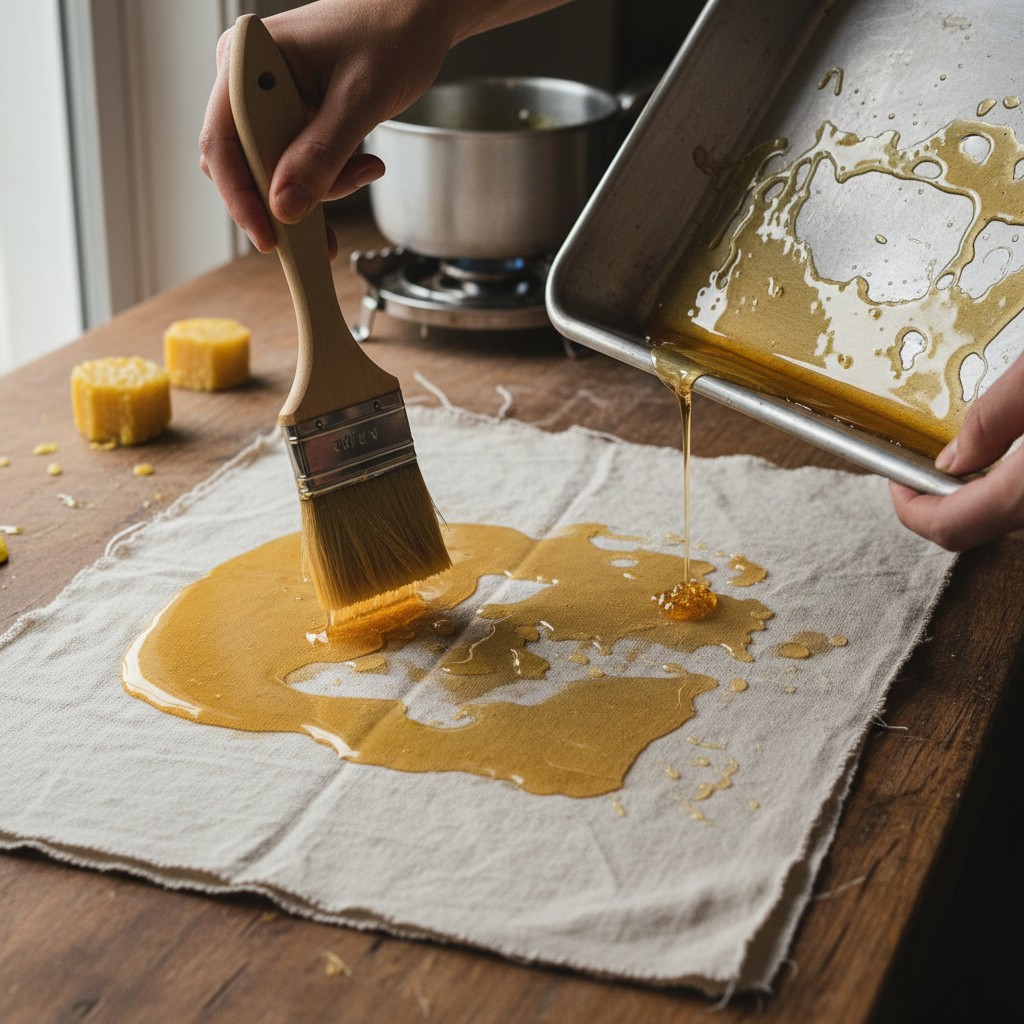
Melt beeswax, pine rosin, and oil together, brush evenly onto fabric on a parchment-lined baking sheet, bake at 185°F for 3–4 minutes, then hang to cool for 30 seconds. This oven method is the easiest for beginners and gives the most even coating.
Step-by-step process:
- Prep your fabric. Wash and dry 100% cotton. Cut to size. Iron flat so you have a smooth work surface.
- Melt the wax mixture in a double boiler. Combine beeswax, pine rosin, and jojoba in a glass jar set inside a pan of simmering water. Stir every 2–3 minutes. Full melt takes 15–20 minutes. Do not use direct heat, beeswax’s flash point is 400°F+ and melted wax is flammable.
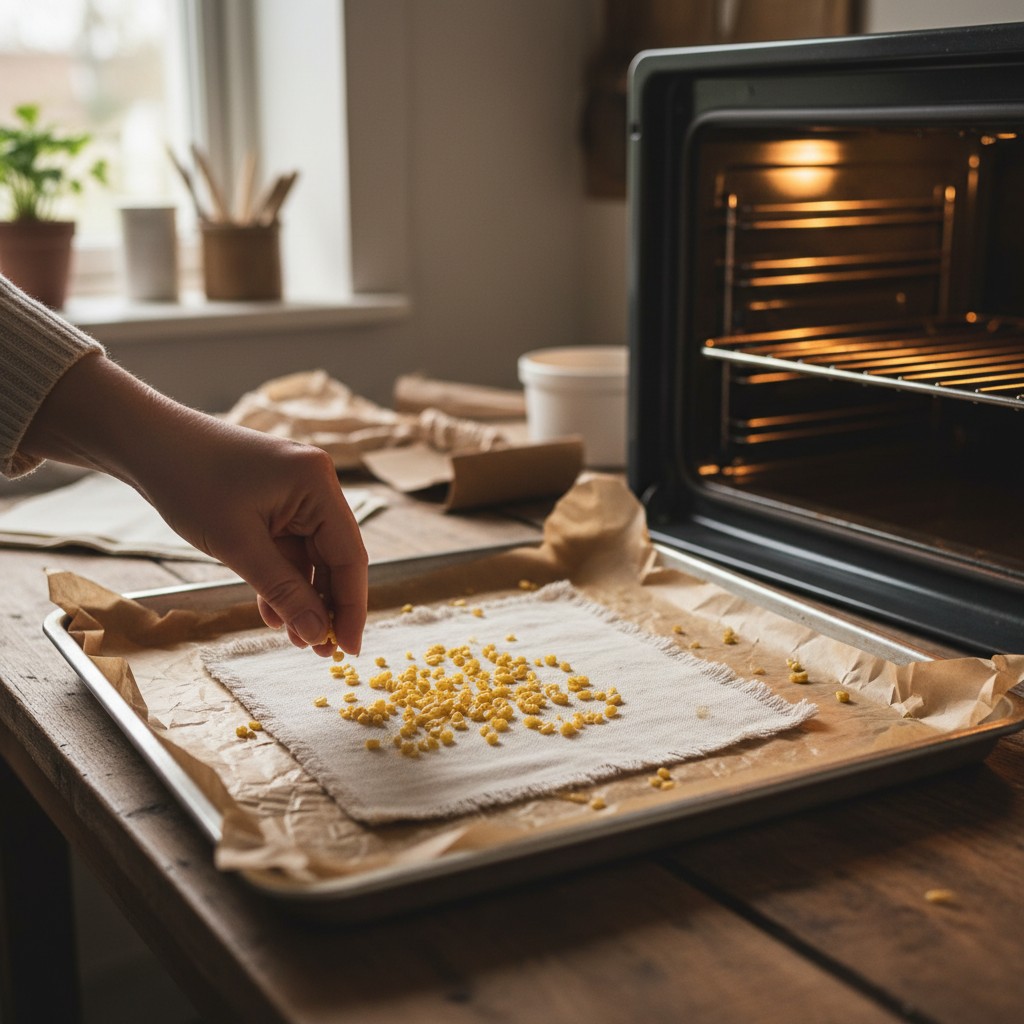
- Preheat oven to 185°F (not higher). Temperatures above 225°F can cause the wax mixture to smoke and degrade. Lay cotton fabric on a parchment-lined baking sheet.
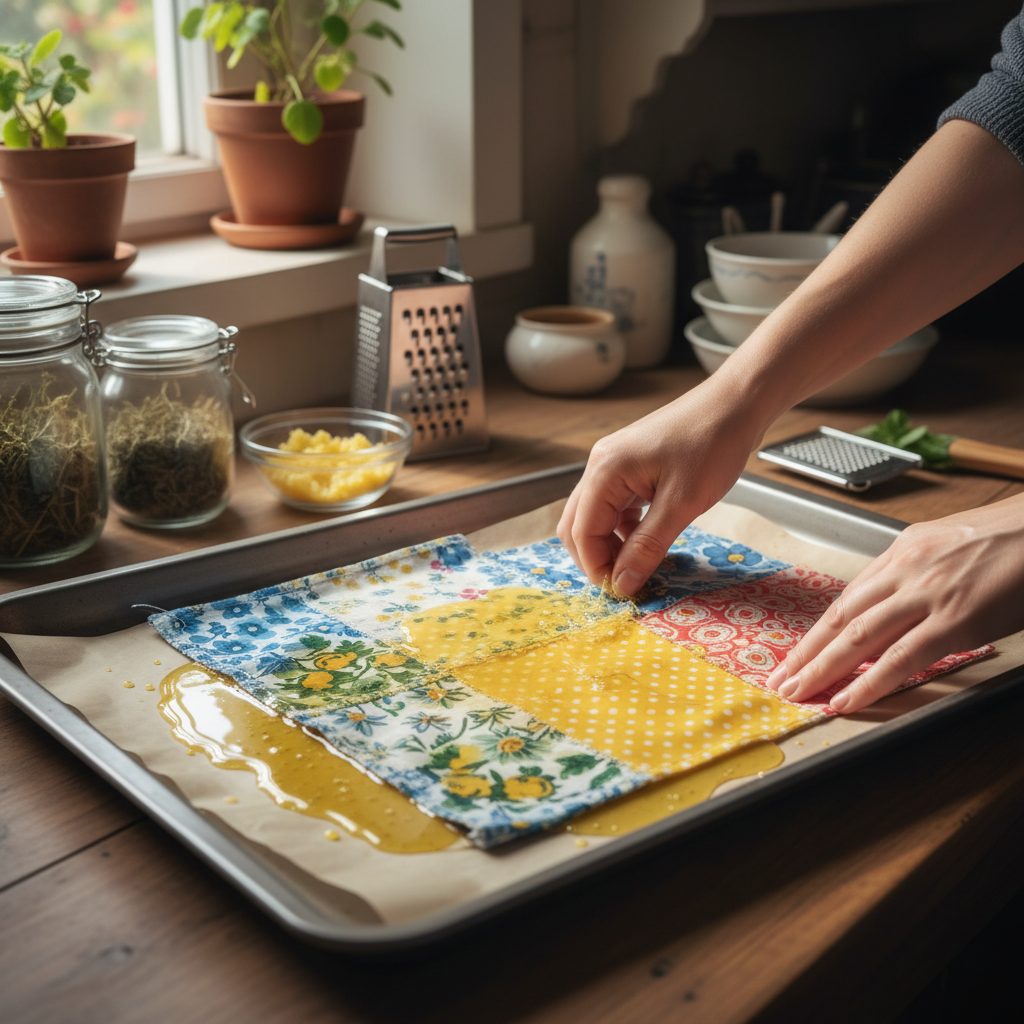
- Brush or drizzle the mixture onto fabric. Don’t soak it, a thin, even coat works better than a thick gloopy one. You can always add more.
- Bake 3–4 minutes. The wax should melt and saturate the fibers. Pull the sheet out when the fabric looks uniformly translucent.
- Hang to cool for 30 seconds. Lift one corner with tongs and hang from a drying rack or clothesline. Wraps set in under a minute.
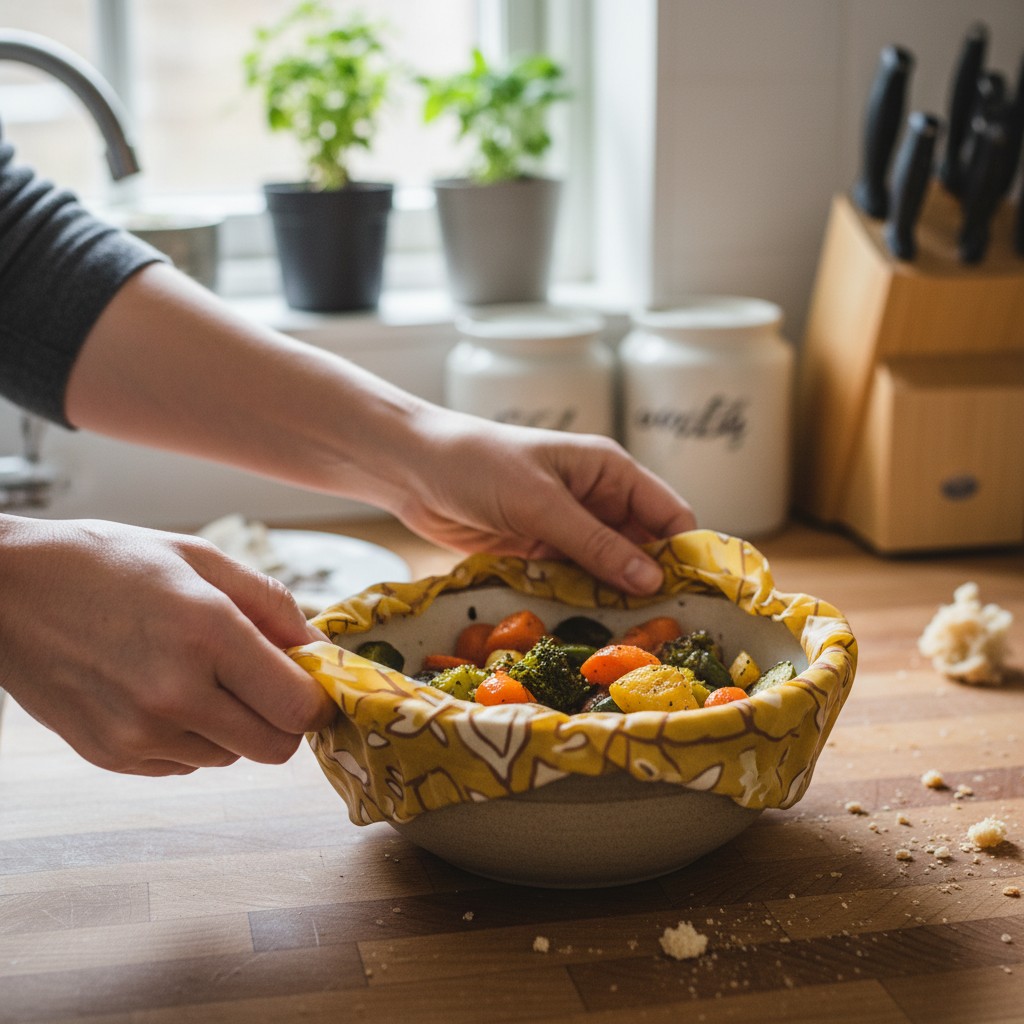
- Test the cling. Warm a wrap between your palms and fold it around a bowl. It should hold shape. If it doesn’t cling, you need more pine rosin; if it cracks, add a bit more oil on the next batch.
The UC ANR Master Food Preservers and Utah State University Extension have both reviewed DIY beeswax wraps and consider them a reasonable reusable alternative to plastic film for produce, cheese, and covered bowls, provided you follow the temperature and raw-protein limits described in the next section.
Food Safety: What Beeswax Wraps Can and Cannot Do
Beeswax wraps are safe for direct contact with many foods, but there are firm safety limits you need to respect. This is the section most DIY tutorials skim over, and it is the difference between a useful kitchen tool and a foodborne-illness problem.
Safe uses:
- Covering bowls of cut fruit, salad, or leftovers (cooled)
- Wrapping hard and semi-hard cheeses
- Wrapping whole or cut produce (cucumbers, halved peppers, herb bunches)
- Wrapping bread, rolls, and baked goods (fully cooled)
- Packing sandwiches for lunch
- Covering a rising bread dough bowl
Do NOT use beeswax wraps for:
- Raw meat, raw poultry, or raw fish. Beeswax is not a sanitizable surface. Pathogens like Salmonella, Campylobacter, and Listeria can persist in the wax and transfer to your next use. This is the single biggest safety rule, echoed by both UC ANR Master Food Preservers and food-safety specialists at university extensions nationwide.
- Hot food or freshly cooked leftovers. Beeswax’s melting point is 144–147°F (62–64°C). Hot food at 180°F-plus will re-melt the coating onto the food itself and ruin the wrap.
- The microwave. Same problem, the wax melts and the wrap can ignite. Never microwave.
- The dishwasher. Hot water plus detergent strips the coating.
- Oven reheating. Any heat above ~110°F softens the coating.
Acidic foods and long-term storage: Beeswax wraps are safe for short-term contact with acidic foods, covering a cut lemon for a day or wrapping a wedge of citrus-dressed salad is fine. However, storing strongly acidic foods (citrus halves, tomatoes with cut surfaces, very acidic ferments) in direct contact with beeswax wraps for extended periods is not recommended. Prolonged exposure to acids can gradually degrade the wax coating, shortening wrap life and potentially leaving a waxy residue on the food. For multi-day storage of acidic foods, use glass containers or fold the wrap loosely over a bowl rather than in tight contact with the food surface.
How Do You Care for and Refresh Beeswax Wraps?
Wash in cool water with mild soap, air dry flat, and refresh the coating when it wears thin by re-melting wax in the oven. In my experience, wraps used for dry goods like bread and cheese last much longer than those used for wet produce, and refreshing takes all of five minutes.
Daily care: Rinse under cool running water. For stickier foods, use a drop of mild dish soap and your fingertips, no scrubby sponges, which can abrade the coating. Shake off excess water and hang or lay flat to dry. Never use hot water; per UC ANR Master Food Preservers, hot water “can melt the wax” and destroys the wrap in a single wash.
When to replace a wrap: Throw a wrap in the compost when you see any of these signs, cracks across folds that don’t smooth out when warmed, visible bare spots where the fabric no longer has wax, persistent odors that don’t rinse away (especially after wrapping onions or garlic), mold, or any use on raw meat/fish/poultry (immediate retirement, no exceptions). With normal use on produce and cheese, expect 6–12 months of life; wraps used only for bread can last longer.
Refreshing a tired wrap: If the cling is fading but the fabric is still intact, you can extend the life by re-melting. Lay the wrap on parchment, sprinkle a small amount of fresh beeswax and a few grains of pine rosin on top, and bake at 185°F for 3 minutes. Pull out, smooth with a pastry brush, and hang to cool. Good as new for another 4–6 months.
End of life: When a wrap is truly done, cut it into strips and add it to your compost bin, 100% cotton fabric with a beeswax coating is fully biodegradable. You can also use worn-out wraps as fire starters; the wax makes them light easily.
🌱 From Our Homestead
I started making beeswax wraps after realizing how much plastic wrap we were going through each week. They are surprisingly easy to make, and ours have lasted over a year of daily use, the kids even decorated their own wraps with fabric scraps. The one mistake I had to learn from: never try to wrap leftover rotisserie chicken while it’s still warm. The wax slides right off.
Frequently Asked Questions About DIY Beeswax Wraps
Yes, for the right foods. Beeswax is FDA-affirmed as GRAS for direct food use under 21 CFR 184.1973, and food-grade pine rosin is permitted for food-contact surfaces under 21 CFR 175.300. Safe for produce, cheese, bread, and cooled leftovers. Not safe for raw meat, raw fish, raw poultry, hot food, or the microwave.
Beeswax melts at 144–147°F (62–64°C). Any food or surface warmer than about 110°F will start softening the coating; above 145°F the wax liquefies onto whatever it’s touching. That’s why hot food, dishwashers, and microwaves are off-limits.
Yes, substitute candelilla wax or soy wax. You still need pine rosin for cling and a plant-based oil. Candelilla wax is the most popular vegan alternative and behaves nearly identically to beeswax in this recipe.
Replace (or compost) when you see cracks that don’t smooth out, bare fabric spots, persistent odors, or mold, or immediately after any accidental use with raw meat. With normal produce and cheese use, expect 6–12 months.
Lightweight 100% cotton is ideal, quilting cotton, muslin, or old cotton shirts. Avoid polyester, nylon, or cotton-poly blends. Natural fibers absorb wax uniformly; synthetics leave stiff, patchy spots.
They do. Beeswax creates a breathable, moisture-resistant barrier that lets cheese and produce respire without drying out. In practice, cheese, bread, cut vegetables, and herbs stay fresh 3–5 days longer than uncovered food, and noticeably longer than the same food covered loosely with plastic wrap.