Making Apple Cider Vinegar from Scratch: A Simple Homestead Recipe
Making Apple Cider Vinegar from Scratch: A Simple Homestead Recipe
- Apple cider vinegar is made through a two-stage fermentation: apple sugars convert to alcohol, then alcohol converts to acetic acid
- You can use apple scraps (cores and peels) or whole apples — nothing goes to waste
- The “mother” is a living culture of beneficial bacteria that transforms alcohol into vinegar
- The entire process takes 4-8 weeks and requires almost no hands-on effort
- Homemade ACV is raw, unpasteurized, and far more flavorful than store-bought versions
If you’ve ever tossed a pile of apple cores and peels into the compost and felt a twinge of guilt, this article is for you. Those “scraps” are the starting point for one of the most useful pantry staples on the homestead: apple cider vinegar.
I started making my own ACV about four years ago, mostly because I was tired of paying six dollars a bottle for the raw, unfiltered stuff. What I discovered is that homemade apple cider vinegar is not only cheaper — it’s better. Richer flavor, more active cultures, and the deep satisfaction of turning kitchen waste into something genuinely valuable.
Whether you use it for cooking from scratch, natural cleaning, or as a daily health tonic, apple cider vinegar made in your own kitchen is a homesteading skill worth learning. And I promise — it’s far easier than you think.
Understanding the Two-Stage Fermentation
Apple cider vinegar doesn’t happen in one step. It’s actually two distinct fermentations, each driven by different microorganisms. Understanding this process helps you troubleshoot and ensures you end up with real vinegar rather than a jar of moldy apple water.
Stage One: Alcohol Fermentation
In the first stage, wild yeasts (naturally present on apple skins) consume the sugars in your apple mixture and produce alcohol. This is essentially the same process that creates hard cider. The sugar you add at the beginning feeds these yeasts and kickstarts the fermentation.
This stage typically takes 1-2 weeks. You’ll notice bubbling, a yeasty smell, and the liquid becoming slightly cloudy. The apple pieces will float at first, then gradually sink as the sugars are consumed.
Stage Two: Acetic Acid Fermentation
Once enough alcohol has been produced, acetobacter bacteria take over. These bacteria convert ethanol into acetic acid — the compound that gives vinegar its sharp taste and preserving power. This is where the magic of vinegar truly happens.
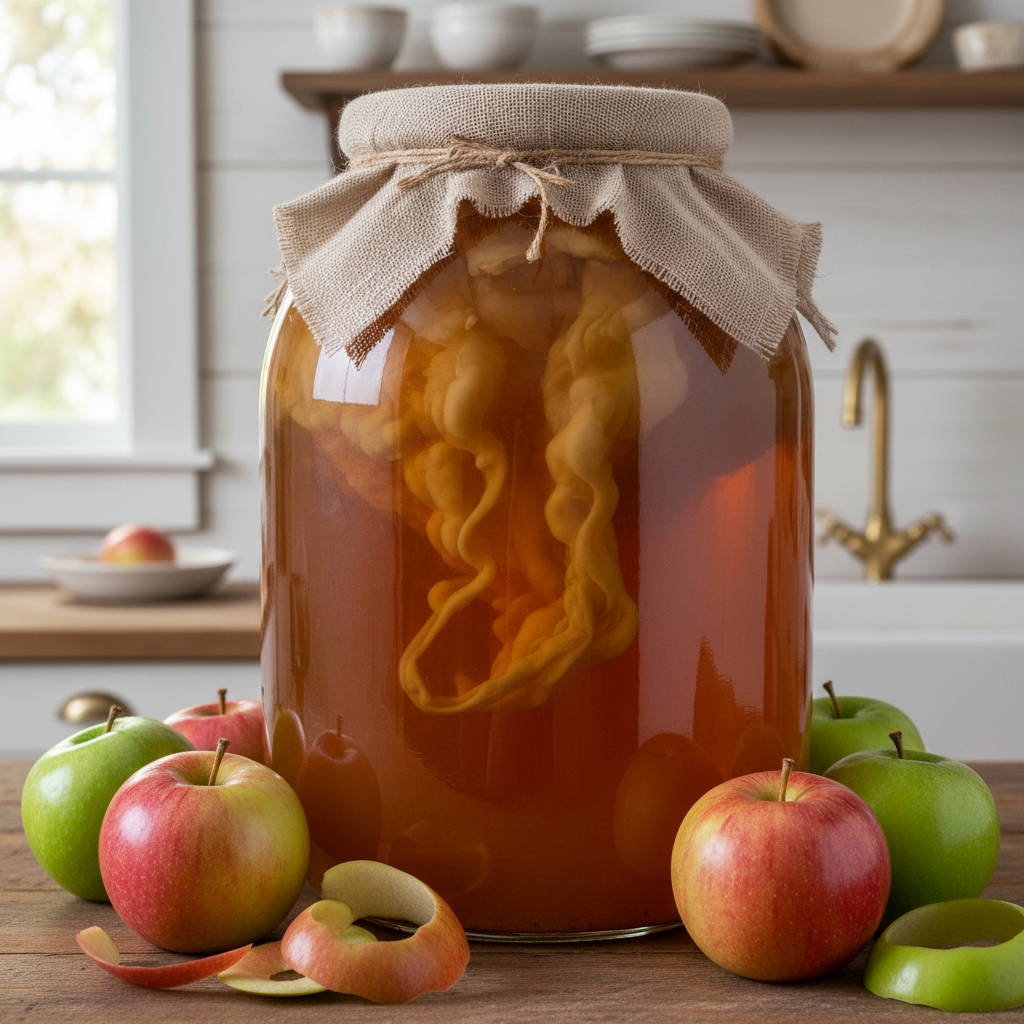
This stage takes 3-6 weeks and requires oxygen exposure (unlike alcohol fermentation, which can happen in sealed containers). You’ll notice the sharp, tangy smell of vinegar developing and a gelatinous disc forming on the surface. That disc is the mother.
What Is the Mother?
The mother of vinegar is a symbiotic culture of acetic acid bacteria and cellulose. It looks like a rubbery, translucent disc that floats on the surface of your vinegar. Some people find it unappealing, but it’s actually a sign that your vinegar is alive and thriving.
The mother serves several purposes:
- It houses the bacteria responsible for converting alcohol to vinegar
- It creates a protective barrier on the liquid surface
- It can be used to inoculate future batches, speeding up fermentation
- It contains probiotics and beneficial enzymes
My first mother formed after about three weeks and honestly startled me — I thought something had gone wrong. Now I keep a “mother hotel” (a jar of vinegar with multiple mothers) so I always have one ready for a new batch. It’s become one of my most treasured kitchen cultures, right up there with my sourdough starter.
What You’ll Need
One of the beautiful things about making ACV is how little equipment is required. You probably have everything already.
| Item | Details |
|---|---|
| Wide-mouth glass jar | Half-gallon or gallon size — wider is better for oxygen exposure |
| Apple scraps or whole apples | Enough to fill the jar about 3/4 full |
| Sugar | 1 tablespoon per cup of water (plain white sugar works best) |
| Filtered water | Enough to cover the apples — chlorine-free is important |
| Breathable cover | Cheesecloth, coffee filter, or clean cloth secured with a rubber band |
| Optional: raw ACV with mother | A splash from a previous batch or store-bought raw ACV as a starter |
Avoid using metal containers or utensils that will stay in contact with the vinegar — the acidity will react with metal and can give your vinegar an off taste.
Step-by-Step: Making Apple Cider Vinegar
Step 1: Prepare Your Apples
You can use whole apples (chopped), apple scraps (cores and peels saved from pies, applesauce, or snacking), or a combination. If using scraps, I recommend saving them in a bag in the freezer until you have enough for a batch.
Organic or unsprayed apples are ideal since the wild yeasts on the skins help drive fermentation. If you only have conventional apples, give them a light rinse but don’t scrub — you want some of those natural yeasts. A mix of apple varieties gives the best flavor complexity.
Step 2: Fill Your Jar
Pack your apple pieces into the jar until it’s about three-quarters full. Don’t pack them too tightly — you want the sugar water to circulate freely.
Step 3: Make the Sugar Water
Dissolve 1 tablespoon of sugar per cup of room-temperature filtered water. The water must be chlorine-free, as chlorine kills the beneficial bacteria and yeasts you’re trying to cultivate. If your tap water is chlorinated, let it sit uncovered for 24 hours or use filtered water.
Pour the sugar water over the apples until they’re fully submerged. This is important — any apple pieces above the waterline can develop mold.
Step 4: Add a Starter (Optional but Recommended)
If you have raw, unpasteurized ACV with mother (homemade or store-bought like Bragg’s), add a splash — about 2 tablespoons per quart. This inoculates your mixture with acetobacter and can cut your overall fermentation time significantly.
Step 5: Cover and Wait (Stage One)
Cover the jar with cheesecloth or a coffee filter and secure it with a rubber band. Place it in a warm, dark spot (ideally 65-80°F). A kitchen cabinet or pantry shelf works well.
Stir the mixture once or twice daily for the first week to prevent mold and ensure even fermentation. You should start to see bubbles within a few days — that’s the yeast at work.
After 1-2 weeks, the bubbling will slow down and the liquid will smell boozy, like hard cider. Time for stage two.
Step 6: Strain and Continue (Stage Two)
Strain out the apple solids through cheesecloth or a fine-mesh strainer. Compost the apple pieces — they’ve done their job. Return the liquid to the clean jar and cover again with your breathable cloth.
Now patience takes over. Place the jar back in its warm, dark spot and leave it alone. No more stirring — the mother needs a still surface to form. Taste it every week or so. You’ll notice the alcohol flavor fading and the sharp vinegar bite developing.
Step 7: Taste and Bottle
After 3-6 weeks, your vinegar should taste sharp, tangy, and pleasantly apple-flavored. When it reaches an acidity you enjoy, it’s done. Strain it through cheesecloth (saving the mother for your next batch) and bottle it in clean glass jars or bottles.
Homemade ACV will continue to develop flavor over time. Store it at room temperature — there’s no need to refrigerate vinegar. If a new mother forms in the bottle, that’s perfectly normal and a sign of a living, healthy product.
Troubleshooting Common Issues
| Problem | Cause | Solution |
|---|---|---|
| White fuzzy mold on surface | Apple pieces above waterline, not stirring enough in stage one | Remove mold, push apples down, stir daily |
| Fruit flies | Cover isn’t tight enough | Use tighter weave cloth, double layer, or coffee filter |
| No bubbling after 5 days | Too cold, chlorinated water, or not enough sugar | Move to warmer spot, check water source, add more sugar |
| Smells like nail polish remover | Too much oxygen during alcohol stage or too warm | Move to cooler spot; usually resolves as vinegar matures |
| Still tastes like alcohol after 6 weeks | Not enough acetobacter, too cool | Add a splash of raw ACV with mother, ensure warm location |
Uses for Homemade Apple Cider Vinegar
Once you start making your own ACV, you’ll find uses for it everywhere. Here are the ways I use it most on our homestead:
In the kitchen: Salad dressings, marinades, pickling brines, and deglazing pans. It adds brightness to soups and stews. A splash in the water when poaching eggs helps them hold their shape. It’s an essential part of our cooking from scratch pantry.
For preserving: While ACV isn’t typically recommended for canning (commercial vinegar with a guaranteed 5% acidity is safer for that), it’s wonderful for quick refrigerator pickles and fermentation projects.
For cleaning: Diluted ACV is an excellent natural cleaning product. I use it to clean counters, degrease the stovetop, and remove hard water deposits. Mixed with baking soda, it unclogs drains better than commercial products.
In the garden: A diluted ACV spray can help deter certain pests in your preserver’s garden. It also makes an effective fruit fly trap — just put some in a jar with a drop of dish soap.
For health: Many people swear by a daily tablespoon of raw ACV diluted in water for digestive health. While I’m not a doctor, I can say it’s been part of my morning routine for years.
For animals: A splash of ACV in the chicken waterer is a time-honored homestead practice believed to support gut health and discourage algae growth in the water.
Tips for the Best Homemade ACV
- Use a variety of apples. Sweet varieties provide more sugar for fermentation, while tart varieties add complexity. A mix is ideal.
- Keep it warm. Fermentation slows dramatically below 60°F. In winter, I keep my vinegar jars near (but not on) the wood stove.
- Be patient. Rushing vinegar leads to weak, flat-tasting results. Let it develop fully.
- Save your mothers. Start a mother hotel — a jar of finished vinegar where you store extra mothers. They’ll keep indefinitely.
- Label everything. Write the start date on your jars. After a few batches, they all start to look the same.
- Make compound vinegar. Add herbs like rosemary, thyme, or garlic to finished ACV for incredible flavored vinegars perfect for salad dressings.
Last fall I made a massive batch of ACV from the windfall apples in our small orchard — apples that were too bruised or wormy to eat fresh but perfect for vinegar. I ended up with over two gallons of beautiful, amber vinegar that lasted us the entire year. There’s something deeply satisfying about turning “waste” into a staple you use every single day.
Scaling Up Your Production
Once you’ve mastered the basic process, you may want to scale up. Here’s what works well:
Continuous brew method: Instead of making individual batches, maintain a large crock of vinegar. Draw off what you need and replace it with fresh apple cider or sugar water. The established mother and bacteria colony makes this incredibly efficient.
Using fresh cider: If you have access to fresh-pressed apple cider (unpasteurized), you can skip stage one entirely. The cider already contains everything needed — just let it sit covered with cloth and the wild yeasts and bacteria will do the rest.
Seasonal batches: I make my biggest batches in fall during apple season, then supplement with smaller scrap batches throughout the year. This ensures I never run out.
A Note on Acidity for Canning
If you plan to use vinegar for canning or water bath preserving, please use commercial vinegar with a guaranteed 5% acidity. Homemade vinegar has variable acidity levels that are difficult to test without specialized equipment. For everything else — cooking, cleaning, health tonics, and more — your homemade ACV is not only adequate but superior.
Frequently Asked Questions
Can I use apple juice instead of whole apples or scraps?
Yes, but make sure it’s organic and preservative-free. Preservatives like potassium sorbate are specifically designed to prevent fermentation and will stop your vinegar from forming. Pasteurized juice works but may ferment more slowly since the natural yeasts have been killed — adding a splash of raw ACV with mother helps compensate.
How do I know when my vinegar is “done”?
Taste is the best indicator. When it tastes pleasantly sharp and tangy without any residual alcohol sweetness, it’s ready. If you want precision, you can test the pH with strips — finished vinegar should be around 2.5-3.5 pH. The longer you let it go, the more acidic it becomes.
My vinegar has a weird film or blob floating in it. Is it safe?
Almost certainly yes. That film or blob is the vinegar mother — a colony of beneficial bacteria. It’s completely harmless and actually a sign of a healthy, living vinegar. You can strain it out for a clearer product or leave it in. The only thing to watch for is fuzzy, colored mold (green, black, or pink), which indicates contamination.
Can I make vinegar from other fruits besides apples?
Absolutely. The same basic process works with pears, peaches, grapes, berries, pineapple, and more. Each fruit produces a vinegar with its own unique flavor profile. The key is having enough sugar for the yeasts to convert. Berry vinegars are particularly lovely for salad dressings.
How long does homemade apple cider vinegar last?
Vinegar is self-preserving thanks to its acidity, so technically it lasts indefinitely. Over time, it may develop more mothers or become cloudier, but it remains safe and usable. The flavor may mellow or shift slightly over years, but I’ve used ACV that was over two years old with excellent results.