Making Beeswax and Soy Candles at Home: A Beginner Guide
Making Beeswax and Soy Candles at Home: A Beginner’s Guide
Key Takeaways
- Beeswax candles burn cleanly, produce a warm honey scent naturally, and last longer than other wax types — but they cost more
- Soy wax is affordable, widely available, holds fragrance beautifully, and is the easier wax for beginners to work with
- Choosing the correct wick size for your container diameter is the most important factor in candle performance
- Essential oils provide natural fragrance, but they require higher concentrations than synthetic fragrance oils (6-10% by weight)
- Basic candle-making requires minimal equipment and can be started for under $50
There’s something deeply satisfying about lighting a candle you made yourself — especially when it’s poured from beeswax your own hives produced or scented with herbs from your garden. Candle-making is one of those homestead crafts that feels both practical and luxurious, and it’s far simpler than most people expect.
Whether you’re a beekeeper looking to use your wax harvest, a crafter wanting to make natural alternatives to store-bought candles, or someone searching for a meaningful handmade gift, this guide covers everything from choosing your wax to pouring your first candle.
Beeswax vs. Soy Wax: Choosing Your Base
The two most popular natural candle waxes each have distinct characteristics. Understanding them helps you choose the right one for your project.
Beeswax
Beeswax is the gold standard of natural candle-making. Produced by honey bees and harvested as cappings during honey extraction (save those cappings from your beeswax wrap projects!), it has properties that no other wax can match:
- Natural honey scent: Beeswax smells wonderful without any added fragrance
- Long burn time: Burns 2-5 times longer than paraffin candles of the same size
- Bright, warm flame: Produces a naturally warm, golden light
- Air purifying: Beeswax candles are said to release negative ions that can help neutralize pollutants (though scientific evidence is limited)
- High melting point: 144-149°F, which means firmer candles but requires more heat to work with
The downsides: beeswax is expensive ($8-$15/lb if purchased; free if you keep bees), it has a higher melting point that makes it trickier to work with, and its natural scent can compete with added fragrances.
Soy Wax
Soy wax is made from hydrogenated soybean oil. It’s become the go-to wax for natural candle-makers who want an affordable, easy-to-work-with material:
- Excellent scent throw: Holds and releases fragrance better than beeswax
- Lower melting point: 120-135°F, making it easier and safer to work with
- Clean burn: Produces minimal soot compared to paraffin
- Affordable: $3-$6/lb in bulk
- Smooth, creamy appearance: Creates a beautiful finished product
Downsides: soy wax can develop “frosting” (white crystalline patterns on the surface — harmless but cosmetically imperfect), and it doesn’t have the natural scent that beeswax offers.
| Feature | Beeswax | Soy Wax |
|---|---|---|
| Cost per pound | $8–$15 (or free from your hives) | $3–$6 |
| Melting point | 144–149°F | 120–135°F |
| Natural scent | Sweet honey aroma | Minimal |
| Scent throw (added fragrance) | Moderate | Excellent |
| Burn time | Longest of natural waxes | Good; shorter than beeswax |
| Best for | Dipped tapers, pillar candles, natural unscented | Container candles, scented candles |
| Beginner friendliness | Moderate | High |
Blending Waxes
Many candle-makers blend beeswax and soy for the best of both worlds. A common ratio is 75% soy and 25% beeswax — you get the scent throw and workability of soy with the improved burn time and warm glow of beeswax. Experimenting with ratios is part of the fun.
Essential Equipment
You don’t need a lot of specialized equipment to start making candles. Most of what you need is already in your kitchen or available cheaply.
Must-Have Supplies
- Double boiler or makeshift setup: A large pot with a smaller pot or heat-safe pitcher inside. Never melt wax directly over a flame — it’s a fire hazard.
- Thermometer: A candy or digital thermometer that reads up to at least 200°F. Temperature matters for scent retention and proper pouring.
- Wicks: Sized appropriately for your container (more on this below)
- Containers or molds: Mason jars, tins, ceramic cups, or dedicated candle molds
- Wick centering tool or pencils: To hold wicks centered while wax hardens
- Wick stickers or hot glue: To secure wick tabs to the bottom of containers
- Scale: For measuring wax and fragrance by weight
- Stirring utensil: A dedicated wooden spoon or chopstick
Nice-to-Have Supplies
- Pouring pitcher with spout
- Heat gun (for smoothing candle tops)
- Dye blocks or liquid candle dye (if you want colored candles)
- Candle mold release spray (for pillar candles)
Understanding Wicks
The wick is the most critical component of a well-performing candle, and getting it right is where most beginners struggle. An improperly sized wick will ruin an otherwise perfect candle.
Wick Types
- Cotton wicks: The most common type. Flat braided cotton wicks work well in soy and beeswax. Look for lead-free, zinc-free wicks.
- Wood wicks: Create a lovely crackling sound when burning. They work well in soy wax but can be finicky in beeswax. A trendy choice for gift candles.
- Hemp wicks: A natural option that pairs well with beeswax. Burns slightly faster than cotton.
Wick Sizing
This is where precision matters. A wick that’s too small will create a “tunnel” — melting only a narrow channel down the center while wasting wax along the sides. A wick that’s too large will burn too hot, produce soot, and consume the candle too quickly.
Wick size is determined primarily by the diameter of your container:
| Container Diameter | Recommended Wick (Cotton, Soy Wax) |
|---|---|
| 2–2.5 inches | ECO 6 or CD 5 |
| 2.5–3 inches | ECO 10 or CD 8 |
| 3–3.5 inches | ECO 14 or CD 12 |
| 3.5–4 inches | ECO 16 or CD 16 |
These are starting points. Always test-burn your candles and adjust wick size if needed. A properly wicked candle achieves a full melt pool (melted wax reaches the edges of the container) within 1-2 hours of burning.
I ruined my first batch of candles by eyeballing the wick size. They tunneled terribly — a ring of solid wax around the edge while the center melted into a hole. Now I order wick sample packs and test three different sizes in the same container before committing to a full batch. Those test candles save a lot of wax and frustration.
Scenting with Essential Oils
One of the best things about homemade candles is choosing your own scents — and using natural essential oils instead of synthetic fragrances.
Essential Oils vs. Fragrance Oils
Essential oils are distilled from actual plants; fragrance oils are synthetically formulated in a lab. For a natural homestead candle, essential oils are the obvious choice, though they come with some trade-offs: they’re more expensive, some scents don’t survive the heat of candle-making well, and you need to use more of them (6-10% by weight of wax, compared to 6-8% for fragrance oils).
If you’re growing medicinal herbs, you already have a fragrance garden at your doorstep. Lavender, rosemary, eucalyptus, and peppermint essential oils all perform well in candles.
Best Essential Oils for Candles
| Essential Oil | Scent Profile | Performance in Candles |
|---|---|---|
| Lavender | Floral, calming, clean | Excellent — one of the best EOs for candles |
| Eucalyptus | Fresh, medicinal, invigorating | Good hot and cold throw |
| Peppermint | Cool, refreshing, bright | Very good; strong scent throw |
| Lemongrass | Citrusy, grassy, uplifting | Good; fades faster than some |
| Cedarwood | Woody, warm, grounding | Excellent; anchors blends well |
| Rosemary | Herbaceous, energizing | Good; blends well with citrus |
| Orange (sweet) | Bright, sweet, cheerful | Fair; evaporates at high temps, use at lower pour temp |
When to Add Essential Oils
Add essential oils after the wax has melted and cooled to the recommended pouring temperature — typically 135-145°F for soy wax and 150-160°F for beeswax. Adding oils to wax that’s too hot causes the volatile compounds to evaporate, wasting your expensive oils and diminishing the scent. Stir gently for 2 full minutes to ensure thorough distribution.
Making Poured Container Candles: Step by Step
Container candles — poured into jars, tins, or ceramic vessels — are the easiest type for beginners. Here’s the process from start to finish.
Step 1: Prepare Containers and Wicks
Clean your containers and ensure they’re dry. Attach a wick tab to the bottom center of each container using a wick sticker or a dab of hot glue. Center the wick and hold it upright by wrapping the top around a pencil or chopstick laid across the container rim.
Step 2: Melt the Wax
Measure your wax by weight (a good rule of thumb: you need roughly double the weight of your container’s volume in ounces — so an 8 oz jar needs about 6-7 oz of wax by weight). Melt wax in a double boiler, stirring occasionally. Heat soy wax to 170-180°F; heat beeswax to 180-190°F.
Step 3: Add Fragrance
Remove from heat and let the wax cool to the recommended temperature for your fragrance (typically 135-145°F for soy). Add essential oils at 8-10% by weight for a strong scent (example: for 8 oz of wax, add about 0.7 oz of essential oil). Stir gently for 2 minutes.
Step 4: Pour
Pour the wax slowly and steadily into prepared containers. Pour at 120-140°F for soy wax (lower temperatures reduce sinkholes and frosting). For beeswax, pour at 145-155°F. Leave about 1/2 inch of space at the top. Save a small amount of wax for topping off.
Step 5: Cool and Top Off
Allow candles to cool at room temperature (not in the fridge — rapid cooling causes cracking). As the wax cools, you may notice sinkholes forming around the wick. After the candle has fully set (4-6 hours for soy, longer for beeswax), poke relief holes around the wick with a skewer and pour a thin layer of reheated wax to create a smooth, level top.
Step 6: Cure
Soy candles benefit from a cure time of 1-2 weeks before burning. During curing, the fragrance binds with the wax, resulting in better scent throw. Beeswax candles can be burned sooner but also improve with a few days of rest. Trim the wick to 1/4 inch before the first burn.
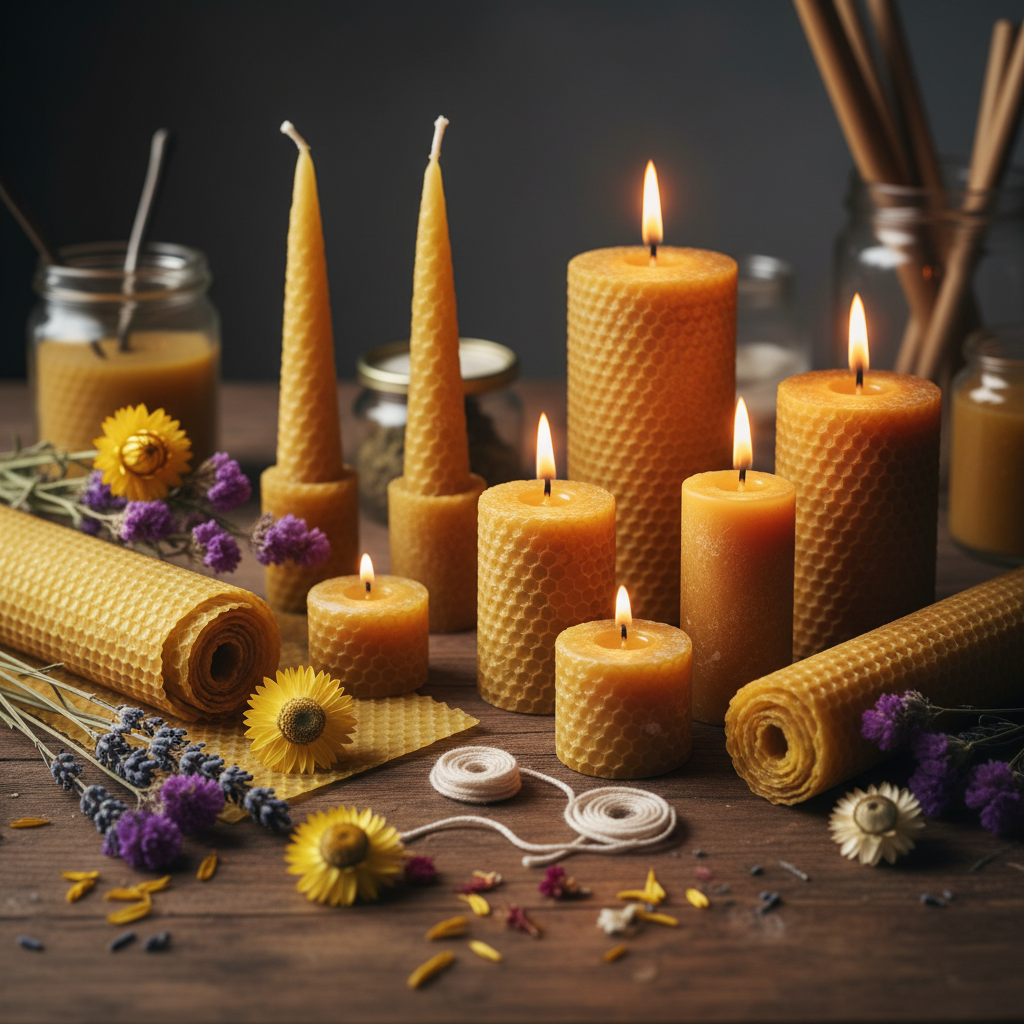
Making Dipped Taper Candles
Dipped tapers are the classic homestead candle — the kind your great-grandmother might have made. They require patience and repetition but no special molds.
The Process
- Prepare your setup: You need a tall, narrow container of melted beeswax (beeswax is traditional and works best for dipping) deep enough to submerge your desired taper length. A tall tin can inside a pot of water works well.
- Cut wicks: Cut wicks about 4 inches longer than twice your desired candle length (you’ll be dipping two candles per wick, one on each end, draped over a dowel).
- Dip and cool: Holding the wick in the center, dip both ends into the melted wax for 2-3 seconds, then lift and let cool for about 30 seconds. After the first dip, straighten the wicks while the wax is still warm.
- Repeat: Continue dipping and cooling. Each dip adds a thin layer of wax. It takes 20-30 dips to build a standard taper candle. The process is meditative and rhythmic.
- Shape: While warm after the final dip, you can roll the tapers on a smooth surface to create a uniform shape. Cut the bottoms flat so they sit in candlestick holders.
Dipping tapers became our family’s winter evening activity. The kids count the dips, and we hang the finished pairs from a broomstick to harden. It’s slower than pouring, but there’s something deeply connecting about making candles the way people have for centuries. Our beeswax tapers are the only candles we use on our dining table now.
Pillar Candles and Molds
Pillar candles stand free without a container and require molds. Beeswax is ideal for pillars because its high melting point creates a firm, long-burning candle. Soy wax is too soft for freestanding pillars unless blended with harder waxes.
Mold Types
- Metal molds: Durable, produce smooth candles, and last forever. Seamless aluminum molds are the professional choice.
- Silicone molds: Flexible, easy to demold, and available in endless shapes — from classic pillars to decorative figures. Great for beeswax because you can peel them off without mold release.
- Found objects: Cardboard tubes (like Pringles cans), PVC pipe, or even milk cartons can serve as molds for casual candles. Line with parchment paper for easier release.
Tips for Pillar Success
- Use mold release spray on metal molds before pouring
- Pour at the recommended temperature to minimize air bubbles and shrinkage
- Allow to cool slowly and evenly — wrap the mold in a towel if your workspace is drafty
- Poke relief holes and top off as the wax contracts during cooling
- Wait at least 24 hours before demolding
Troubleshooting Common Problems
Tunneling
The candle melts down the center but not to the edges. Cause: wick too small. Solution: use a larger wick next time. For the current candle, wrap aluminum foil around the top edge to reflect heat inward during burning.
Sooting
Black smoke and soot deposits on the jar or ceiling. Cause: wick too large, not trimmed, or drafty location. Solution: trim the wick to 1/4 inch before each burn, and keep candles away from drafts.
Wet Spots (Soy)
Patches where the wax has pulled away from the glass, creating a mottled appearance. This is purely cosmetic and doesn’t affect burn quality. Cause: temperature fluctuation during cooling. Solution: warm your containers before pouring, and pour at a lower temperature.
Frosting (Soy)
White crystalline coating on the surface. This is a natural characteristic of soy wax and is actually a sign of pure soy (blended waxes frost less). Embrace it as a mark of your natural candle, or minimize it by pouring at lower temperatures.
Fragrance Not Strong Enough
Cause: oil added at too high a temperature (evaporated), not enough oil used, or not enough cure time. Solution: add oils at the correct temperature, increase to 10% by weight, and allow 2 weeks of cure time before judging the scent.
Creative Candle Projects
Once you’ve mastered the basics, explore these fun variations:
- Layered candles: Pour different colored or scented layers, allowing each to partially set before adding the next
- Herb-embedded candles: Press dried lavender, rosemary, or flower petals against the inside of the jar before pouring (keep botanicals away from the wick for safety)
- Beeswax rolled candles: Use sheets of beeswax foundation and roll them around a wick — the simplest possible candle, perfect for beginners and kids
- Citronella candles: Add citronella essential oil to soy wax for natural outdoor bug-repelling candles
- Massage candles: Use a blend of soy wax and coconut oil that melts at body-safe temperatures — pour into a tin, burn briefly, and use the warm oil for massage
Candle-making pairs beautifully with other homestead crafts. If you enjoy working with beeswax, you’ll love making reusable beeswax wraps. The same essential oils that scent your candles can go into homemade soap and natural cleaning products. Each craft feeds into the next, creating a wonderfully self-sufficient cycle.
Candle Safety
A few important safety reminders:
- Never leave a burning candle unattended
- Keep candles away from curtains, paper, and other flammable materials
- Never melt wax directly over an open flame — always use a double boiler
- Keep water away from hot wax (water in hot wax can cause splattering)
- Have a fire extinguisher accessible in your candle-making area
- If wax catches fire, smother it with a lid — never use water
Frequently Asked Questions
How much wax do I need per candle?
As a general rule, multiply your container volume (in fluid ounces) by 0.8 to get the approximate weight of wax needed in ounces. So an 8 oz mason jar needs about 6.4 oz of wax by weight. Buy 10-15% extra for your first batch to account for wax left in the pouring pitcher and top-off needs.
Can I reuse wax from old candles?
Absolutely. Melt down leftover wax from container candles (remove old wicks and debris), and repour into new containers with fresh wicks. You can blend different leftover waxes together. The scent may be weaker in recycled candles, so consider adding fresh fragrance.
Is candle-making cost-effective?
Compared to buying premium natural candles ($15-$30+ each), homemade candles cost roughly $3-$6 each in materials for soy, or nearly free if you’re using your own beeswax. The startup equipment cost is minimal. If you’re gifting candles or selling them at farmers’ markets, the economics work well.
How do I clean wax spills?
For hard surfaces: let the wax harden completely, then pop it off with a plastic scraper. For fabric: place a paper towel over the wax and run a warm iron over it — the wax melts into the paper towel. For equipment: wipe with paper towels while still warm, then wash with hot soapy water.
Can I use crayons to color candles?
It’s not recommended. Crayons contain pigments that can clog the wick, leading to poor burning, smoking, and an inconsistent flame. Use candle-specific dye blocks or liquid dye instead. They’re formulated to dissolve fully in wax without affecting burn performance.