Water Bath Canning for Beginners: How to Make Your First Batch of Jam
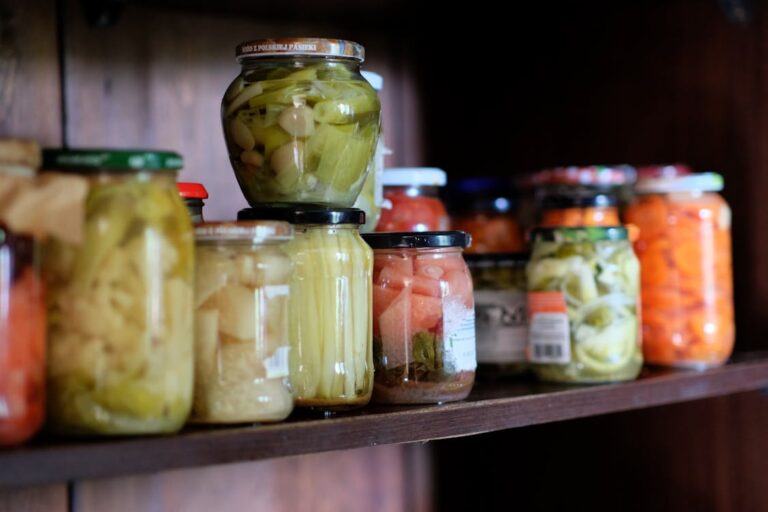
- Water bath canning works for high-acid foods only: jams, pickles, salsa, fruits
- You need a large pot, mason jars, new lids, a jar lifter, and tested recipes
- Process jars in boiling water for the time specified in your recipe
- Properly sealed jars are shelf-stable for 12–18 months
- Always use USDA-tested recipes — never alter acid or proportions
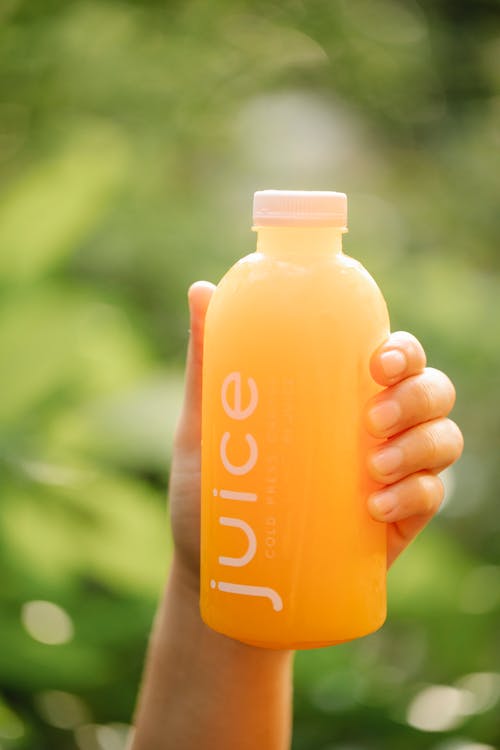
Water bath canning is the gateway to food preservation. It is simple, safe, requires minimal equipment, and there is truly nothing more satisfying than hearing those lids pop as your jars seal — knowing you have just turned fresh fruit into shelf-stable jam, jelly, or pickles that will last a year or more in your pantry.
I remember my very first batch of strawberry jam — I was nervous about every step, but when I heard that first lid pop, I practically did a victory dance in the kitchen. Years later, canning day is still one of my favorite homestead traditions.
What Foods Can You Water Bath Can?
Water bath canning is safe for high-acid foods only, including most fruits, jams, jellies, pickles, relishes, and tomatoes with added acid. Low-acid foods like green beans, meat, and plain vegetables require pressure canning — a different process. The USDA National Center for Home Food Preservation is the gold standard for safety guidelines.
What Equipment Do You Need for Canning?
You need a large pot, mason jars with new lids, a jar lifter, a wide-mouth funnel, and a bubble remover. Here is the full list:
- A large pot deep enough to cover jars with 1 to 2 inches of water (a dedicated canning pot with a rack is ideal but not required)
- Mason jars with two-piece lids (new lids every time; rings can be reused)
- A jar lifter for safely moving hot jars
- A wide-mouth funnel for filling jars
- A bubble remover or chopstick
- Clean towels
How Do You Can Jam Step by Step?
Cook your fruit with sugar and pectin, fill hot jars leaving proper headspace, then process in boiling water for the specified time. Here is the process:
- Prepare your fruit. Wash, hull, chop, and mash your fruit. Mix with sugar and pectin according to your tested recipe.
- Sterilize jars. Run them through the dishwasher or boil for 10 minutes. Keep them hot until filling.
- Cook the jam. Bring the fruit mixture to a full rolling boil that cannot be stirred down. Boil for the time specified in your recipe (usually 1 to 2 minutes with added pectin).
- Fill the jars. Using the funnel, ladle hot jam into hot jars, leaving 1/4 inch headspace. Remove air bubbles with the bubble remover.
- Wipe and seal. Wipe jar rims clean with a damp cloth, place lids, and screw on bands fingertip-tight.
- Process. Lower jars into boiling water, ensuring they are covered by at least 1 inch. Process for the time specified in your recipe (usually 10 minutes for jam at sea level).
- Cool. Remove jars and place on a towel. Do not touch or tilt them. You will hear the lids pop as they seal over the next few hours.
- Check seals. After 24 hours, press the center of each lid. If it does not flex, the jar is sealed. Any unsealed jars should go in the fridge and be used first.
| Food | Headspace | Processing Time | Shelf Life |
|---|---|---|---|
| Jam / Jelly | 1/4 inch | 10 min | 12–18 months |
| Pickles | 1/2 inch | 10–15 min | 12–18 months |
| Salsa | 1/2 inch | 15–20 min | 12 months |
| Whole Fruit | 1/2 inch | 20–25 min | 12–18 months |
| Tomatoes (acidified) | 1/2 inch | 35–45 min | 12–18 months |
What Are the Essential Safety Rules?
Always use tested recipes from trusted sources and never alter the acid, sugar, or proportions. Here are the non-negotiable rules:
- Always use tested recipes from trusted sources like the USDA, Ball, or your local extension service
- Never alter the acid, sugar, or proportions in a canning recipe
- Always use new lids — they have a sealing compound that is designed for one use
- Do not can in an oven, dishwasher, or microwave — only a boiling water bath or pressure canner
Your first batch of jam will probably not be perfect — and it does not need to be. Even slightly runny jam tastes incredible on toast. Once you hear those lids pop, you will understand why people have been preserving food this way for generations. Pair your fresh jam with homemade sourdough or your canned tomatoes with a big pot of soup and homemade bone broth. Welcome to the club.
If you love canning, you will also want to explore dehydrating food and fermentation as companion preservation methods. Together, they make your emergency food pantry incredibly well-stocked.
Frequently Asked Questions
A: No. The sealing compound on lids is designed for one use. Rings can be reused, but always use new lids for a reliable seal.
A: If your processing time is 10 minutes or longer, the jars will be sterilized during processing. For shorter times, pre-sterilize by boiling for 10 minutes.
A: Under-cooked jam, too little pectin, or not enough acid. You can re-process runny jam by bringing it back to a boil with additional pectin, or simply enjoy it as syrup.
A: Yes, but only with a tested recipe that has enough acid. Most USDA-tested salsa recipes include added vinegar or lemon juice to ensure safe acidity levels.
A: Above 1,000 feet, add 5 minutes for 1,001–6,000 feet and 10 minutes for above 6,000 feet. Check the USDA guidelines for exact adjustments.