Your First Baby Chicks: Brooder Setup and Week-by-Week Care
[toc]
The first batch of chicks I brooded, I used a heat lamp clipped to the side of a plastic tote, the kind with the ceramic socket. By week three it had slipped, was sitting an inch from the shavings, and I'd been checking temperatures at the wrong spot. Switching to a heat plate that second spring was the best $40 I ever spent on poultry gear.
Bringing home a box of peeping chicks is among the most exciting moments in backyard homesteading, and among the most stressful if you haven’t prepared. The first six weeks are the foundation of a healthy, productive flock. Get the brooder right, and your chicks will practically raise themselves. Miss the basics, and you’ll be scrambling to save tiny lives at 2 a.m.
This guide walks you through everything: choosing the right container, setting the correct temperatures week by week, what to feed, how to keep water safe, what normal development looks like, when to move birds outside, and how to catch the two most common problems before they become emergencies. If you’re still deciding whether chickens are right for you, start with our complete beginner’s guide to backyard chickens first.
What Do You Actually Need in a Brooder?
A brooder is simply a warm, dry, predator-proof space where chicks live until they’re feathered enough to handle outdoor temperatures. It does not need to be fancy or expensive, but it does need to check four boxes: containment, warmth, ventilation, and easy cleanup.
Choosing a Brooder Container
For a flock of 4–8 chicks, a large plastic storage tote (at least 66 quart / roughly 2 sq ft per chick) works well for the first two weeks. After that, chicks need more space, a 100-gallon galvanized stock tank or a wooden brooder box built to about 2–3 sq ft per bird is the better long-term option. Cardboard boxes are tempting but absorb moisture, grow bacteria fast, and become a fire hazard near heat sources. Avoid them.
The container must have sides at least 18 inches high once chicks hit week 3, they’ll start attempting escape flights. A hardware-cloth lid or simple screen panel keeps them in and cats out while still allowing airflow.
Source: Penn State Extension, “Raising Chicks at Home,” 2023
Best Brooder Bedding
Pine wood shavings (medium flake, not fine sawdust) are the gold standard. They’re absorbent, inexpensive, widely available, and low-dust. Lay a 3–4 inch deep layer so chicks can scratch around and stay dry. Avoid cedar shavings, the aromatic oils irritate respiratory tracts. Avoid newspaper: it’s slippery, which causes splayed leg in young chicks before their tendons set properly. Straw works but compacts and holds moisture; it’s better used in the coop than the brooder.
Spot-clean daily (scoop wet patches) and do a full bedding change every 5–7 days, or sooner if the brooder smells strongly of ammonia. Ammonia buildup above 25 ppm causes respiratory damage and slows growth.
Source: University of Kentucky Cooperative Extension, “Brooding and Rearing Chicks,” 2022
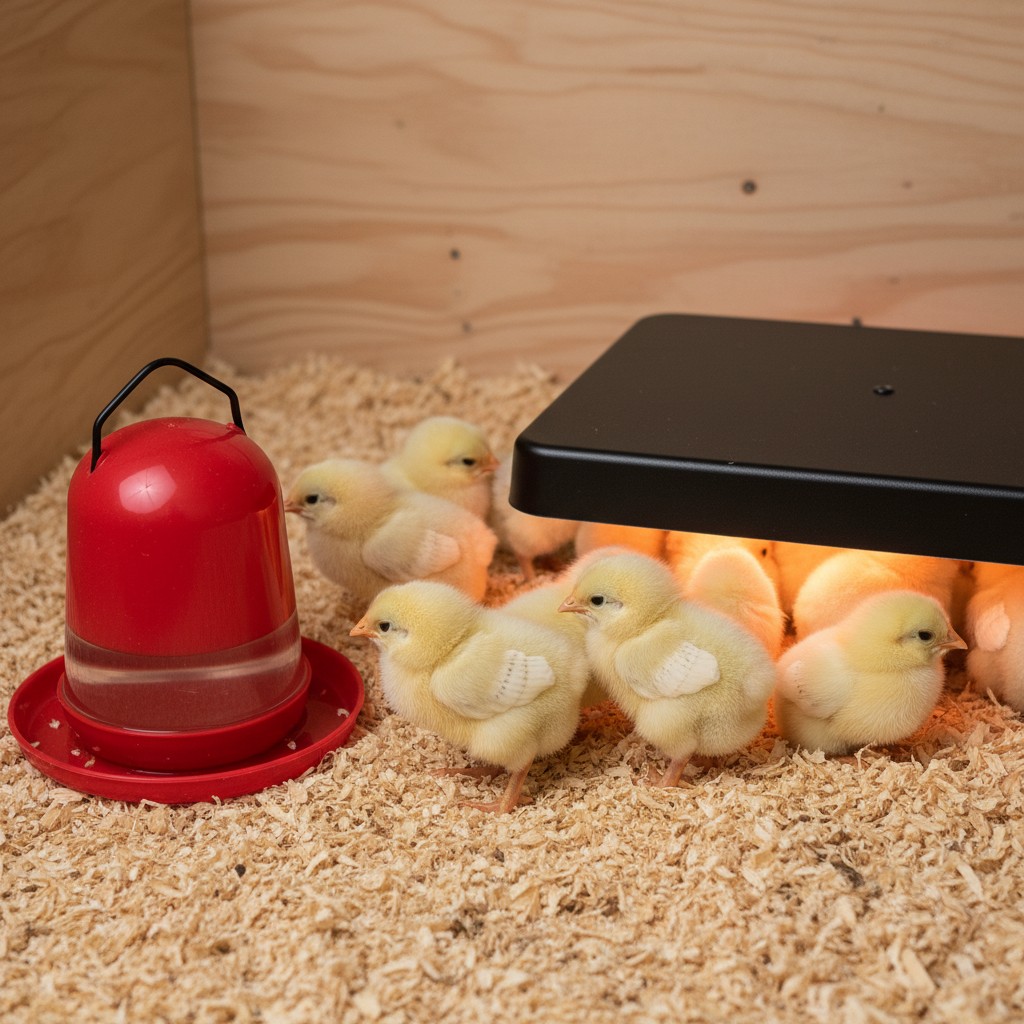
Heat Source: Use a Heat Plate, Not a Heat Lamp
This is the most important equipment decision you’ll make. Heat lamps: the classic red 250-watt bulb, are responsible for hundreds of barn and garage fires every year. A clamp fails, a bulb shatters, shavings ignite. It only takes seconds.
A radiant heat plate (brands like Brinsea EcoGlow or Premier1) mimics a broody hen. Chicks duck underneath and get warmth from above, just as they would under a mother. The surface temperature is regulated, the unit sits low to the ground, and it cannot fall into bedding. Heat plates also encourage better sleep patterns because they don’t flood the brooder with constant light, which can stress chicks and lead to feather-pecking.
A 20-chick heat plate costs $40–$80 and lasts for years. It’s worth every cent for the fire safety alone.
Source: Brinsea Products, “EcoGlow Safety Brooder User Guide,” 2024; National Fire Protection Association farm fire statistics
Week-by-Week Temperature Schedule
Temperature management is the single most critical variable in chick survival. Too cold and chicks pile on top of each other, suffocating the ones on the bottom. Too hot and they pant, refuse to eat, and die of heat stress. The target temperature drops by 5°F each week as chicks grow their own insulation.

| Week | Brooder Temp (°F) | Ambient Room Temp OK |
|---|---|---|
| 1 | 95°F | 60–70°F |
| 2 | 90°F | 60–70°F |
| 3 | 85°F | 60–70°F |
| 4 | 80°F | 60–70°F |
| 5 | 75°F | 60–70°F |
| 6 | 70°F / wean off | Ready for coop if >60°F nights |
These temperatures apply to the warm zone of the brooder, the area directly under or beside the heat plate. The rest of the brooder should be 10–15°F cooler so chicks can self-regulate by moving in and out of the heat zone. If you’re using a heat plate, set it at the height specified in the manual and observe behavior. Chicks crowding under the plate = too cold. Chicks avoiding the plate entirely = too hot. Chicks spread out naturally doing chick things = just right.
A simple $10 digital thermometer with a probe lets you verify the warm zone temperature without guessing.
Source: Iowa State University Extension and Outreach, “Caring for Your New Baby Chicks,” 2023
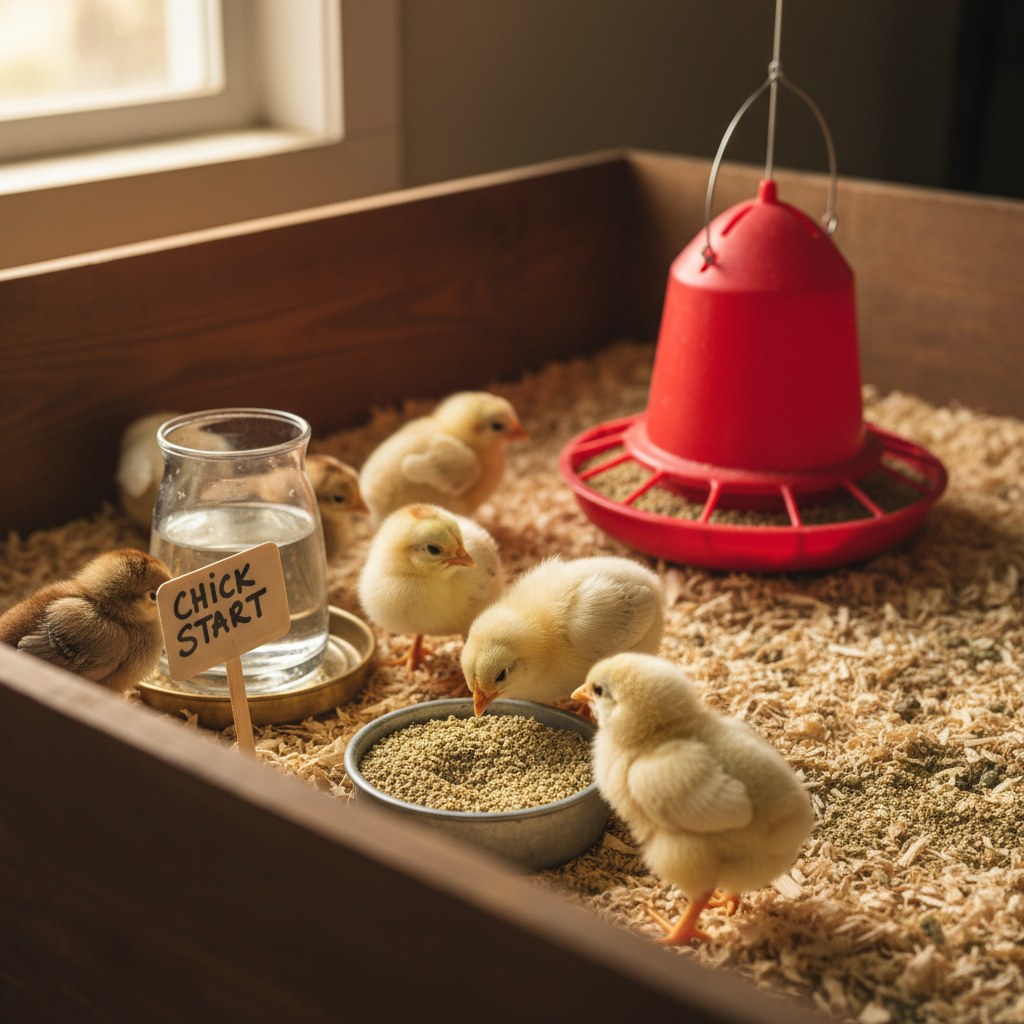
Feeding Baby Chicks: What, How Much, and When
Chicks need chick starter feed from day one. Do not feed layer pellets, the calcium levels are designed for laying hens and will damage developing kidneys in young chicks. Chick starter comes in two forms: medicated (contains amprolium to prevent coccidiosis) and unmedicated. If your chicks were not vaccinated for coccidiosis at the hatchery, medicated starter is the safer choice for the first 8 weeks.
Protein Requirements
Look for a chick starter with 18–20% crude protein. This range supports the rapid feathering and skeletal development happening in weeks 1–8. Brands like Purina Flock Raiser, Nutrena NatureWise Chick Starter, or Scratch and Peck Feeds Organic Starter all meet this target. After 8 weeks, transition to a grower feed (16–18% protein) until point of lay.
Feed chick starter in a small chick feeder, the long trough-style feeders with a divider prevent chicks from scratching all the feed onto the floor. Keep feed available at all times (ad libitum feeding). Chicks have tiny crops and need to eat frequently throughout the day.
Hold off on treats, scratch grains, or table scraps until at least week 3. Before that, their digestive systems aren’t ready. After week 3, if you offer any non-starter food, provide a small dish of chick grit (fine granite) so they can grind it properly.
Source: Purina Animal Nutrition, “Chick Nutrition Guide,” 2024; University of Georgia Extension, “Feeding Chickens,” 2022
Water Safety: Marbles Save Lives
Day-old chicks can drown in less than half an inch of water. A standard small-animal waterer dish is all it takes. The fix is simple and cheap: fill the water dish with glass marbles or clean pebbles. Chicks can still drink around them, but they cannot fall in and become waterlogged and hypothermic.
Use a 1-quart mason jar chick waterer or a purpose-built chick fount with a very shallow trough. Both keep the water surface low and minimize the risk. Remove the marbles after week 2 when chicks are large enough to climb out on their own.
Electrolytes for the First 48 Hours
Newly hatched or shipped chicks are often dehydrated and stressed. Adding a poultry electrolyte/vitamin supplement (like Sav-A-Chick) to the water for the first 48 hours helps them recover faster and start eating sooner. After that, plain, clean room-temperature water is all they need.
Change the water at least twice a day. Chicks scratch bedding and droppings into waterers constantly. Dirty water is a major source of coccidiosis and bacterial infections. Elevating the waterer on a small wooden block or brick (once chicks are a few days old) helps keep it cleaner longer.
Source: Merck Veterinary Manual, “Poultry Water Requirements and Management,” 2023; Mississippi State University Extension, “Baby Chick Care,” 2022
Week-by-Week Development Milestones
Knowing what’s normal at each stage prevents unnecessary panic, and helps you catch genuine problems early. Chick development is fast. In six weeks, a golf-ball-sized fluffball becomes a recognizable juvenile chicken.
Week 1: All Fluff, All Peeping
Chicks arrive (or hatch) covered in soft down. They sleep a lot, up to 70% of the day, and eat and drink frequently when awake. Wing tip feathers begin emerging by day 3–5. You’ll notice them doing tiny wing stretches. Normal behavior includes dust-bathing in the shavings, brief sprints around the brooder, and falling asleep mid-stride (yes, they just tip over, it’s normal and alarming the first time you see it).
Week 2: Rapid Feathering Begins
Primary wing feathers come in quickly. Chicks start looking patchy, half fluff, half feathers, which is completely normal and not a sign of illness. They become more active and start establishing a pecking order. Mild pecking at each other is normal social behavior. Watch for any chick being relentlessly targeted or isolated in a corner, which signals a real problem.
Weeks 3–4: The Awkward Phase
Chicks enter what chicken keepers affectionately call the “dinosaur phase.” They’re gangly, feathers come in unevenly, and they lose most of their baby fuzz. Tail feathers appear. They start roosting, provide a low roost bar (1–2 inches off the ground) at week 3. This is also when they become noticeably louder and more interested in exploring. Escape attempts increase significantly.
Weeks 5–6: Juvenile Chickens
By week 5, most chicks are mostly feathered. By week 6, they look like small, slightly scruffy versions of adult chickens. Combs begin developing (rooster combs grow faster and more prominently, your first hint at sexing if you ordered straight-run chicks). They’re thermoregulating well enough to handle temperatures down to 50–55°F if acclimated gradually.
Source: The Livestock Conservancy, “Baby Chick Development Guide,” 2023; BackYard Chickens Community Resource, “Chick Feathering Timeline,” 2024
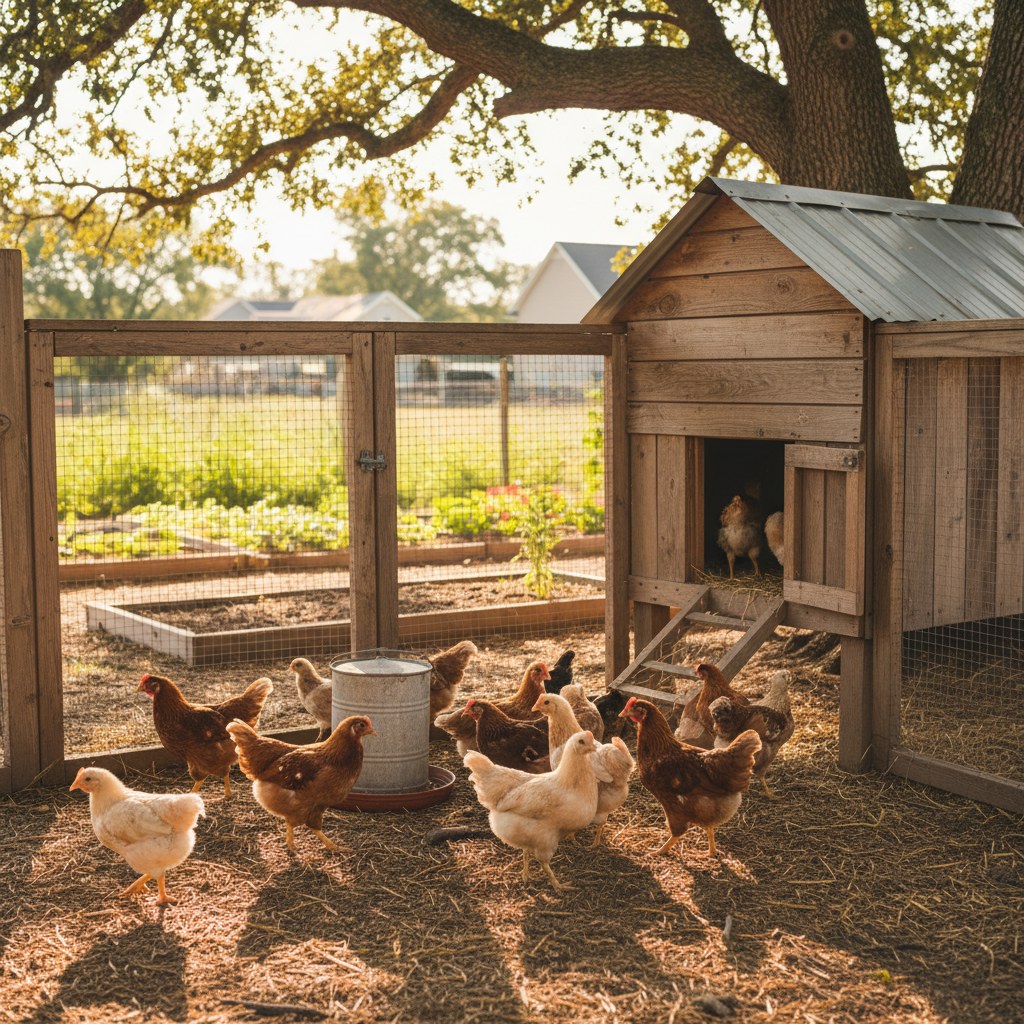
When to Move Chicks to the Coop
The standard answer is 6 weeks old when fully feathered, but that’s the minimum, not a hard rule. What actually matters is whether nighttime lows in your area stay above 50°F and whether the coop is safe from drafts and predators. A fully feathered 6-week-old chick can handle 50°F nights without supplemental heat. Below that, wait another week or two or provide a small heat plate in the coop as a transition aid.
The Gradual Transition Method
A cold-turkey move to the outdoor coop stresses chicks. Instead, start transitioning at week 4 or 5 by moving the brooder to an unheated garage or barn for a few days so they experience ambient outdoor temperatures. Then move them to the coop during the day while still returning them inside at night. After a week of this, they’re ready for full outdoor living.
If you’re adding young pullets to an existing flock of adult hens, wait until week 8–10 and introduce them with a physical divider (“look but don’t touch”) for at least a week before full integration. Adult hens can seriously injure juveniles that haven’t yet established their place in the pecking order. Our guide on hatching eggs covers this integration process in more detail if you’re raising birds from eggs rather than hatchery chicks.
Source: Oregon State University Extension Service, “Backyard Chickens: Moving Chicks Outside,” 2023
Common Chick Problems and How to Fix Them
Most chick health issues in a well-managed brooder come down to two things: pasty butt and splayed leg. Both are common, both are treatable if caught early, and both are largely preventable with proper setup.
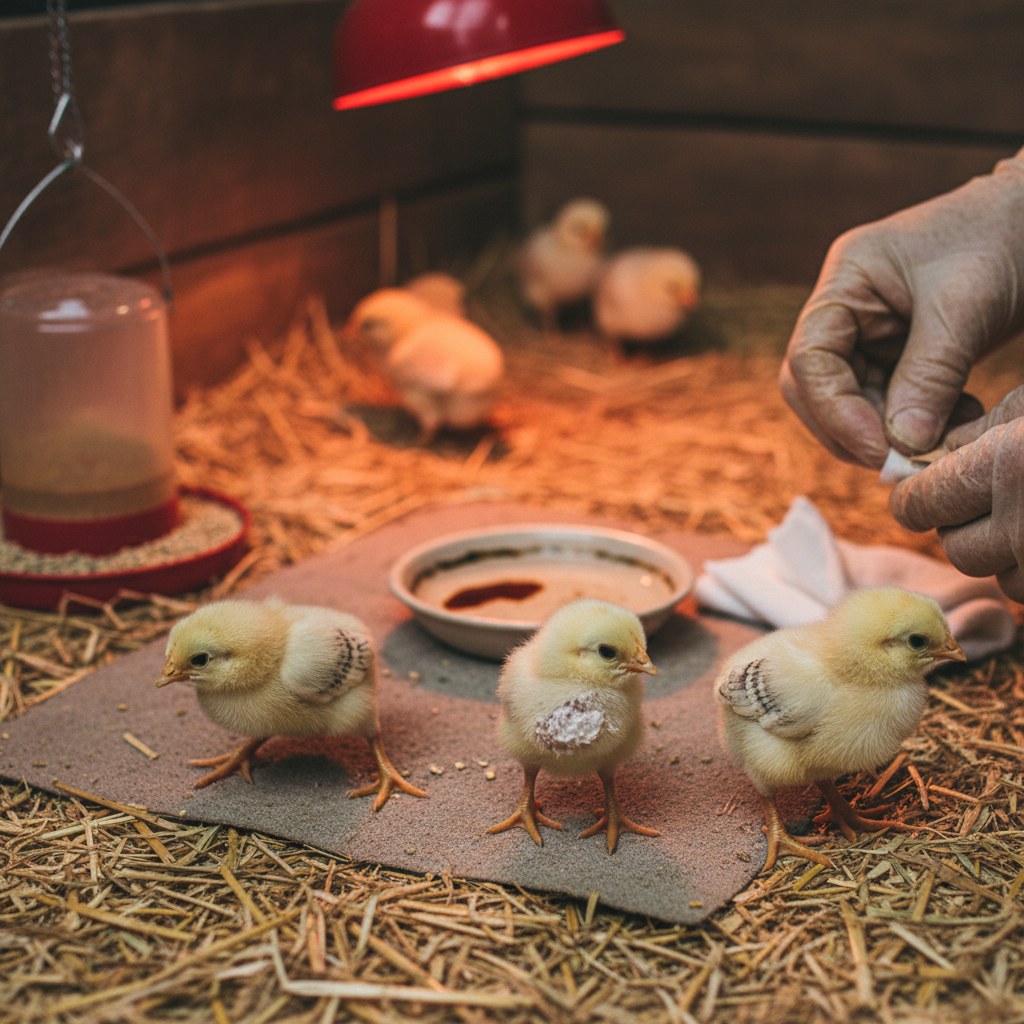
Pasty Butt (Pasted Vent)
Pasty butt is exactly what it sounds like: dried droppings that stick to the vent (the chick’s opening for waste and, eventually, eggs) and block it completely. It’s most common in shipped chicks during the first week due to shipping stress and temperature fluctuations. Left untreated, it’s fatal within 24–48 hours.
What to do: Check every chick’s vent twice daily for the first week. If you see a crusty blockage, soak a cotton ball in warm water and gently soften and wipe away the paste. Do not pull it off dry, you’ll tear the skin. After cleaning, apply a tiny amount of coconut oil or plain petroleum jelly to prevent further sticking. Keep the chick warm while it’s wet.
Prevention: Ensure brooder temperature is correct (a too-cold brooder is the #1 cause). Add electrolytes to water for the first 48 hours. Avoid giving chick grit or scratch too early.
Splayed Leg (Spraddle Leg)
Splayed leg occurs when a chick’s legs slide outward instead of sitting properly under the body. The chick cannot stand or walk normally. It’s caused by slippery flooring (newspaper, bare plastic) preventing proper muscle and tendon development in the first days of life.
What to do: If caught in the first 3–4 days, it’s highly correctable. Cut a small strip of vet wrap or medical tape (about 1–2 inches). Loop one end loosely around one leg, then cross to the other leg and loop again, creating a “hobble” that holds the legs at the correct width, roughly hip distance apart. The hobble should be snug but not tight enough to restrict blood flow. Most chicks correct within 2–5 days with the hobble.
Prevention: Use pine shaving bedding from day one. Never use newspaper or bare plastic tub floors.
Other Warning Signs to Watch For
Beyond pasty butt and splayed leg, watch for: a chick that sleeps while others are active (lethargy), a chick that’s being pecked at and segregated, watery droppings that persist more than 24 hours (some loose droppings are normal, especially with cecal poops), and any chick that doesn’t eat or drink after being placed in the brooder. A chick that won’t eat or drink within the first 4–6 hours likely needs a temperature adjustment or electrolytes.
Source: Tufts University Cummings School of Veterinary Medicine, “Common Chick Health Issues,” 2023; The Merck Veterinary Manual, “Poultry Health,” 2024
Frequently Asked Questions
How many chicks should I start with?
A minimum of 3–4. Chickens are flock animals and become distressed in isolation. Starting with 4–6 chicks gives you a buffer for losses (attrition is common in the first weeks), ensures social health, and still stays manageable for a first-time keeper. Most hatcheries have minimum orders of 3–6 chicks for this reason.
Can I use a heat lamp instead of a heat plate?
Technically yes, but it’s strongly discouraged. Heat lamps cause hundreds of barn fires annually and produce constant bright light that stresses chicks and disrupts sleep. A heat plate costs roughly the same as a quality heat lamp setup and eliminates both risks. If you absolutely must use a lamp, use a porcelain socket (not plastic), a lamp guard, two separate clamps or chains securing the lamp from two directions, and check it twice a day.
Do I need to add vitamins to the water?
Only for the first 48 hours if chicks were shipped, or if you have a chick that’s weak or not eating. After that, a quality chick starter provides all required vitamins and minerals. Continuous vitamin supplementation in water can actually cause vitamin toxicity (especially fat-soluble vitamins A, D, E, K) if overdone. Plain water after the first two days is correct.
My chick keeps falling asleep mid-walk and flopping over. Is it sick?
Almost certainly no, this is completely normal chick behavior and terrifying the first time you see it. Young chicks go from full speed to dead asleep in seconds, sometimes literally mid-step. If the chick perks up when you tap the brooder, it’s fine. A chick that won’t rouse, doesn’t move, or is cold to the touch is the one to worry about.
When will I know which chicks are roosters?
Comb development is your earliest clue, cockerels develop larger, redder combs faster than pullets, often visible by weeks 4–6. Feathering patterns can also hint: in some breeds, males feather more slowly. By week 8–10, tail feather development (long, arching sickle feathers on roosters) is usually obvious in most heritage breeds. Sex-link breeds (like Golden Comet or Black Sex-Link) can be sexed at hatch by color.
Ready to take the next step? Read our complete beginner’s guide to backyard chickens for coop building, breed selection, and what to expect in your first laying season.