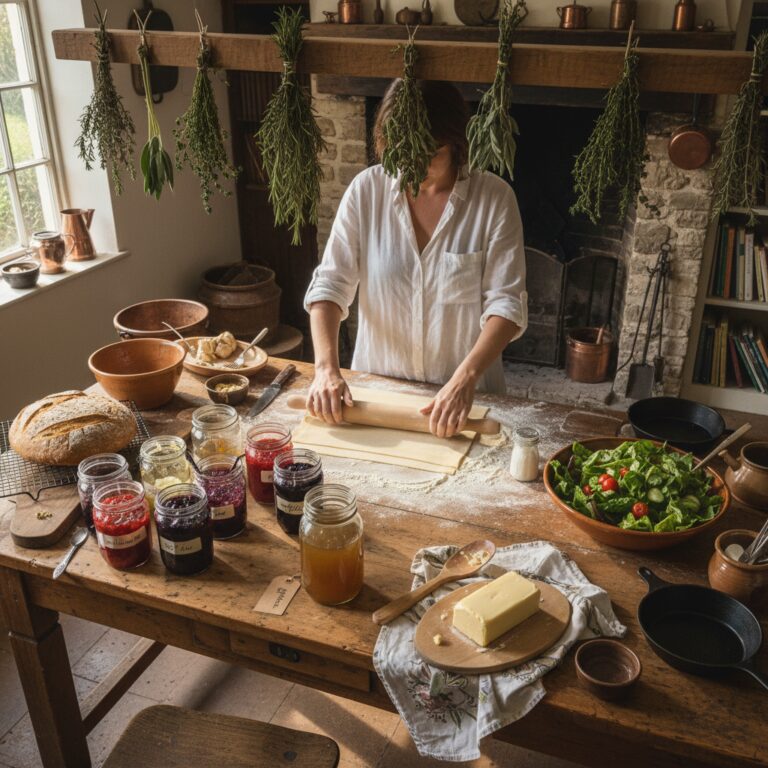
How to Make Homemade Butter in 10 Minutes
Key Takeaways
- Homemade butter requires just one ingredient: heavy cream grading. Salt and herbs are optional.
- Three methods work, mason jar (fun with kids), food processor (fastest), and stand mixer (easiest cleanup).
- The entire process takes 10 to 20 minutes from cream to finished butter.
- Washing the butter thoroughly is the critical step most people skip, it removes residual buttermilk and extends shelf life from days to weeks.
- The leftover buttermilk is genuine cultured buttermilk (if using cultured cream) and is too valuable to pour down the drain.
The Simplest Thing You’re Not Making
Making butter at home sounds like something from a Laura Ingalls Wilder novel. Churns, cream separators, hours of labor. The reality is nothing like that. You take heavy cream, agitate it for about 10 minutes, and it becomes butter. That’s it.
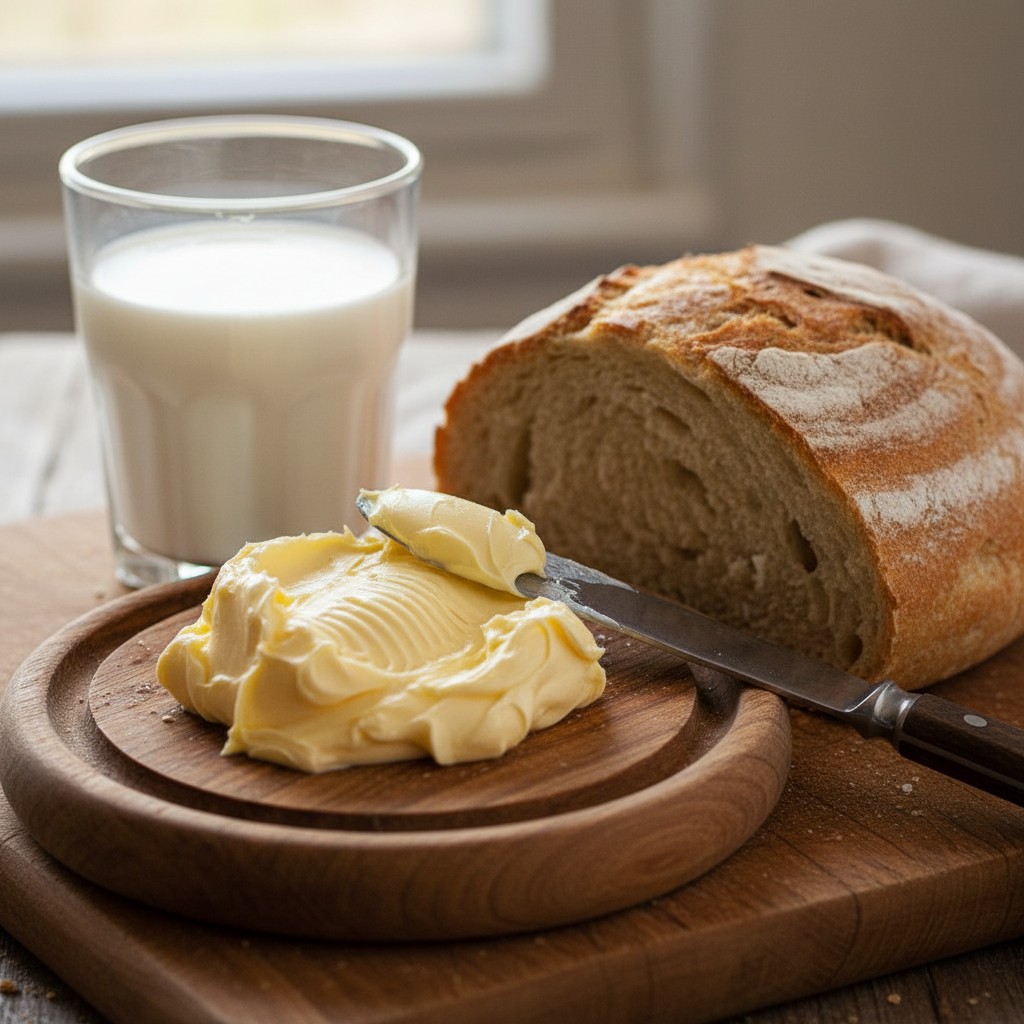
The first time I made butter at home, I genuinely couldn’t believe how easy it was, or how different it tasted from the store-bought sticks I’d been using my whole life. Homemade butter is richer, creamier, and has a sweetness that commercial butter lacks. It tastes like cream in its most concentrated form, because that’s exactly what it is.
The economics depend on your cream source. At standard grocery store prices, homemade butter costs about the same as premium store-bought butter. But if you have access to farm-fresh cream, keep dairy animals, or catch heavy cream on sale, you’ll come out well ahead, and the quality will be incomparable.
The Science in 30 Seconds
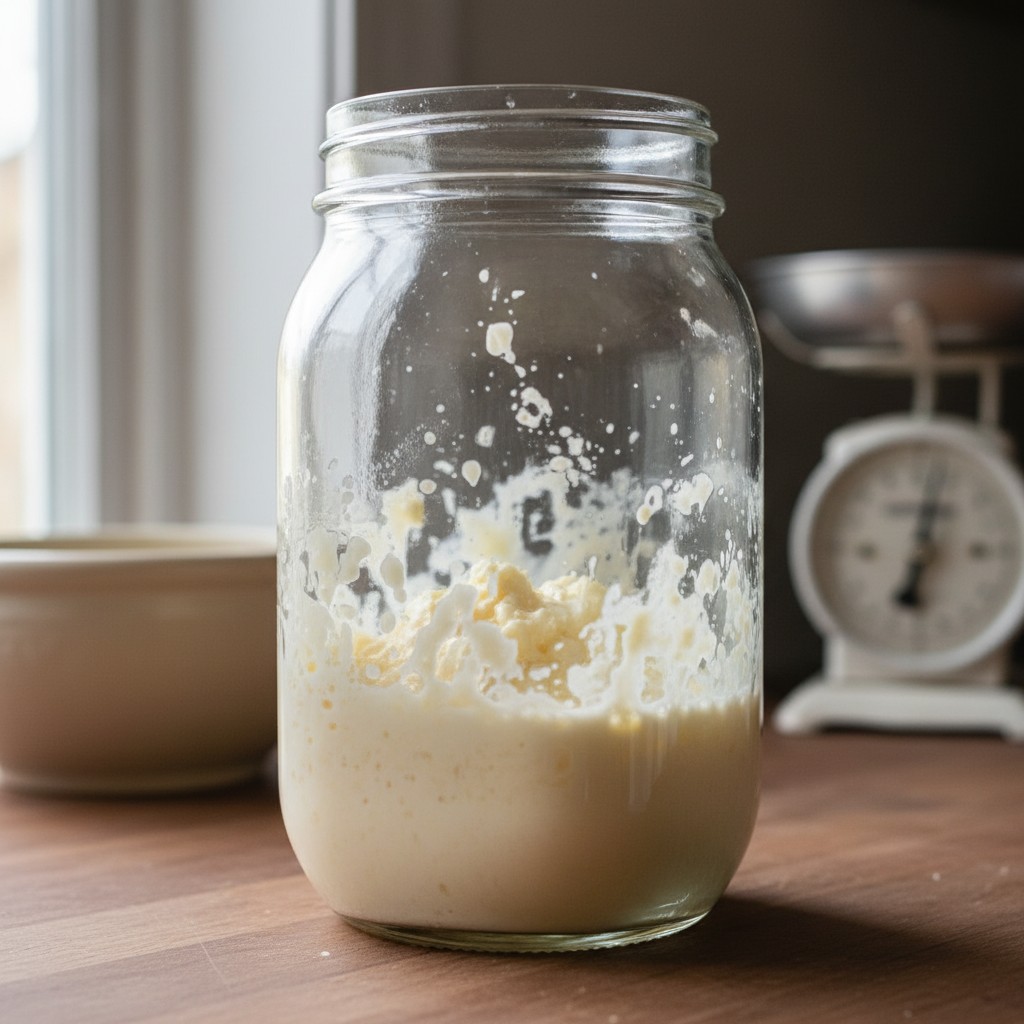
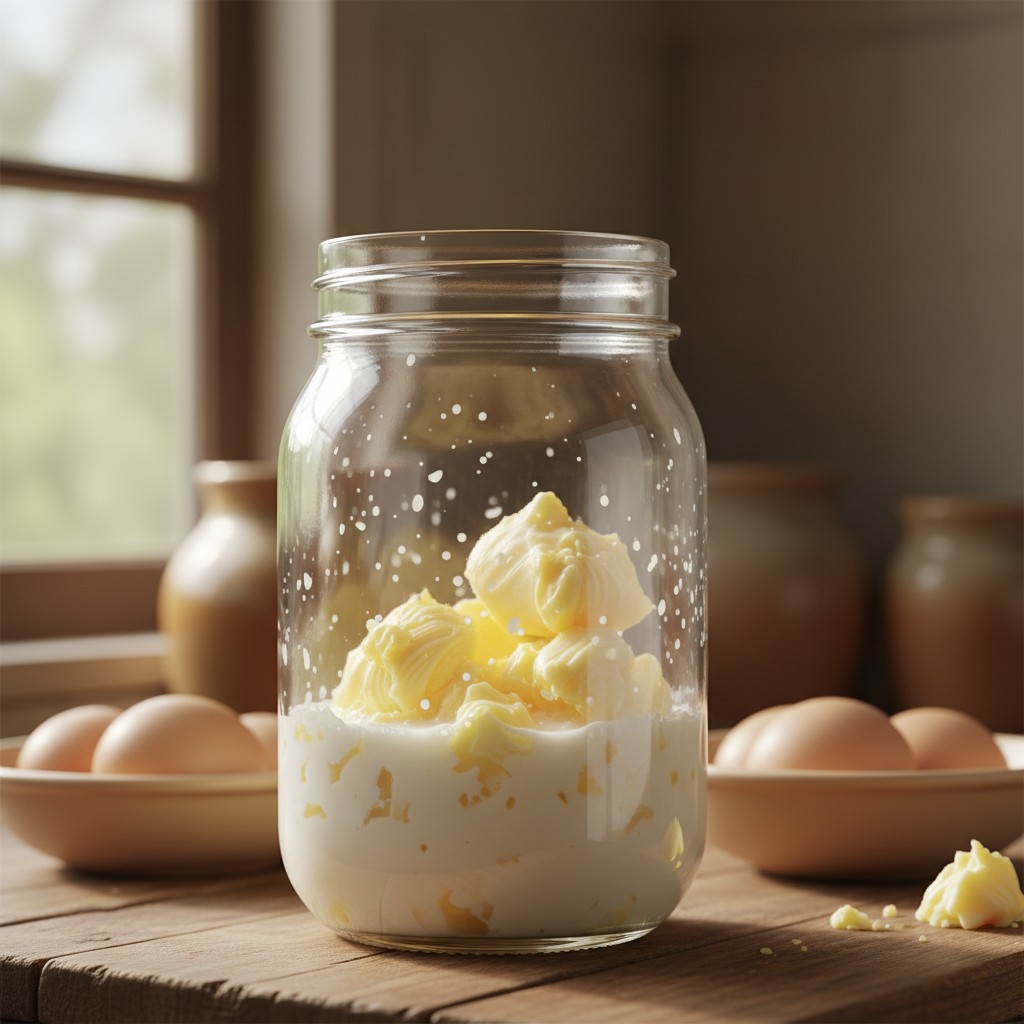
Heavy cream is an emulsion, tiny globules of fat suspended in a water-based liquid. Each fat globule is surrounded by a membrane that keeps it separate from its neighbors. When you agitate cream vigorously, those membranes break. The fat globules smash together and clump up. Eventually, enough fat sticks together to form a solid mass (butter), and the remaining liquid (buttermilk) separates out.

Whipped cream is the halfway point in this process. The fat globules have been partially disrupted and are trapping air bubbles, but they haven’t fully clumped. Keep going past whipped cream, and the mixture suddenly “breaks”, the fat collapses into a lump and the buttermilk splashes out. That moment of breaking is always a little thrilling, no matter how many times you’ve done it.
What You Need
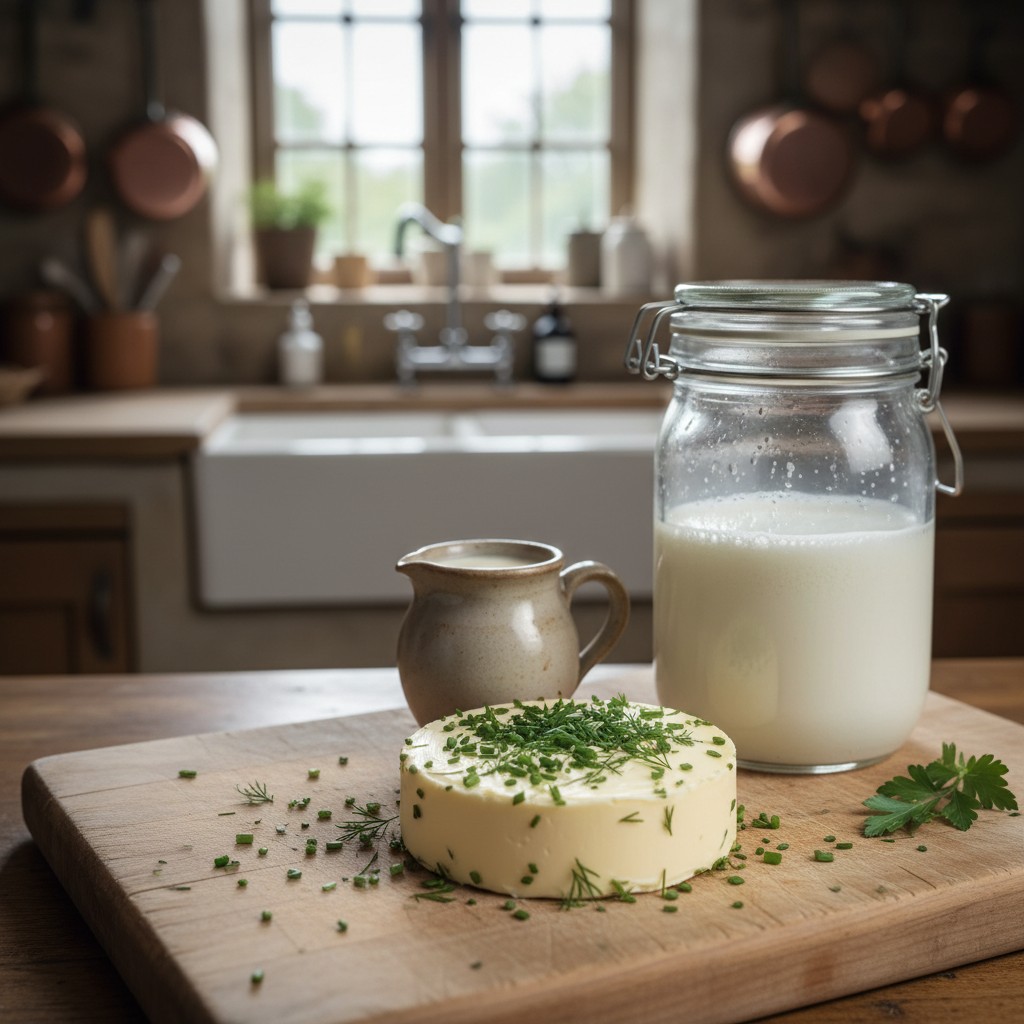
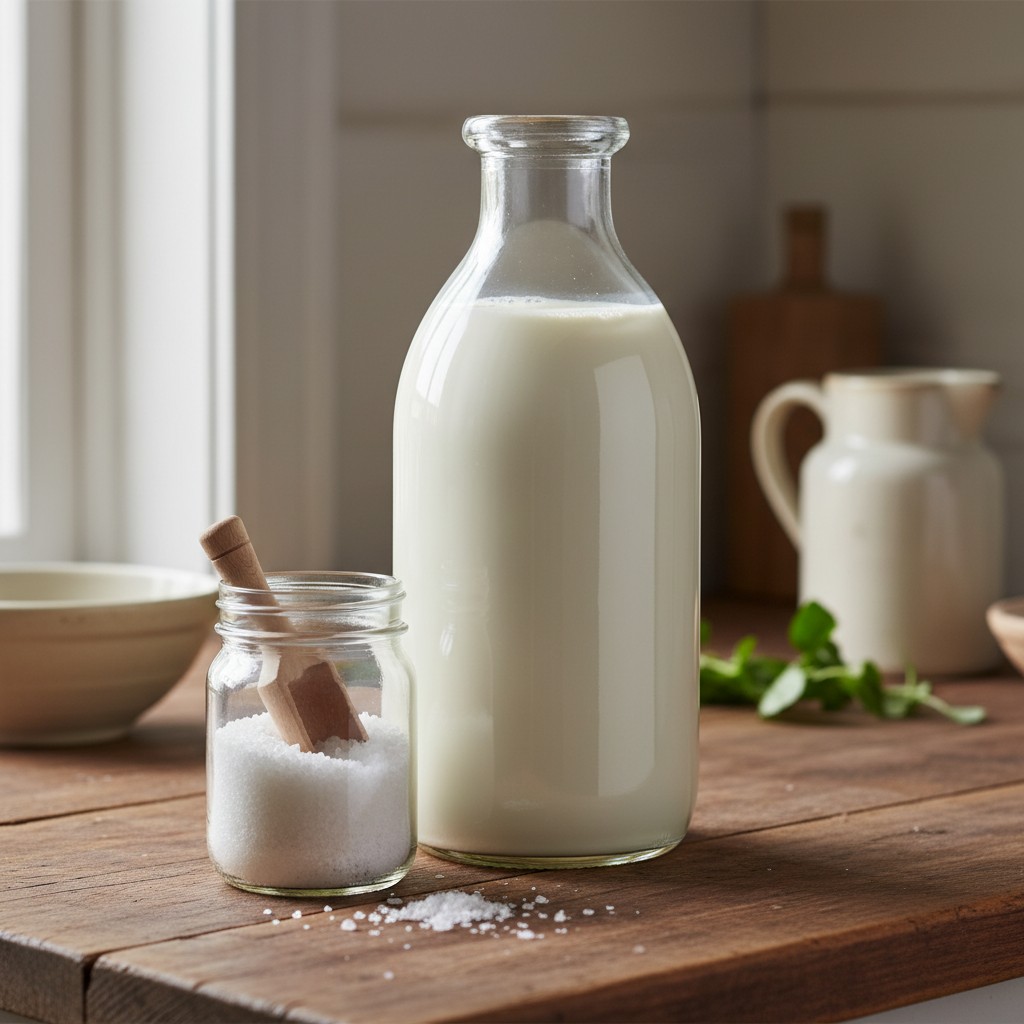
- Heavy cream or heavy whipping cream. At least 36% fat content. The higher the fat, the more butter you’ll get. One pint (2 cups) of cream yields about 8 ounces (1 cup) of butter.
- Fine sea salt. If you want salted butter. About ¼ teaspoon per cup of butter.
- Ice water: For washing the butter.
- A bowl of cold water. For kneading.
One important note: let the cream sit at room temperature for 30 to 45 minutes before starting. Cold cream takes longer to churn. You want it around 60°F to 65°F, cool to the touch but not fridge-cold.
Method 1: The Mason Jar (Best for Kids)
This is the most hands-on method and the one I recommend if children are involved. It’s physical, it’s loud, and the moment the butter forms is unmistakable.
- Pour cream into a quart mason jar, filling it no more than halfway. The cream needs room to move.
- Seal the lid tightly. Add a clean marble if you want to speed things up (it helps break the fat membranes).
- Shake. Vigorously. For 10 to 20 minutes.
- The cream will first thicken (you’ll feel resistance), then suddenly thin out as the butter separates. You’ll hear the solid lump of butter sloshing around in the buttermilk. That’s your signal, you’re done shaking. Good news if you overshoot: you cannot ruin butter by over-churning. If you continue past the “breaking” point, the butter simply becomes more consolidated and the buttermilk more fully separated, which is actually ideal. Just keep going until you have a clear solid mass.
- Pour off the buttermilk (save it!) and proceed to washing.
This is genuinely tiring. Hand the jar to different family members in shifts. Kids under five will last about two minutes before handing it back. Kids over eight can usually power through the whole process, especially if it’s framed as a challenge.
Method 2: Food Processor (Fastest)
If you just want butter and you want it now, the food processor is your friend.
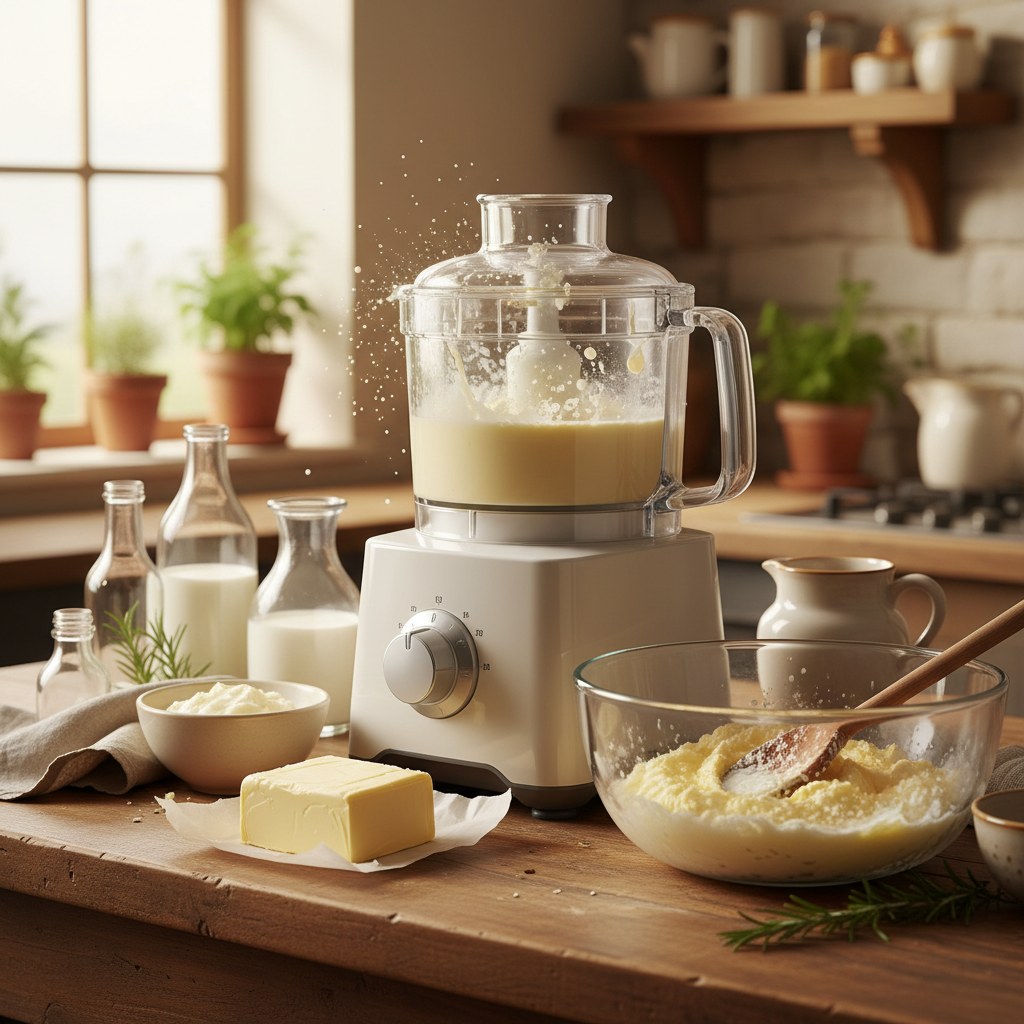
- Pour room-temperature cream into the bowl of a food processor fitted with the standard blade.
- Process continuously. The cream will go through these stages: sloshing liquid → thick whipped cream → very stiff whipped cream → suddenly, the butter breaks free and buttermilk splashes everywhere.
- Total processing time: 3 to 5 minutes.
- Drain the buttermilk through a fine mesh strainer. Proceed to washing.
Fair warning: the moment the butter breaks, liquid goes everywhere inside the processor bowl. It happens fast. Some people drape a towel over the food processor for this reason. It’s not dangerous, just messy.
Method 3: Stand Mixer (Easiest Cleanup)
This is my everyday method. The mixer does the work, and the deep bowl contains the splash better than a food processor.
- Pour cream into the bowl of a stand mixer fitted with the whisk attachment.
- Start on medium speed. Once the cream thickens, you can increase to medium-high.
- Watch for the transition from whipped cream to broken butter. It happens quickly, one moment it’s stiff and fluffy, the next it’s grainy and wet. Then a solid mass forms and the buttermilk separates.
- Total time: 5 to 10 minutes.
- Switch to a low speed for the last minute to avoid splattering buttermilk across your kitchen. Better yet, drape a kitchen towel over the mixer bowl.
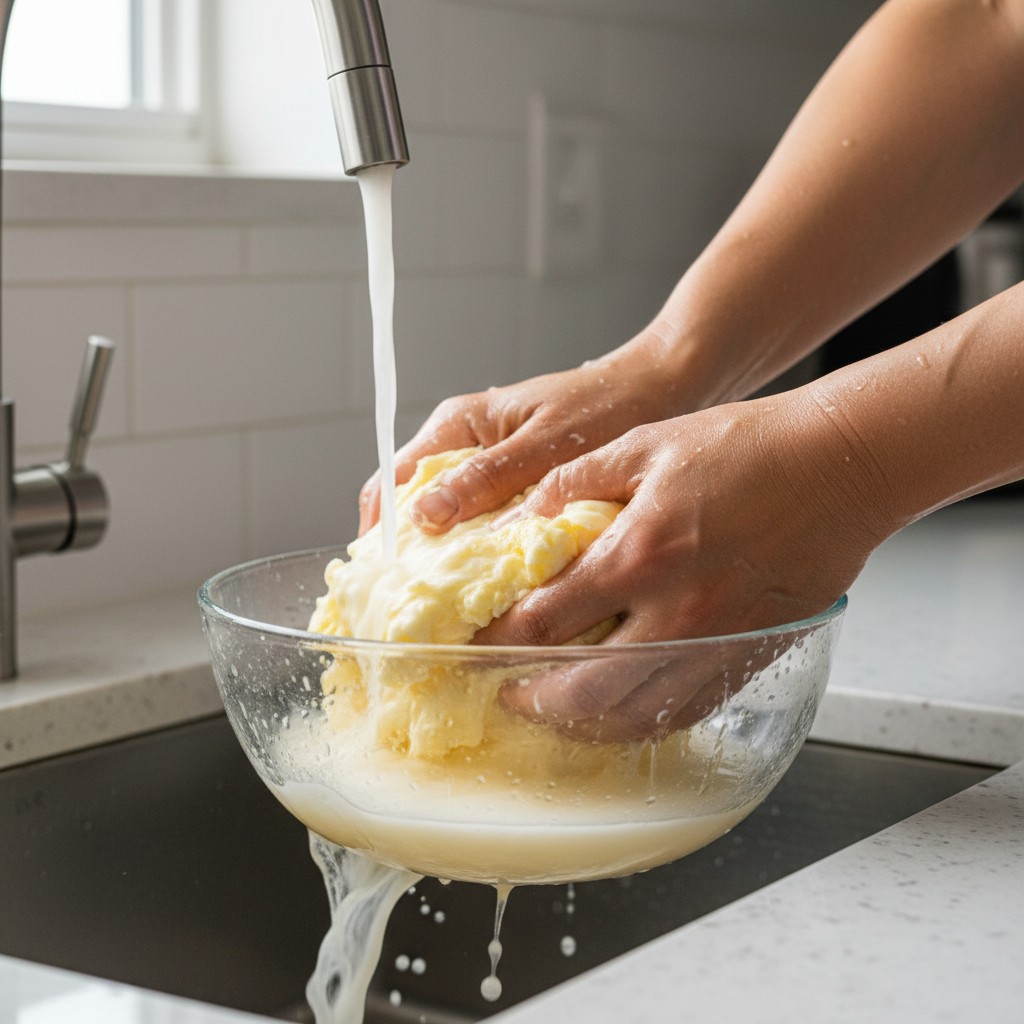
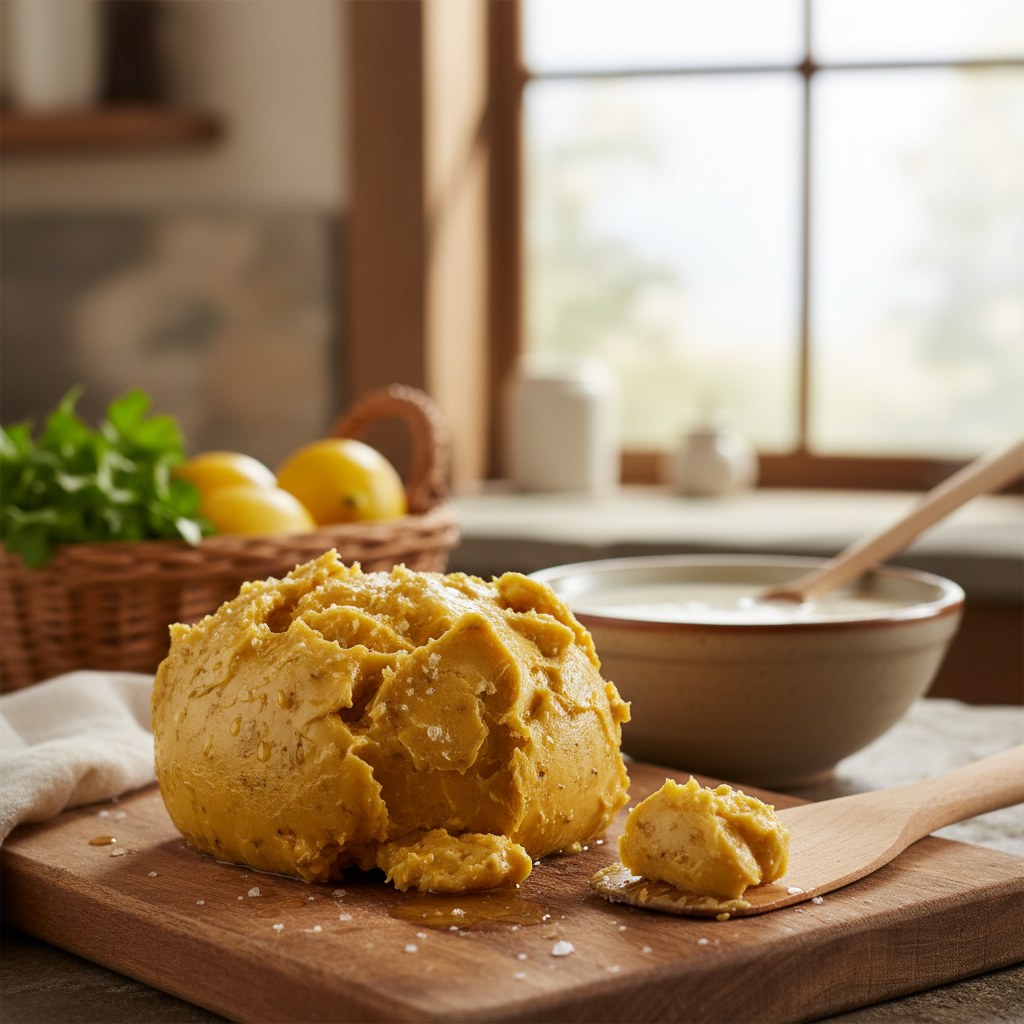
The Critical Step: Washing the Butter
This is where most homemade butter recipes fall short. They tell you to drain the buttermilk and call it done. But if you don’t wash the butter, residual buttermilk trapped in the fat will spoil within a few days, turning the butter sour and rancid.
Properly washed butter keeps in the refrigerator for 2 to 3 weeks, comparable to store-bought.
How to Wash
- Place the butter in a bowl of very cold water (ice water is ideal).
- Knead and press the butter with a spatula, wooden spoon, or your hands. You’ll see the water turn milky as buttermilk is released from the butter.
- Drain the milky water. Add fresh cold water. Knead again.
- Repeat until the water stays clear, usually 3 to 4 rinses.
Work quickly and keep the water cold. Warm hands and warm water soften the butter and make it greasy and difficult to handle. If the butter gets too soft during washing, refrigerate it for 10 minutes and continue.
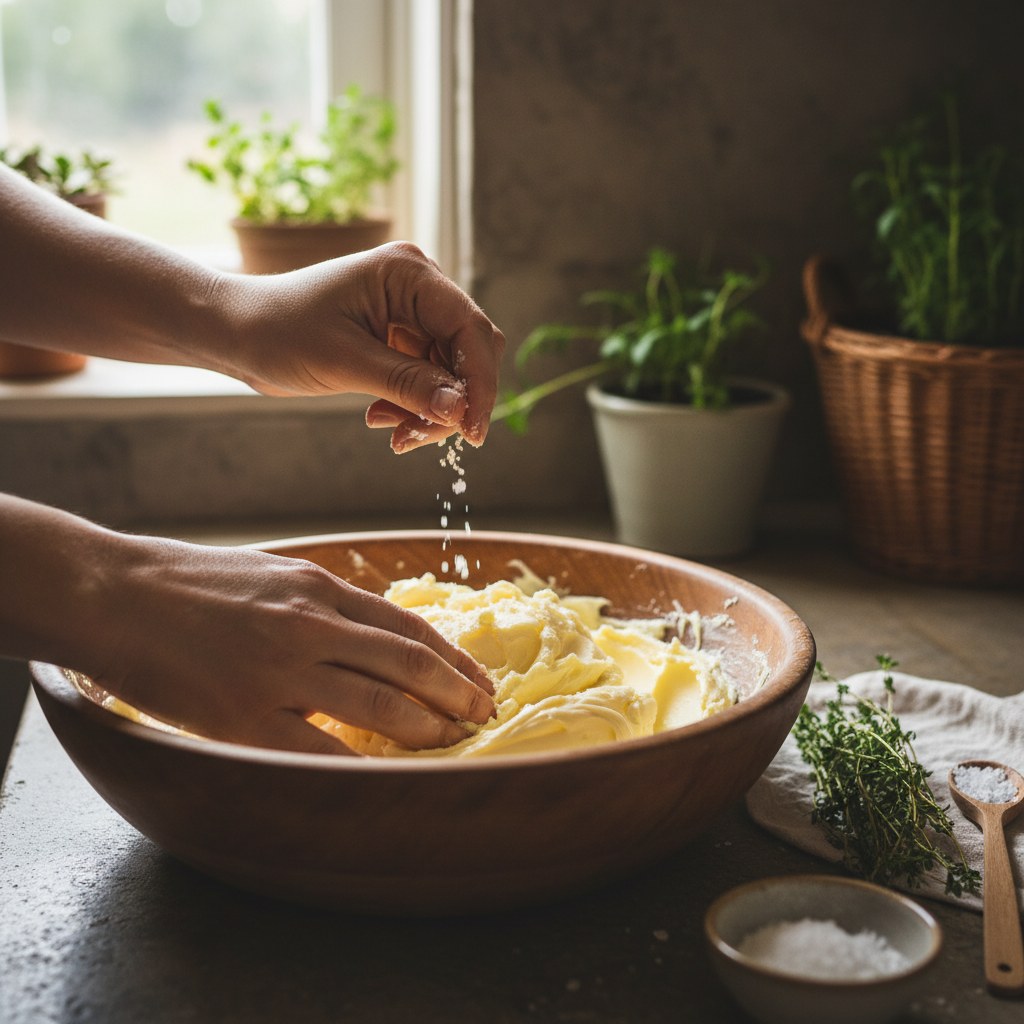
Adding Salt and Flavors
Salted Butter
After washing, knead in about ¼ teaspoon of fine sea salt per cup of butter. Taste and adjust. The salt enhances flavor and also acts as a mild preservative, it inhibits the growth of spoilage bacteria and slows oxidation of the butterfat. This is why properly salted homemade butter keeps 2–3 weeks in the refrigerator while unsalted butter lasts only 1–2 weeks. If you plan to freeze butter, you can skip salt since freezing handles preservation; but for fridge storage, salt meaningfully extends shelf life.
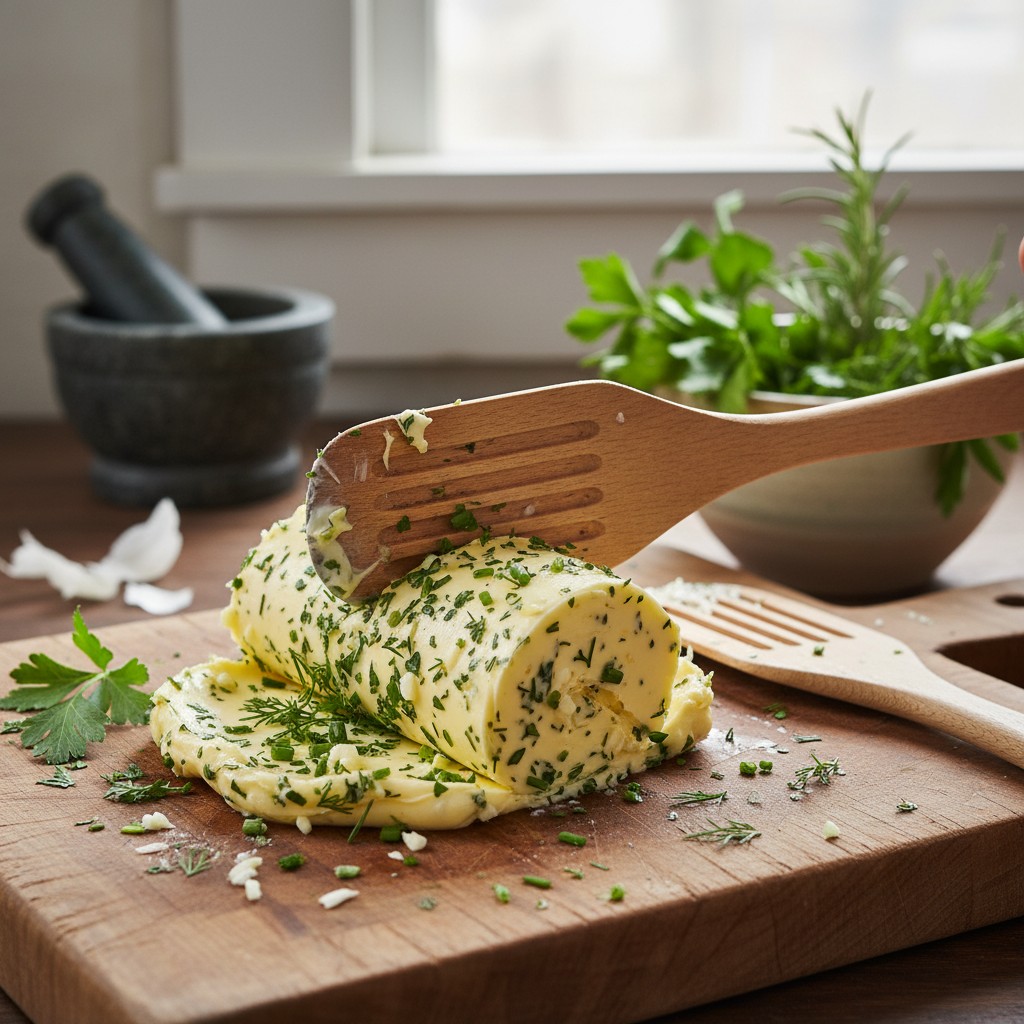
Herb Butter (Compound Butter)
This is where homemade butter becomes a genuine luxury. Mix in any combination of:
- Garlic and herb: 2 cloves minced garlic, 1 tablespoon fresh parsley, 1 teaspoon fresh thyme
- Lemon herb: Zest of 1 lemon, 1 tablespoon fresh dill, pinch of black pepper
- Honey cinnamon: 1 tablespoon honey, ½ teaspoon cinnamon, incredible on pancakes or toast
- Smoky chipotle: 1 teaspoon chipotle powder, pinch of smoked salt, melt this on a grilled steak
- Brown sugar maple: 1 tablespoon brown sugar, 1 teaspoon maple syrup, perfect on sweet potatoes
Roll the flavored butter into a log using plastic wrap or parchment paper. Refrigerate until firm. Slice into rounds as needed. Compound butter also freezes beautifully for up to 3 months.
Cultured Butter: The Next Level
Cultured butter is made from cream that’s been fermented before churning. The result is tangier, more complex, and has a depth of flavor that regular butter can’t touch. European-style butters like Kerrygold and Plugrá are cultured. A block of cultured butter at the store costs $5 to $8. You can make it for a fraction of that.
How to Culture Your Cream
- Add 2 tablespoons of plain yogurt with live active cultures (or buttermilk from a previous batch) to 2 cups of heavy cream.
- Stir to combine, cover loosely, and let it sit at room temperature for 12 to 24 hours. The cream will thicken slightly and develop a tangy aroma.
- Refrigerate for at least 2 hours to chill, then churn as usual.
The cultured cream churns into butter with a noticeably different flavor, slightly nutty, slightly tangy, deeply savory. Once you’ve tried it, regular butter tastes one-dimensional by comparison.
What to Do with the Buttermilk
Do not pour it out. The buttermilk from homemade butter churning is the real deal, thin, slightly tangy, and rich with milk proteins. Important distinction: this is not the same as the cultured buttermilk sold in grocery stores. Store-bought “buttermilk” is actually cultured skim milk, it has been fermented with lactic acid bacteria to give it tang and thickness. True churn buttermilk (what you have here) is the liquid that remains after fat has been removed from cream. Both are acidic and work similarly in baking, but they are different products with different origins. It works in many of the same ways.
- Baking: Use it in biscuits, pancakes, waffles, and quick breads. The acidity reacts with baking soda for a lighter texture.
- Marinades: Buttermilk is a classic chicken marinade. The mild acidity tenderizes the meat without making it mushy. Marinate for 4 to 24 hours before frying or grilling.
- Salad dressings: Ranch dressing made with fresh buttermilk is incomparably better than the bottled stuff.
- Drinking: Old-fashioned, yes, but cold buttermilk with a pinch of salt is a refreshing drink, especially in warm weather.
- Smoothies: Adds tang and protein. Blend with banana and honey.
Buttermilk keeps in the refrigerator for about a week. You can also freeze it in ice cube trays for baking use later.
Storing Your Butter
Properly washed and salted homemade butter keeps in the refrigerator for 2 to 3 weeks. Unsalted butter lasts about 1 to 2 weeks, the lack of salt means slightly less preservation.
For longer storage, butter freezes exceptionally well. Wrap tightly in plastic wrap, then in foil or a freezer bag. Frozen butter keeps for 6 months or more without significant quality loss.
At room temperature, butter can sit out safely for a day or two in a covered butter dish (French butter keepers work well). Beyond that, especially in warm weather, refrigerate it.
A Note on Cream Quality
The cream you start with determines everything. Ultra-pasteurized cream (the most common type at grocery stores) works but produces a milder-tasting butter and can take longer to churn. Regular pasteurized cream churns faster and tastes better. Raw cream from a local dairy produces the richest, most flavorful butter, if you have access to it, use it.
Avoid cream with added thickeners like carrageenan or guar gum. These additives interfere with the churning process and can prevent clean separation of butter and buttermilk. Check the ingredient list, it should say “cream” and nothing else (or “cream, milk” at most).
🌱 From Our Homestead
Making butter from fresh cream is one of those homestead tasks that never gets old. The kids love shaking the jar and listening for the moment it turns, and the fresh buttermilk left over goes straight into pancakes the next morning.
Frequently Asked Questions
Why won’t my cream turn into butter?
Three common culprits: the cream is too cold (let it warm to about 60°F), the cream is ultra-pasteurized (it works but takes longer, keep going), or the cream contains thickeners that prevent proper separation. Also make sure your cream has at least 36% fat. “Light cream” or “half and half” won’t churn into butter, they don’t have enough fat.
How much butter does one pint of cream make?
One pint (2 cups) of heavy cream yields approximately 1 cup (8 ounces or 2 sticks’ worth) of butter, plus about ¾ cup of buttermilk. The exact yield depends on the fat content of the cream, higher-fat cream produces more butter and less buttermilk.
Is homemade butter healthier than store-bought?
Nutritionally, homemade butter is the same as store-bought, both are primarily milk fat. The advantage is purity: homemade butter contains cream and whatever you add (salt, herbs). Commercial butter may contain “natural flavors” and colorants. If you use cream from pasture-raised cows, the butter will be higher in omega-3 fatty acids and conjugated linoleic acid (CLA) compared to butter from conventionally raised cattle.
Can I make butter from raw milk?
Yes, but you’ll need to separate the cream first. Let the raw milk sit in the refrigerator for 24 hours. The cream rises to the top and can be skimmed off with a ladle or turkey baster. Raw cream makes exceptional butter with the deepest, most complex flavor. Be aware that raw dairy products carry a higher risk of bacterial contamination, so source from a reputable dairy and consume promptly.