How to Build a Mason Bee House: Boost Your Garden’s Pollination Naturally
How to Build a Mason Bee House: Boost Your Garden’s Pollination Naturally
Roughly 250 mason bees can pollinate one full acre of apple trees, a job that would otherwise require 15,000 to 20,000 honeybees, according to the USDA Agricultural Research Service. That single statistic explains why backyard orchardists, market gardeners, and homesteaders have spent the last decade building mason bee houses by the hundreds. The native blue orchard bee (Osmia lignaria) is gentle, easy to host, and dramatically more efficient at fruit tree pollination than its European cousin.
Building a mason bee house is a beginner woodworking project. You need an untreated wood block, a drill with a 5/16-inch bit, and an afternoon. Get the tunnel dimensions right and the placement right and the bees will find you on their own, usually within the first season. Get them wrong and the house sits empty for years, or worse, becomes a parasite trap.
This how-to walks through every step the extension entomologists actually recommend: hole sizing, frame construction, mounting, mud sources, cocoon release, and end-of-season cleaning. Skip the maintenance steps and your bee population crashes within two years from pollen mites and chalkbrood. Follow them and a single starter colony of 20 cocoons grows into hundreds.
Why Build a Mason Bee House at All?
A mason bee house turns an ordinary backyard into a high-output pollination zone for fruit trees, berries, and early-spring vegetables. According to the USDA Forest Service Pollinator of the Month profile, Osmia lignaria “is prized for its efficiency pollinating fruit trees” and is one of the very few native bees actively managed in commercial agriculture. Unlike honeybees, mason bees fly in cool, drizzly weather. OSU Extension and the Pacific Northwest mason bee literature both note that mason bees forage in cool, lightly rainy, and overcast conditions when honeybees stay grounded — useful during apple and cherry bloom, when cold snaps and wet stretches still hit. Early-spring fliers like the blue orchard bee are documented foraging at temperatures down to roughly 54°F.
The pollination math is striking. Mason bees carry pollen loosely on their abdomens, so almost every flower they visit gets cross-pollinated. Honeybees pack pollen tightly into leg sacs, transferring far less per visit. Hosting mason bees pairs naturally with backyard beekeeping or a dedicated pollinator garden; together they cover early spring through late fall.
What Tools and Materials Do You Need?
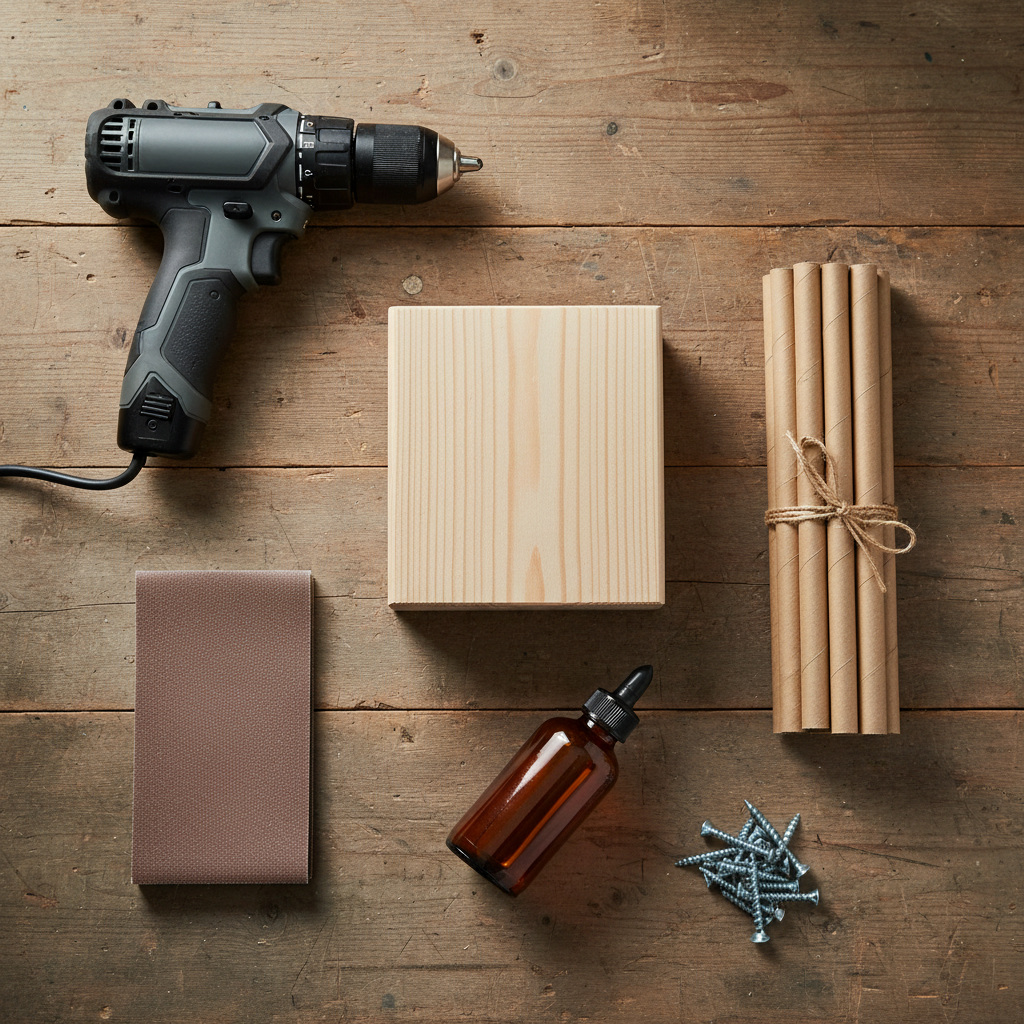
You need an untreated wood block, cardboard or paper nesting tubes, a drill, a 5/16-inch drill bit at least 6 inches long, and basic mounting hardware. Standard guidance from Xerces Society and multiple university extensions is to use untreated lumber. Pressure-treated wood can leach chemicals into developing larvae, and finished or sealed surfaces leave residues that mason bees avoid. Skip cedar too — its natural oils repel insects when fresh, including the bees you are trying to attract.
Wood and Tube Materials
- One block of untreated pine, fir, or hardwood, at least 4 inches deep and 6 inches tall (avoid cedar and pressure-treated wood)
- 30 to 50 cardboard nesting tubes, 5/16 inch inside diameter, 6 inches long, sealed at one end, OR paper liners that fit a 5/16-inch drilled hole
- Untreated scrap lumber for a roof and back panel, about 8 inches square
- Exterior wood glue and 1.5-inch galvanized screws
Tools
- Cordless drill with adjustable speed
- 5/16-inch brad-point or auger drill bit, 6 to 8 inches long
- Tape measure and pencil
- Sandpaper (120 grit) to smooth tunnel mouths
- Two heavy-duty mounting screws or a French cleat for installation
Total cost runs $15 to $25 if you have basic woodworking tools. Source the cardboard tubes from a beekeeping supplier rather than crafting them yourself; the seam tightness matters for pest control.
How Do You Drill the Right Hole Size?
Drill 5/16-inch holes exactly 6 inches deep into the long grain of an untreated wood block, spacing each hole 3/4 inch apart. Penn State Extension’s orchard pollination guide is specific: “Artificial nests should have internal tunnel dimensions roughly 5/16 of an inch in diameter and with a depth of 6 to 8 inches.” Hole diameter matters because mason bees self-select tunnels that fit their body size; a tunnel even 1/16 inch too wide attracts wasps and parasitic flies instead.
Tunnel depth controls the sex ratio of the brood. Mason bee research summarized in Bosch and Kemp’s USDA-ARS handbook How to Manage the Blue Orchard Bee — drawing on Dr. Philip Torchio’s foundational work — is direct on this point: if holes are drilled to less than full depth, nesting females will produce fewer female and more male progeny. Females lay female eggs at the back of the tunnel and male eggs near the entrance, so a shallow tunnel produces a male-heavy generation that pollinates poorly the following spring.
Drill into the side of the block, never into the end grain. End grain splits and absorbs moisture. Sand the entrance of each hole lightly to remove splinters that could shred a bee’s wings as she enters. Do not drill all the way through; the back of the tunnel must be sealed because mason bees will not nest in a tunnel that is open at both ends.
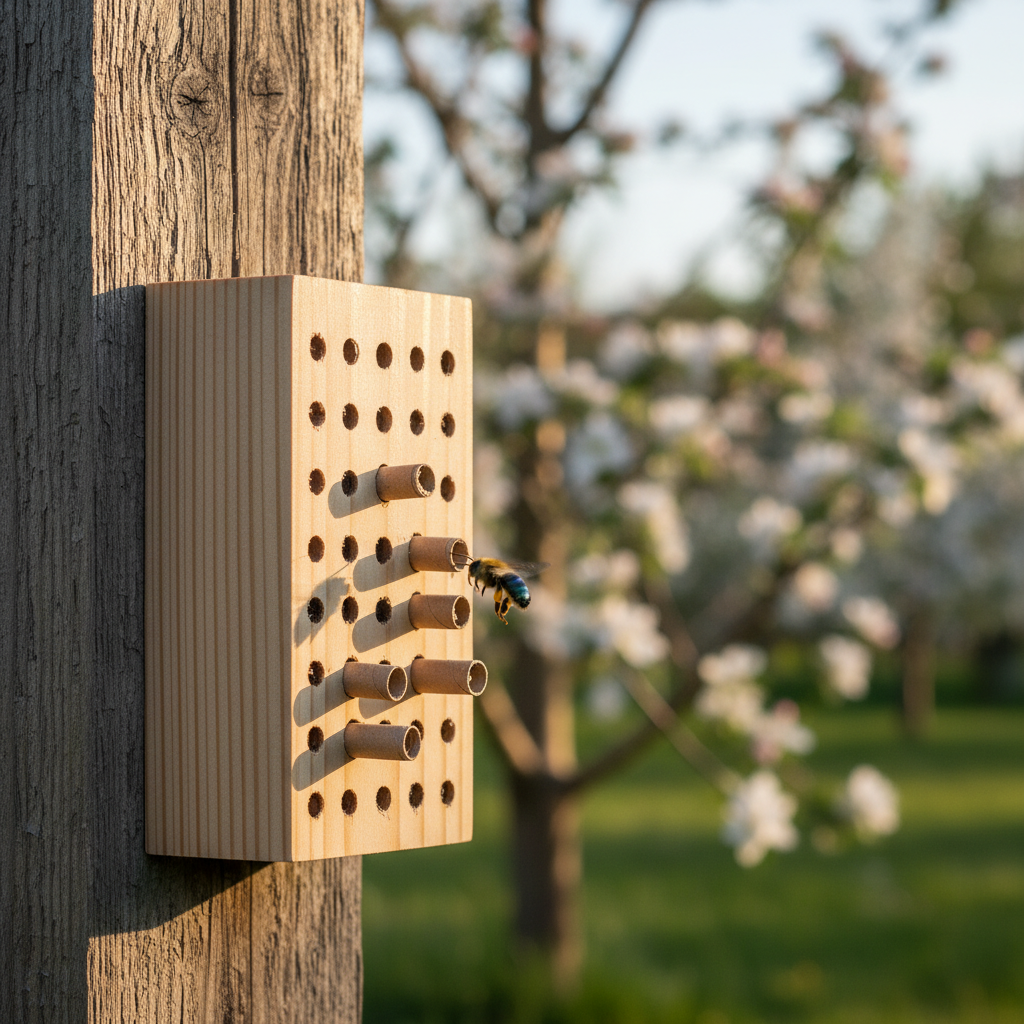
How Do You Build the Wooden Frame and Roof?
Build a simple shelter around the drilled block: a back panel, two short side walls, and a sloped roof that overhangs the front by 2 to 3 inches. NC State Extension’s Bee Hotel Design and Placement guidance recommends that the shelter “overhang nest entrances by at least a couple of inches to protect from rain.” Two to three inches of overhang is the standard target. Rain that gets into the holes molds the pollen provisions and kills the developing bees.
Cut the back panel slightly larger than the drilled block so you have material to attach mounting hardware. Screw the side walls to the back panel, drop the drilled block (or a bundle of cardboard tubes) into the cavity, then add the roof. Pitch the roof at 15 to 20 degrees so water sheds away from the entrance face. Leave the front fully open; mason bees navigate by sight and need a clear approach path.
Skip paint, varnish, and stain on the inside. Strong solvents and sealers leave residues that deter nesting. The exterior can be painted a light color for weather protection if needed, but most builders leave the wood bare and let it weather to gray.
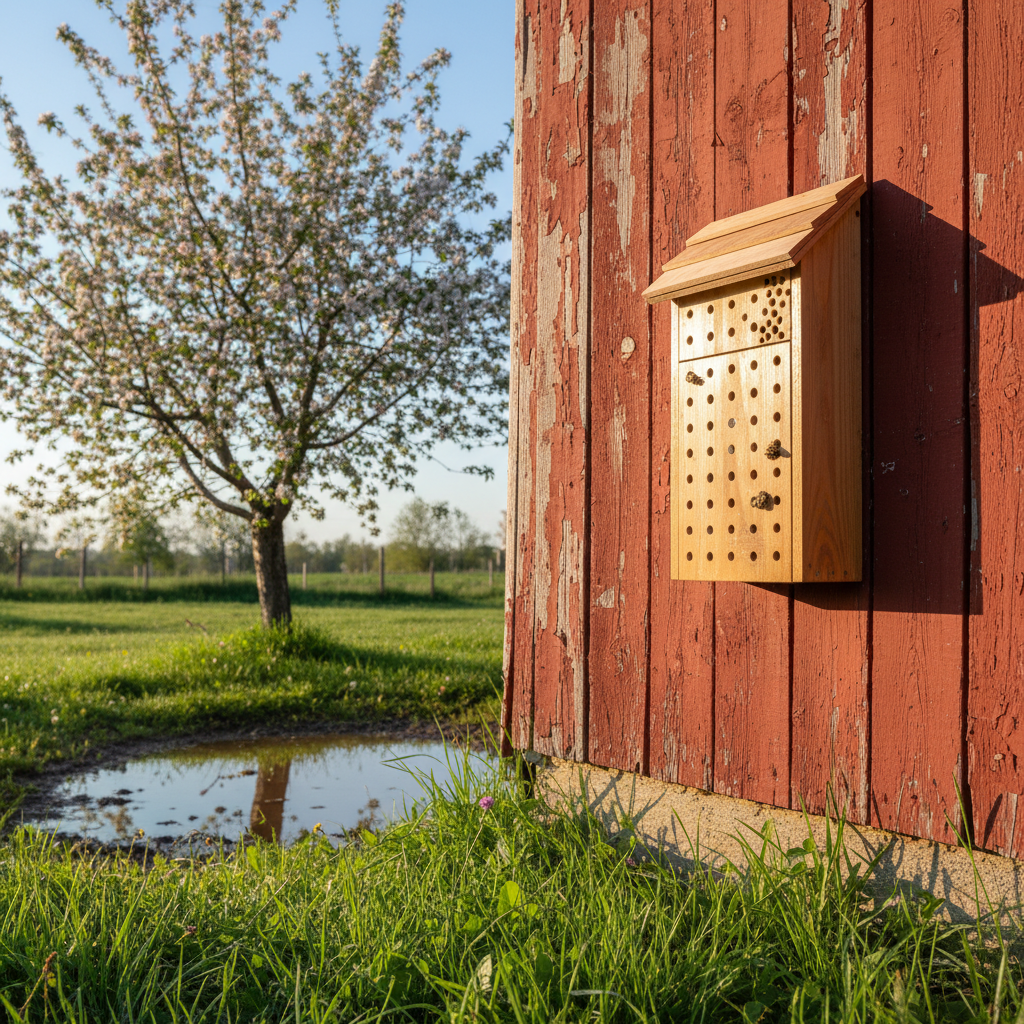
Where Should You Mount Your Mason Bee House?
Mount the house on a south or southeast wall, 3 to 6 feet off the ground, on a stable structure that does not sway. Oregon State University Extension instructs, “Place the nesting house where it will be warmed by the morning sun but protected from the hot afternoon sun, facing south or southeast if possible.” Mason bees are cold-blooded, so morning sun warms them up and gets them foraging hours earlier than a shaded house would.
The 3 to 6 foot height range balances bee preferences with maintenance access. Lower placements get splashed by mud during heavy rain and are more accessible to skunks and raccoons. Higher placements force you onto a ladder for fall cocoon harvest, which makes maintenance harder to complete.
Stability is non-negotiable. NC State Extension’s bee-hotel guidance is that the structure must be firmly fixed and not allowed to swing from a branch — movement disturbs developing larvae and can dislodge mud cell partitions before they cure. A wobbling house also dislodges mud cell partitions before they cure. Use lag screws into a fence post, an exterior wall stud, or a dedicated 4×4 post sunk in concrete. On our homestead here in southern New England, we lost an entire first-year colony to a January wind storm before we figured out a swaying mount was the cause; the next house went on a south-facing barn wall and produced cocoons every year since.
How Do You Provide Mud and Forage Within Range?
Mason bees need a mud puddle within roughly 25 feet of the house and pollen sources within 200 to 300 feet. Penn State Extension notes that female mason bees need a steady supply of mud near the nests; they use it to wall up each egg and to seal the tunnel entrance once the cells are filled. Clay-rich mud holds together best. Without nearby mud, females either skip your house entirely or burn time and energy flying long distances, which lowers their reproductive success.
University of Minnesota Extension’s pollinator-nest guidance describes three non-negotiable resources for mason bee success: a tunnel-shaped cavity to nest in, nearby nectar and pollen, and a source of mud for cell partitions. If your soil is sandy, dig a 6-inch-deep hole near the house, line the bottom with clay-rich subsoil from a creek bank, and keep it watered. The mud should be the consistency of soft cookie dough; bees reject mud that is either runny or dry-cracked.
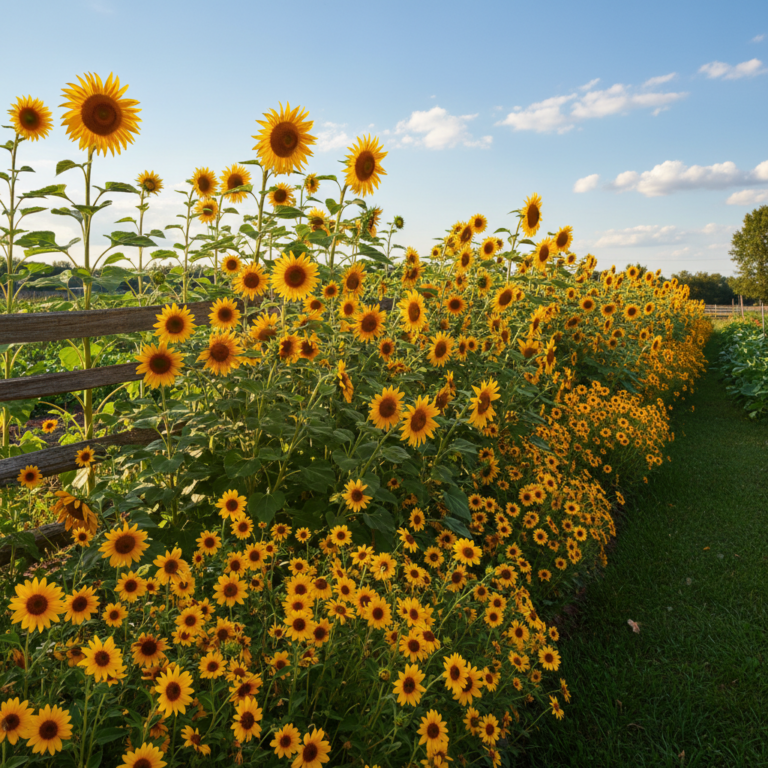
For early-season pollen, plant or protect what is already blooming when bees emerge in March or April: dandelions, willows, redbuds, fruit trees, and early bulbs. Apple, pear, plum, and cherry trees are mason-bee magnets. So are blueberry bushes, which bloom right when mason bees hit peak activity. Edible flowers like calendula, borage, and nasturtium extend forage past peak fruit bloom.
When Should You Release Mason Bee Cocoons?
Release purchased or overwintered cocoons when daytime temperatures stay between 50 and 55 degrees Fahrenheit for three or more consecutive days, typically two to three weeks before fruit trees bloom. Oregon State University Extension’s release-timing guidance is to “place cocoons in the nesting house when day temperatures reach 50°F to 55°F.” Adult mason bees become flight-active at roughly the same threshold; release earlier and males emerge before any flowers are open, release later and you miss the apple bloom window. Release too early and males emerge before any flowers are open; release too late and you miss the apple bloom window.
Place cocoons in a small, vented release box (a cardboard tube with paper covering one end works) and tuck it inside or directly beside the bee house. Males emerge first because their cells sit closer to the tunnel entrance, according to the USDA. They wait around the house for several days until females emerge, mate, and start prospecting for empty tunnels.
Stagger releases if you have more than 20 cocoons. Put half out at the first warm spell and the other half a week later. Staggering smooths out the pollination window and protects against a late frost wiping out the entire generation in one bad night.
How Do You Maintain a Mason Bee House Year-Round?
Replace nesting tubes or paper liners every single year and harvest cocoons in fall to control parasites. Penn State Extension’s orchard pollination guide is direct on this point: “The most effective way to control mites and diseases is by providing mason bees with new or sanitized nesting materials each year.” OSU’s guidance is similar — paper liners are disposable, cardboard tubes can be cleaned and reused, but every season the tunnels themselves get fresh material. The two big enemies are pollen mites, which ride into nests on adult bees and then explode in population, and chalkbrood, a fungal pathogen that turns larvae into chalky white mummies.
The annual maintenance calendar is short:
- Late October through December: Remove filled tubes and store them in a cool, dry, rodent-proof container.
- November or December: Open tubes carefully and harvest cocoons. Crown Bees and Vancouver Bee Project both recommend a brief rinse in dilute chlorine bleach to knock down pollen mites and chalkbrood spores — typically 1 to 2 tablespoons of household bleach per gallon of cool water, with cocoons swirled in for 1 to 2 minutes and then rinsed thoroughly. Oregon State University Extension uses a weaker 0.05% solution (1 tablespoon per 8 cups of water). Either ratio works; rinse well and air-dry before storage.
- December through February: Store cleaned cocoons in a refrigerator crisper drawer or unheated outbuilding alongside a damp paper towel for humidity.
- March or April: Replace all tubes with fresh ones and release cocoons (see previous section).
Common parasites to watch for during cocoon cleaning, per NC State Extension, include “pollen mites, chalkbrood fungal pathogen, and Houdini fly maggots.” Houdini flies (Cacoxenus indagator) sneak into open tunnels while a female is foraging and lay eggs that consume the bee’s pollen provisions. Their maggots look like tiny beige rice grains; cull any cocoon-cell debris that contains them.
Common Mistakes That Tank Mason Bee Populations
Most failed mason bee houses fail for the same handful of reasons. Avoid these and your colony grows year over year instead of crashing.
- Tunnels drilled too shallow. Holes under 6 inches deep produce mostly male bees, which do not nest or pollinate efficiently. Use a 6-to-8-inch bit and drill the full depth.
- Cedar or pressure-treated wood. Cedar’s natural oils repel bees; pressure-treated lumber leaches chemicals into developing larvae. Use plain pine, fir, or untreated hardwood.
- Reusing old tubes. Skipping the annual tube swap is the single biggest cause of population collapse. Pollen mites multiply exponentially in reused cardboard.
- House mounted in deep shade or full afternoon sun. Shade keeps bees too cold to forage; baking afternoon sun cooks larvae. Southeast-facing mounts hit the right balance.
- No mud source nearby. Females without mud abandon the site within a day. Provide a clay puddle within 25 feet.
- Pesticide drift. Even “organic” insecticides like spinosad kill mason bees on contact. Never spray within 50 feet of an active house, especially during bloom.
Pro Tips for Higher Mason Bee Survival Rates
Several small refinements separate a mediocre mason bee house from a thriving one. North America hosts roughly 4,000 species of native bees, and about 30 percent are above-ground cavity-nesters according to UC Davis’s native-bee outreach materials. Many of those species — including leafcutter bees and other beneficial solitary pollinators — will adopt a well-built mason bee block.
- Use removable paper liners. Paper liners inside drilled holes let you slide cocoons out without splitting the wood, making fall harvest much faster.
- Mix tube lengths. A few 8-inch tubes alongside the standard 6-inchers produces larger, more fecund females, since females lay female eggs deepest in the tunnel.
- Add a wire mesh guard. A 1/2-inch hardware cloth screen mounted an inch in front of the tubes blocks woodpeckers without obstructing bee flight.
- Keep records. Note release dates, daily highs, and cocoon counts each year. Patterns emerge after two seasons that no general guide can teach you.
- Plant in waves. Stagger early bloomers (willow, redbud) with mid-spring fruit trees and late-spring berries so forage never gaps during the four-to-six-week adult flight season.
Mason Bee House FAQ
Do mason bees sting?
Mason bees almost never sting. Oregon State University Extension’s Orchard Mason Bee guide states that “the male mason bee does not sting” and describes females as non-aggressive, stinging only when handled roughly or trapped against skin under clothing. A female sting feels closer to a mosquito bite than a honeybee or wasp sting. Children and pets can stand directly in front of an active house without issue, which is one reason mason bees suit family homesteads better than honeybees do.
How many mason bee tubes do I need?
Start with 30 to 50 tubes for a typical backyard with a few fruit trees. A productive female fills roughly 4 six-inch tubes during her four-to-eight-week life (range 1 to 6 under field conditions), with about 8 eggs per tube. Thirty tubes can comfortably host 5 to 8 founding females and grow from there. If you have a quarter-acre orchard, scale up to 100 to 200 tubes split across 2 or 3 separate houses to reduce parasite pressure.
How long do mason bees live?
Adult mason bees live four to six weeks in spring, after which they die. The next generation overwinters as cocooned adults inside the sealed cells from the previous spring, emerging the following March or April. Penn State Extension’s “Mason Bees in the Home Garden” page describes adults as active “from mid-April to mid-June” — roughly six to eight weeks of flight time depending on the region. The visible bees you see flying in April and May are dead by late June, but their offspring are sleeping in the tubes, waiting for next year.
Can I leave a mason bee house outside all winter?
You can, but indoor or unheated-shed storage produces higher survival rates. Cocoons left outside face freeze-thaw cycles, woodpecker raids, and rodent attacks. Most extension services recommend pulling filled tubes after October, harvesting cocoons, and storing them in a refrigerator or unheated outbuilding alongside a damp paper towel. Reinstall fresh tubes and release cocoons in spring once temperatures stabilize at 50 to 55 degrees.
Why are no bees using my mason bee house?
The four most common reasons are wrong hole size (anything other than 5/16 inch), wrong orientation (not facing southeast), no mud source within 25 feet, and no nearby foraging plants in early spring. If your area has very few wild mason bees, you may need to seed the population with purchased cocoons; some regions have lost native populations to habitat fragmentation and pesticide use, and a starter colony jumpstarts establishment in a single season.
Build It Once, Pollinate for Years
A well-built, well-placed mason bee house pays for itself in the first apple harvest. The investment is small (an afternoon and $20 in materials), the maintenance commitment is one weekend per year for cocoon harvest, and the payoff is a measurable jump in fruit set on every flowering tree and shrub within 300 feet of the house. According to USDA data, 250 mason bees can replace the pollination work of 15,000 honeybees on an acre of fruit trees, which makes a single backyard house genuinely meaningful for orchard yields.
Start small. Build one block this weekend, drill 30 tunnels, mount it on a southeast wall, and pick up 20 starter cocoons from a regional supplier. Add a mud puddle within 25 feet, plant a few early-spring bloomers, and skip the pesticides during apple bloom. Combine a mason bee setup with a dedicated pollinator garden and the homestead pollination economy starts running on its own, season after season.