Beeswax Food Wraps at Home: What Every Homesteader Should Know
Americans generated roughly 4.2 million tons of plastic bags, sacks, and wraps in 2018, and only about 420,000 tons of that pile was recycled, according to the U.S. Environmental Protection Agency. The other 3.78 million tons were landfilled or combusted for energy recovery, with a fraction lost to the environment as litter and waterway debris. A single homemade beeswax wrap can replace hundreds of feet of cling film over its lifetime, and the materials cost roughly a dollar per square once you set up a kitchen batch. The catch is that the materials and method matter. Use the wrong fabric, the wrong wax-to-resin ratio, or the wrong food, and a wrap fails in a week.
This guide walks through what beeswax wraps actually are, what to make them from, how to assemble them in a home oven, what foods they handle well, how to wash them, and when to retire them. Every recommendation is grounded in university extension publications, FDA regulation, and peer-reviewed research on beeswax. If you already preserve garden harvests by dehydrating fruits and herbs or putting up tomatoes, beeswax wraps slot into the same low-waste workflow.
What Are Beeswax Food Wraps, and Are They Safe?
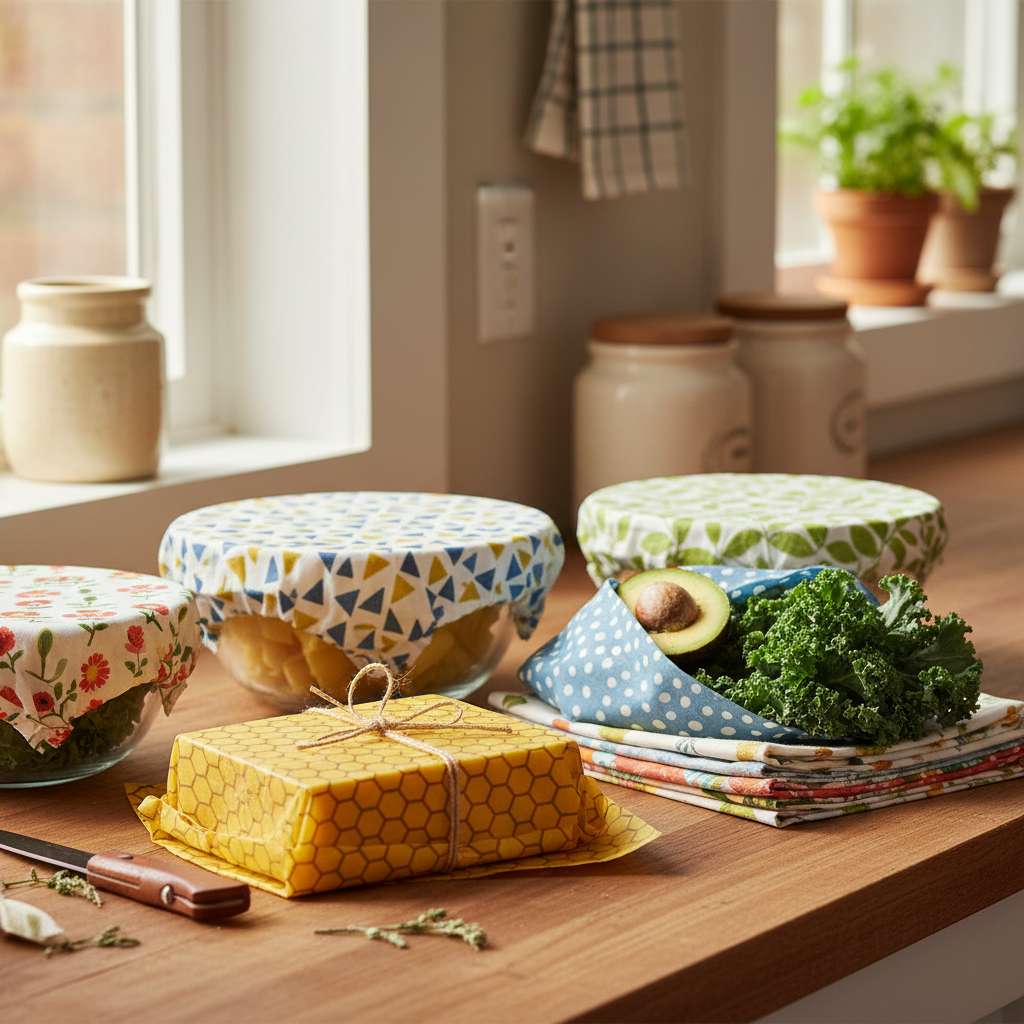
A beeswax food wrap is a square of woven cotton fabric infused with melted beeswax, often blended with tree resin and a small amount of jojoba oil. The wax stiffens when cool and softens slightly with the warmth of your hands, so you can press a wrap around a bowl rim or fold it over a sandwich and it stays put. The U.S. Food and Drug Administration lists both yellow and white beeswax as Generally Recognized as Safe (GRAS) under 21 CFR 184.1973, the regulation that governs food-grade beeswax derived from honeycomb after honey removal. That GRAS status is the same standard FDA applies to ingredients like vinegar and salt in direct food contact.
Lab work backs up the safety record. According to a 2016 minireview published in the Asian Pacific Journal of Tropical Medicine, beeswax shows antimicrobial activity against Staphylococcus aureus, Salmonella enterica, Candida albicans, and Aspergillus niger, especially in combination with other natural compounds. A 2020 study in the journal Polymers (Frydrych et al.) found beeswax-modified textiles — tested on polyester/cotton/viscose blends and pure polyester — produced “the highest biocidal activity” of the tested species against the mold A. niger, which is part of why finished wraps resist surface mildew between washes.
Why Are We Replacing Plastic Wrap on the Homestead?
Plastic film almost never gets recycled. EPA data show only about 10% of plastic bags, sacks, and wraps generated in the U.S. in 2018 were recycled, because thin film tangles in the rotating screens at materials recovery facilities and forces operators to shut the line down. Curbside programs reject it on purpose. The remaining 90%, roughly 3.78 million tons in that single year, ended up landfilled, incinerated, or loose in the environment.
For a homesteading kitchen, the swap pays back three ways. First, it removes a recurring grocery-list line for cling film and zip bags. Second, it pairs naturally with the rest of a from-scratch food system: garden produce gets wrapped fresh from the bed, sourdough proofs under a wrap, and leftovers from a grocery-saving garden harvest stay sealed without single-use packaging. Third, every wrap composts at the end of its useful life, returning to the same soil the food came from. On our place, one Saturday afternoon making wraps replaced an entire year of cling film purchases.

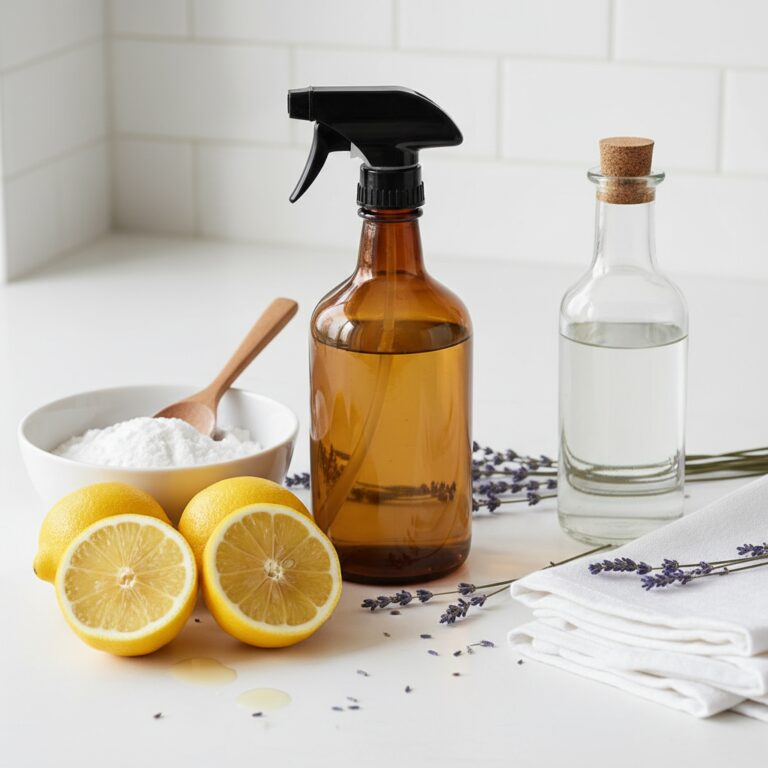
What Materials Do You Need to Make Beeswax Wraps?
You need four ingredients, and quality matters more than quantity. The University of Florida IFAS Extension recommends about 1/4 cup of beeswax per 10-inch square of fabric, with thin 100% cotton (washed sheets, old quilting cotton, or T-shirt-weight cotton) giving the best wax penetration. Coarser canvas absorbs unevenly; polyester blends repel the wax entirely. Buy a small kitchen scale if you don’t have one already; recipes that drift outside a 4:1 wax-to-resin ratio either feel rigid or stick to your hands.
Beeswax
Use cosmetic-grade or food-grade yellow beeswax pellets. Pellets melt faster and more evenly than blocks. A pound of pellets coats roughly twelve to fifteen 10-inch squares depending on fabric weight. Store unused pellets in a sealed jar away from light to keep the natural color and scent.
Pine or Damar Tree Resin
Resin is what gives a wrap its cling. Without it you have a stiffened cloth that holds a fold but won’t stick to itself or to a bowl rim. The University of California Agriculture and Natural Resources Master Food Preservers describe a base ratio of 1 part beeswax to roughly 1/4 to 1/2 part resin. Damar resin tastes neutral; pine resin smells stronger and can transfer faint flavor to delicate cheese. By weight, a 4:1 wax-to-resin ratio gives reliable cling without becoming uncomfortably sticky on hands.
Jojoba Oil
A teaspoon or two of jojoba oil per 30 to 50 grams of beeswax keeps the cured coating pliable and resistant to cracking when you fold a chilled wrap. (UC Master Food Preservers go heavier — a 1:1 ratio of wax to jojoba — but most home-DIY recipes settle in the lower range to keep the wraps from staying tacky.) Jojoba is shelf-stable and food-safe, which is why it gets chosen over olive or sunflower oil that can go rancid in the cloth.
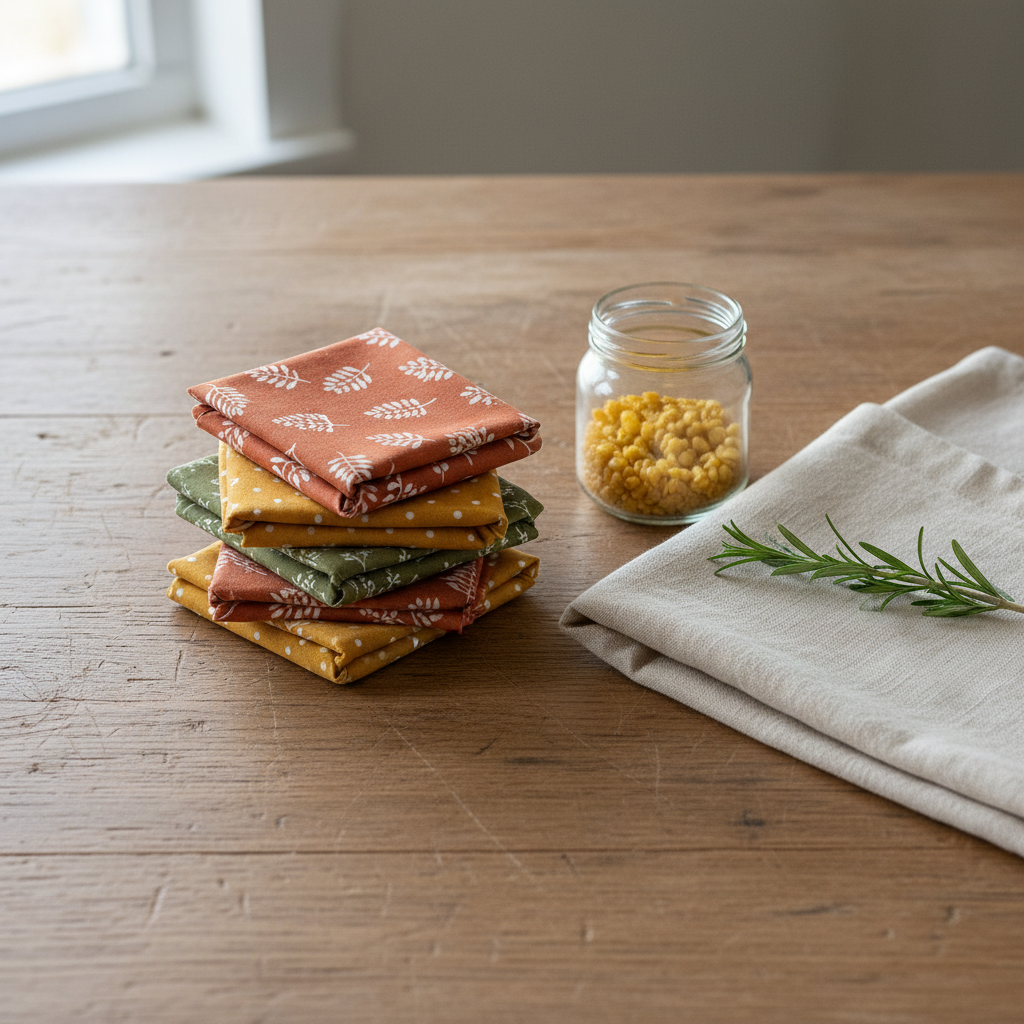
Cotton Fabric
Pre-wash and dry the fabric to remove sizing and any factory finish. Cut squares with pinking shears so the zigzag edges resist fraying after dozens of washes. Common finished sizes: 7 inches (small, for half-fruits), 10 inches (medium, for sandwiches and bowl covers), and 13 inches (large, for cheese blocks, dough, and salad bowls).
How Do You Make Beeswax Wraps Step by Step?
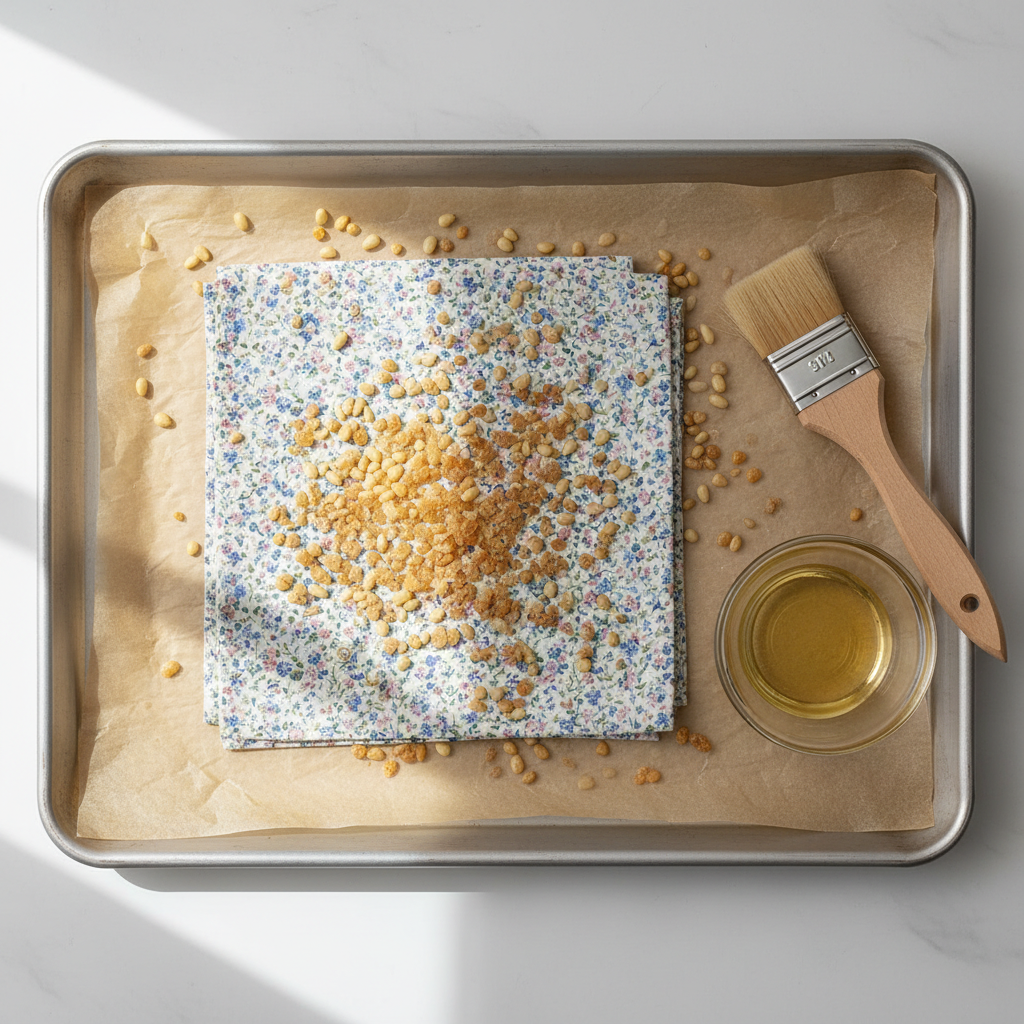
The oven method gives the most consistent coating across a batch. According to UC Berkeley’s University Health Services DIY Household Goods guide, the basic procedure is to lay fabric on a parchment-lined sheet pan, sprinkle wax (and resin, if using) evenly across the surface, place it in the oven for five to ten minutes until the wax fully melts, then brush the melted wax across the cloth and lift the wrap to dry. Plan for an open window or a kitchen with the range hood running; melting resin smells like a pine forest in a hot car.
Equipment Checklist
One half-sheet pan, two pieces of parchment paper (one under and one over for spillover protection), a 1-inch natural-bristle brush you’ll dedicate to wax work going forward, a clothesline or drying rack, and an oven that holds 200°F reliably. A second pan speeds the run because you can prep the next square while one is in the oven.
Step-by-Step Oven Method
- Preheat the oven to 200°F. Lower than 200°F won’t fully melt powdered resin; higher than about 185°F (85°C) for prolonged periods starts darkening the wax and degrades its honey aroma. Cotton itself doesn’t scorch until well above 400°F, so the limiting factor is the wax, not the cloth.
- Line a sheet pan with parchment. Lay one cotton square flat on the parchment with no folds.
- Sprinkle pellets and powdered resin. For a 10-inch square: 1/4 cup beeswax pellets, 1 tablespoon resin powder, 1/4 teaspoon jojoba oil distributed in drops.
- Bake for 6 to 8 minutes. Watch through the oven window. The wax is ready when it pools fully clear with no white pellets visible.
- Brush evenly. Pull the pan out, work fast, and use the bristle brush to push wax to every corner. Any dry spots will fail to seal in use.
- Lift and air-dry. Pinch two corners and hang the wrap on a clothesline. It cures in under 60 seconds. Repeat with the next square.
Iron Method (No Oven)
Sandwich grated wax between two sheets of parchment with the cotton in the middle, set the iron to medium-low (about 250°F, no steam), and press in slow circles until the wax melts through. Output is slightly less even than the oven method, but the iron method works in a small kitchen with no rack space.
What Foods Should You Wrap (and Which Ones to Avoid)?
Beeswax wraps work for cool, dry, or lightly moist foods, and they fail with raw animal products and hot dishes. The UC Master Food Preservers state that “beeswax wraps are not recommended for use with raw meat or hot items, as the heat can melt the wax coating.” The underlying reason is structural: The wax surface is porous and hydrophobic, and it cannot be sanitized with hot water (which would melt the coating), so any raw juice that seeps in stays in.
Good Fits
Cut fruit halves (avocado, lemon, melon), washed garden greens and herbs, hard cheese blocks, sandwiches, sourdough loaves and proofing dough, bowl covers for salads or rising bread, and cut vegetables. Wraps preserve homegrown tomatoes and pepper halves nicely because the cotton breathes slightly, which slows surface condensation.
Foods to Avoid
Raw meat, raw poultry, raw fish, hot leftovers (the wax begins melting near 144°F, so anything noticeably warmer than room temperature degrades the seal), highly acidic foods such as pineapple or cut citrus that can degrade the coating with sustained contact, and anything you’d send through the dishwasher or microwave. Liquids leak; never use a wrap as a primary container for soup, broth, or beverages. If you need to cover a bowl of hot chili, let it cool to room temperature first.
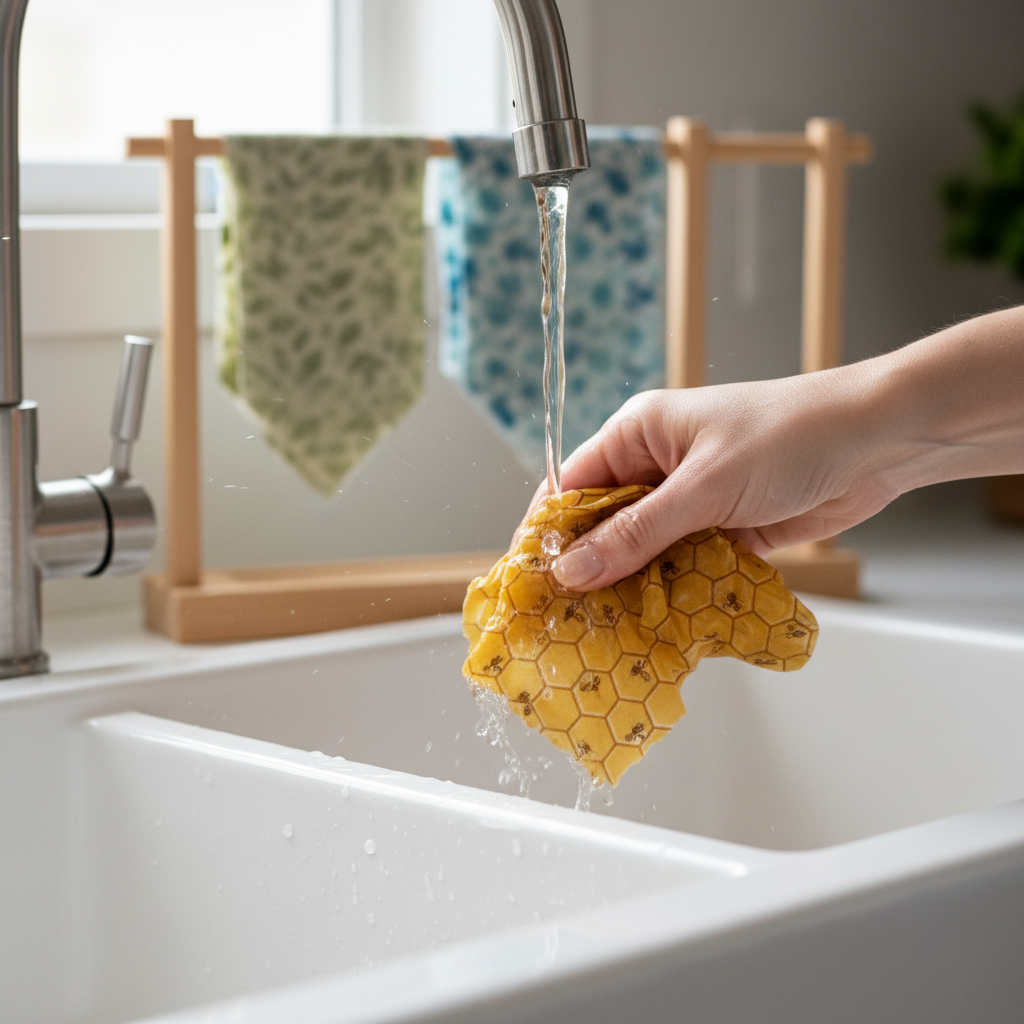
How Do You Wash and Care for Beeswax Wraps?
Cool water is the rule. The UC Master Food Preservers instruct readers to “wash the wraps with mild soap and cold water. Avoid hot water, as it can melt the wax.” Hot water dissolves the wax matrix off the cotton in a single rinse. Most reusable-wrap manufacturers stay below 60°C (140°F), which is cooler than household hot-tap water in many homes.
The procedure is short. Rinse under cool running water, dot a small amount of dish soap on a soft sponge (not a scour pad), wipe both sides, rinse again, and hang on a drying rack. Don’t bunch a wet wrap into a drawer or you’ll trap moisture against the cotton and grow mildew. After drying, fold loosely and store flat or rolled, away from sunny windowsills since UV breaks down wax over time. One personal note from our kitchen: I keep a small stack of dry wraps in a 1-gallon glass jar by the fridge so they’re at hand the moment leftovers hit the counter, and that single change cut our cling film use to zero in about three weeks.
When Do Wraps Wear Out, and How Do You Refresh Them?
A typical home-use wrap lasts about a year. The UC Master Food Preservers note that “with proper care, these wraps can be used for up to a year,” and we’ve seen the same pattern on our property: small bowl-cover wraps wear out faster than the lunch-size squares because they get the most stretching and folding.
Signs It’s Time to Refresh
The wrap stops clinging to itself or to a bowl rim. The cloth shows shiny smooth patches where the wax has rubbed off. You can see the woven warp where the surface used to be coated. The wrap holds a permanent crease instead of relaxing flat. Refresh first; only retire when the cloth itself starts to fail.
How to Refresh in Five Minutes
Lay the worn wrap on a parchment-lined sheet pan, sprinkle a fresh tablespoon of beeswax pellets across the dry patches, and bake at 200°F for 4 to 5 minutes until the new wax flows. Brush even, lift, hang, and the wrap is back in service. A single wrap can usually be refreshed two or three times before the cotton itself begins to break down. Once the cloth tears or develops a sour smell after washing, retire it to the compost bin instead.
What Is the Real Environmental Impact?
Compared with cling film, the math comes out clearly in beeswax’s favor for a homestead-scale household. The University of Hawaii Sea Earth Atmosphere Learning curriculum teaches DIY beeswax wraps in fifth-grade science specifically so students can “design and create their own beeswax wraps to develop alternatives to single use plastics” that contribute to marine debris. One reusable wrap displaces an estimated 100 to 150 square feet of cling film per year of normal use.
End-of-life is where the format genuinely shines. A worn-out wrap is cotton, beeswax, plant resin, and a few drops of jojoba oil. All four ingredients are biodegradable and compost-safe. Cut the wrap into one-inch strips and bury them in your active compost pile; they break down in three to six months in a hot pile and add a small dose of carbon. Compare that with plastic wrap, which the EPA classifies as non-recyclable through curbside streams and which persists in landfills indefinitely. If you’re already running a closed-loop kitchen with backyard food forest harvests and a working compost system, beeswax wraps fit cleanly into that loop without producing any landfill output.
Frequently Asked Questions
Are beeswax food wraps actually food-safe?
Yes for the materials, with limits on use. The FDA classifies both yellow and white beeswax as Generally Recognized as Safe (GRAS) under 21 CFR 184.1973. The wrap itself is safe for cool, ready-to-eat foods like cheese, bread, fruit, and produce. It is not safe as a contact surface for raw meat, raw poultry, raw fish, or anything hot, since the porous wax coating cannot be sanitized with hot water without melting.
Can I put a beeswax wrap in the microwave or dishwasher?
No to both. Microwave heat melts the wax coating off the cotton, ruins the wrap, and at high settings the wax can ignite. The dishwasher’s hot water and detergent strip the coating in a single cycle, leaving plain cloth. Hand-wash with cool water and mild dish soap only, and air-dry on a rack before folding.
Why does my new wrap smell like honey or pine?
That is the beeswax curing, plus any tree resin you used. The honey scent fades after the first two or three uses as the surface oxidizes slightly. If the smell is more like pine, that is the resin (use damar resin instead of pine if you want a milder finish), and it also dissipates with regular use and washing.
Can I wrap raw meat in an emergency?
Don’t. The UC Master Food Preservers explicitly note that “beeswax wraps are not recommended for use with raw meat or hot items, as the heat can melt the wax coating.” Beyond melting risk, the wraps cannot be sanitized in hot water, so any raw-meat juice that contacts the wax stays in the matrix and can support bacterial growth. Use parchment paper or a dedicated meat container instead, then put the meat in a glass dish and cover the dish (not the meat itself) with a beeswax wrap if you need a lid.
Do beeswax wraps actually kill germs on food?
Beeswax has measurable antimicrobial activity in lab testing against species including Staphylococcus aureus, Salmonella enterica, Candida albicans, and Aspergillus niger, according to the 2016 minireview in the Asian Pacific Journal of Tropical Medicine. That activity reduces surface mildew between washes, but it does not sanitize food. Treat a wrap like a clean cloth napkin, not a sterile barrier.
How many wraps does a homestead actually need?
A starter set of six covers most single-household needs: two small (7 inches, for half-fruits and lemons), three medium (10 inches, for sandwiches and bowls), and one large (13 inches, for cheese blocks, dough, and salad bowls). Add more if you bake bread weekly, pack multiple lunches, or use the larger sizes as bowl covers for raised-bed harvest rinses.
Can vegans make a wax-free version?
Yes. Substitute soy wax or candelilla wax for the beeswax at the same weight. Candelilla in particular gives a similar tackiness when blended with damar resin, though the finished wraps tend to be slightly less long-lived than beeswax versions and require more careful temperature control during the oven step.