How to Build a Backyard Smokehouse: DIY Plans for Every Budget
A backyard smokehouse turns cheap cuts into showstoppers and preserves food without electricity. Whether you want to cold-smoke bacon on weekends or hot-smoke a brisket for a crowd, the right structure makes all the difference. This guide walks through every budget tier, from a $50 barrel rig to a permanent cinderblock build, so you can choose the right smokehouse for your space, skill level, and goals.
What Is the Difference Between Cold Smoking and Hot Smoking?
Before you build anything, decide which type of smoking you need, because the two methods require different chamber designs.
Cold smoking runs at temperatures below 90°F (ideally 50–80°F). It adds smoke flavor without cooking the food. Bacon, cheese, salmon, and cured sausages are common cold-smoke candidates. Because food stays in the “danger zone” (40–140°F) during a cold smoke, you must cure or brine the food first. The smoke chamber sits away from the firebox, connected by a tunnel or pipe so the smoke cools before it reaches the food.
Hot smoking runs between 225°F and 275°F and cooks the food as it smokes. Brisket, ribs, chicken, and whole turkeys are classic hot-smoke projects. Hot smoking is more forgiving for beginners because reaching safe internal temperatures eliminates pathogen risk during the smoke itself. Your firebox can be directly below or adjacent to the chamber. If you’re just getting started, check out the full guide to smoking meat for beginners with your first brisket before diving into construction.
Most backyard smokehouses are designed for hot smoking, but a simple modification, a longer intake pipe and an offset firebox, lets the same structure double as a cold smoker in cooler weather.
Source: USDA Food Safety and Inspection Service, Smoking Meat and Poultry, fsis.usda.gov, defines cold smoking as sub-90°F and requires pre-curing before cold smoking raw meats.
Which Budget Tier Is Right for Your Backyard Smokehouse?
Cost, permanence, and build complexity vary widely across smokehouse styles. Here is a straightforward comparison to help you decide where to start.
| Tier | Approx. Cost | Materials | Lifespan | Best For |
|---|---|---|---|---|
| Budget | $50–$75 | Metal barrel or heavy cardboard box | 1–3 seasons | First-timers, renters, small batches |
| Mid-Range | $150–$250 | Exterior-grade plywood + hardware | 5–10 years | Homesteaders, regular use, larger cuts |
| Permanent | $500–$1,500+ | Cinderblock, brick, or stone | Decades | Serious homesteads, whole-animal processing |
The sections below cover each tier in detail. The mid-range plywood build gets the full step-by-step treatment because it hits the sweet spot of cost, capacity, and durability for most backyard homesteaders.
Source: Penn State Extension, Home Meat Curing, extension.psu.edu, notes that a dedicated smoking structure significantly improves temperature consistency over improvised setups.
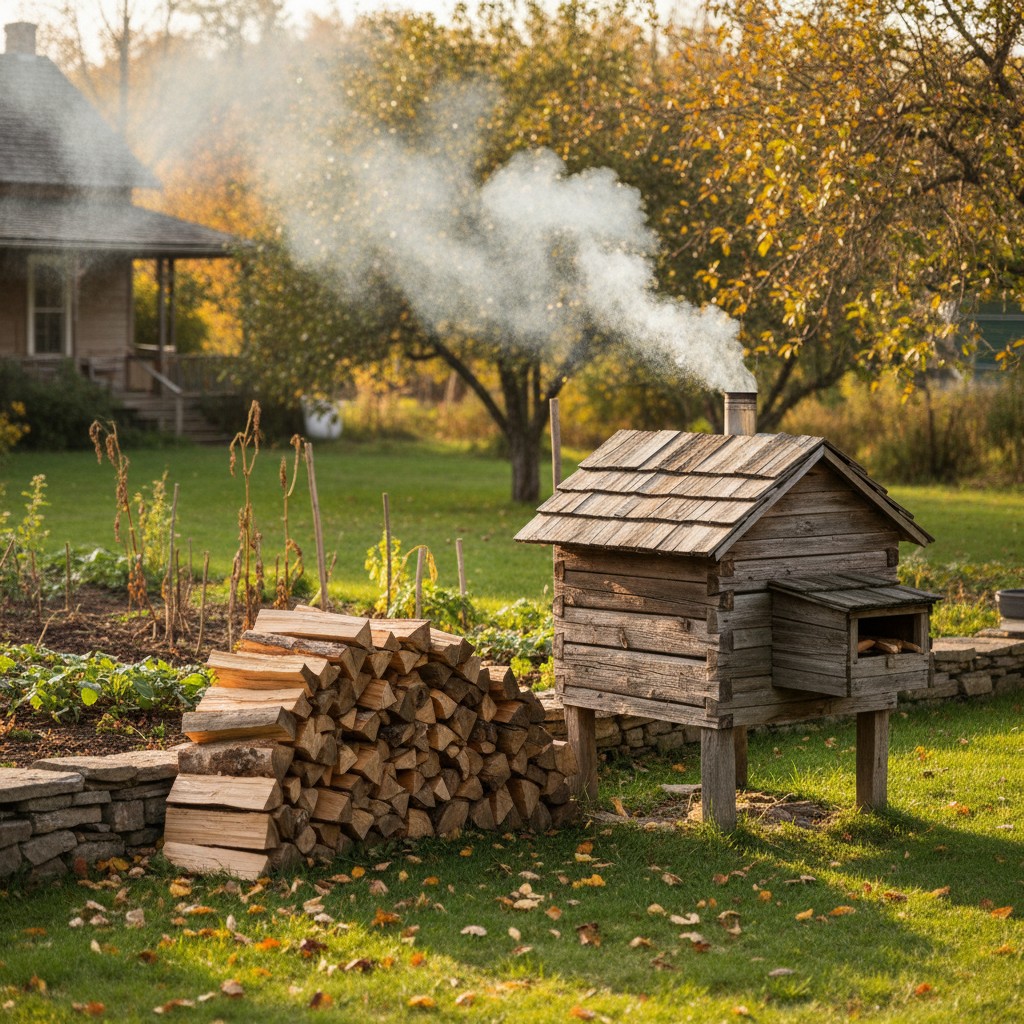
How Do You Build a $50 Barrel or Cardboard Smokehouse?
A 55-gallon metal drum or a large appliance box gets you smoking for almost nothing. These rigs won’t last forever, but they teach you the fundamentals of airflow, temperature, and wood management before you commit to a bigger build.
Barrel smokehouse: Drill or cut a 4-inch hole near the base for the firebox intake and a 2-inch vent hole at the top for exhaust. Weld or bolt two steel rods across the interior at mid-height to hold grates or hanging hooks. Set a small charcoal basket or a cast-iron skillet with wood chips on a propane burner at the base. Control temperature by adjusting the burner flame and the size of the top vent. A $15 dial thermometer mounted through the side completes the setup. Total cost: $40–$65 depending on whether you source the barrel for free (check Craigslist or restaurant suppliers).
Cardboard box smokehouse: Line a large appliance box with heavy-duty foil. Set a hot plate or small electric element inside with a foil pan of wood chips on top. Hang meat from wooden dowels pushed through the sides near the top. This method is cold-smoking only, the cardboard cannot withstand hot-smoking temperatures, and works best in cool weather for cheese, fish, or pre-cured meats. Replace the box after a few uses when the foil lining starts to degrade.
Both options prove the concept and cost almost nothing. If you find yourself smoking every weekend, move up to the plywood build.
Source: Mother Earth News, Building Your Own Smokehouse, motherearthnews.com, documents barrel smokehouses as a viable entry-level method used widely on homesteads since the 1970s.
How Do You Build a Mid-Range Plywood Smokehouse Step by Step?
A plywood smokehouse is the most popular DIY build for good reason: it requires basic carpentry skills, costs under $250, and produces enough interior volume to hang four to six large cuts at once. The design below creates a 2-foot × 2-foot × 4-foot interior, small enough to heat efficiently, large enough to smoke a whole brisket or several racks of ribs.
Materials List
- Three sheets of 3/4-inch exterior-grade plywood (4×8)
- Two-by-four lumber: eight 8-foot lengths for framing
- Box of 2.5-inch exterior screws
- Two door hinges + one latch
- Four metal rods or 1/2-inch rebar (cut to 24 inches) for hanging hooks
- One 4-inch diameter metal stovepipe elbow + 12 inches of pipe (for intake)
- One 4-inch adjustable vent cap (for exhaust at top)
- High-temp silicone sealant
- One dial thermometer with 4-inch stem (mount through the door)
- Optional: sheet metal liner for the firebox floor
Step 1: Frame the Floor and Walls
Cut 2×4s to build a 24-inch × 24-inch floor frame. Cut four vertical corner posts at 54 inches. Screw the corner posts to the floor frame corners. Add a top frame identical to the floor frame. You now have a box skeleton. Sheathe three sides and the top with plywood panels cut to fit flush. Leave the front face open for the door.
Step 2: Build and Hang the Door
Cut a plywood panel to 24 inches wide × 54 inches tall. Attach two hinges to one side and mount it to the front frame. Add the latch to the opposite side. The door should seal tightly, smoke leaking out means heat escaping and inconsistent temperatures. Run a bead of weatherstripping foam tape around the door frame to improve the seal.
Step 3: Install Intake and Exhaust Vents
Cut a 4-inch hole near the bottom of one side wall, about 4 inches up from the floor. Insert the stovepipe elbow so it points downward outside the box, this acts as a rain guard and prevents direct draft. At the top of the opposite side wall (or the roof panel), cut another 4-inch hole and install the adjustable vent cap. Controlling these two openings is how you manage temperature: more open = higher temp and more oxygen; more closed = lower temp and denser smoke.
Step 4: Add Hanging Rods and Grate Support
Drill 1/2-inch holes through both side walls at 12-inch intervals, starting 8 inches below the top frame. Push the metal rods or rebar through these holes. S-hooks on the rods let you hang whole chickens, briskets, or fish. For grate-based smoking (ribs, sausages), cut two wooden cleats and screw them to opposite walls at your desired height, then rest a wire grate across them.
Step 5: Build the External Firebox
The firebox sits outside the smokehouse, connected by the intake pipe. Use cinderblocks, a metal charcoal chimney starter, or a simple campfire ring set 12–18 inches from the smokehouse wall. Run a 4-inch metal pipe from the fire source through the intake hole. A longer pipe (3+ feet) cools the smoke for cold smoking. A shorter pipe (6–12 inches) passes heat into the chamber for hot smoking. Seal around the pipe entry with high-temp silicone.
Step 6: Season the Smokehouse
Before smoking any food, run two or three fires inside the empty smokehouse. This dries out the wood, kills any mold from the plywood, and deposits a light layer of creosote that actually helps preserve the wood over time. After seasoning, your smokehouse is ready to use.
Source: University of Georgia Cooperative Extension, Home Smoking of Meat, extension.uga.edu, provides construction principles including venting ratios and firebox placement guidelines for safe home smokehouses.
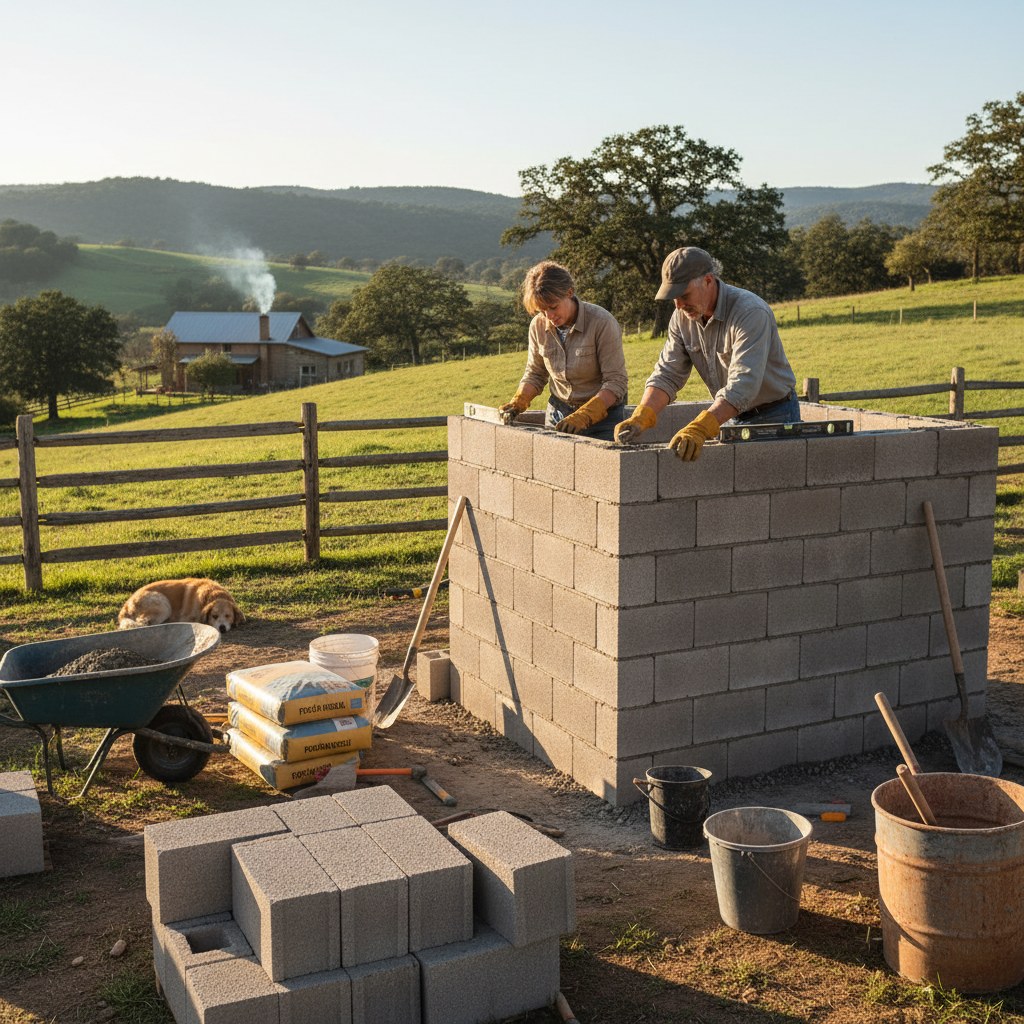
How Do You Build a Permanent Cinderblock Smokehouse?
A cinderblock smokehouse is a long-term investment that pays back over decades of use. It holds heat better than wood, handles larger loads, and won’t rot or warp. The build is heavier on labor than the plywood version, but the construction principles are similar, just substituting masonry for lumber.
Lay a concrete slab footer at least 4 inches thick and larger than your planned interior dimensions by 8 inches on each side. Stack standard 8-inch × 8-inch × 16-inch cinderblocks in a running bond pattern, using mortar between courses. Plan for a 3-foot × 3-foot interior at minimum, cinderblock smokehouses are worth building large since the material cost per cubic foot drops as you scale up. Frame the door opening with metal lintel bars. Roof the structure with a concrete poured slab or heavy corrugated metal roofing sealed with high-temp silicone at the edges.
Install a cast-iron or steel firebox door at the base of one wall, or build a separate external firebox with a buried clay pipe leading to the base. Add steel rebar hanging rods through the block courses near the top. An adjustable metal chimney cap on a 6-inch flue pipe through the roof gives you exhaust control. Once complete, a cinderblock smokehouse can be used year-round, requires almost no maintenance beyond the metal door hardware, and will outlast every other structure on your property. If you enjoy building permanent outdoor structures with fire, the same principles apply to a wood-fired pizza oven build.
Source: National Center for Home Food Preservation, nchfp.uga.edu, recommends non-combustible materials like masonry for permanent smoking structures to reduce fire risk and improve temperature stability.
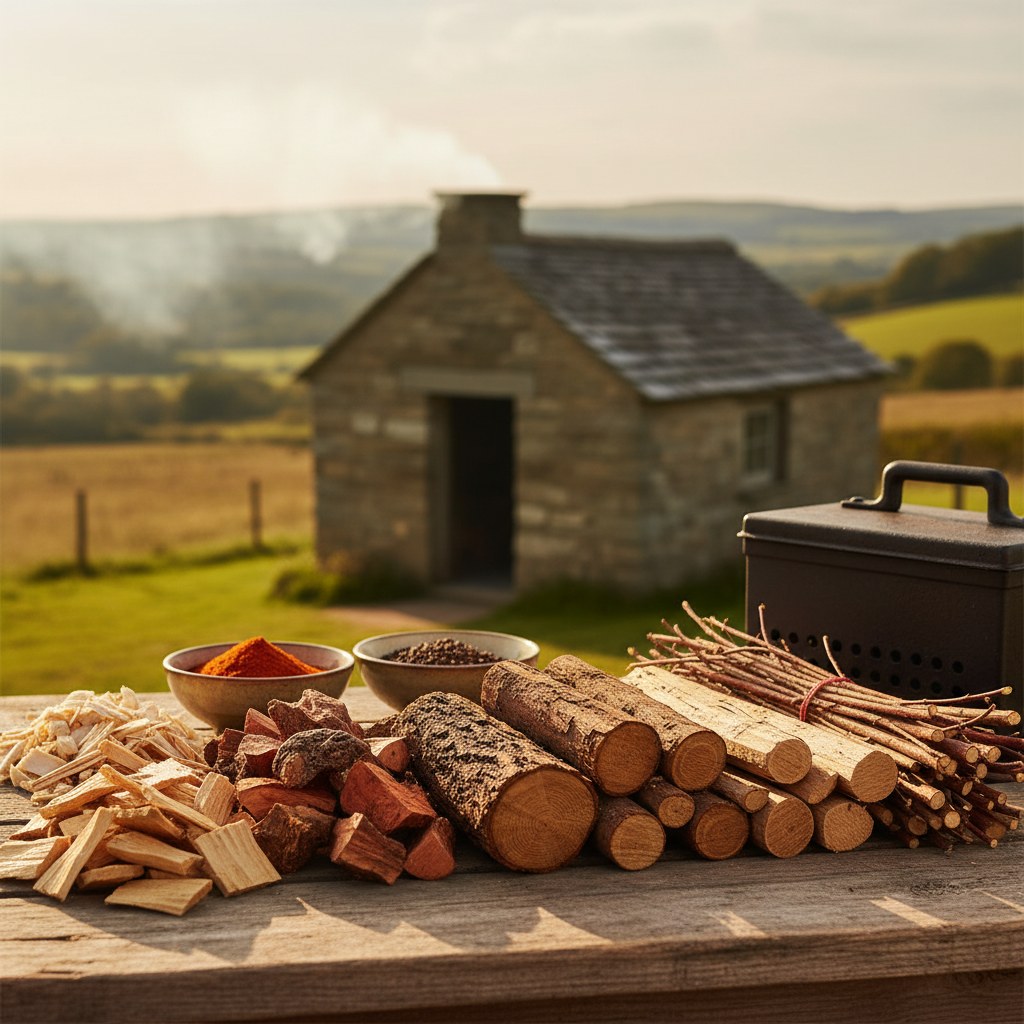
What Wood Should You Use for Smoking?
Wood choice is as important as smokehouse design. The wrong wood produces bitter, acrid smoke; the right wood complements your food and creates the signature flavor profile you’re after. Always use dry, seasoned hardwood, never green wood, treated lumber, or wood with bark still on it (bark contains resins and tannins that produce off flavors).
Hickory is the classic American smoking wood. Strong, earthy, and bold, it pairs with pork shoulder, ribs, and beef brisket. Too much hickory on light proteins like fish creates an overpowering flavor, so use it in moderation for poultry.
Apple burns mild and slightly sweet, producing pale smoke. It works exceptionally well with pork chops, chicken, and turkey. Apple is also the standard choice for cold-smoking cheese because it won’t overpower the dairy.
Cherry adds a fruity sweetness and turns the surface of meat a deep mahogany color. Cherry mixes beautifully with hickory, about 70% hickory and 30% cherry gives you the full smoke ring and a rounded flavor.
Oak is the European standard and the workhorse of competition barbecue. Medium-intensity smoke with an earthy, slightly vanilla finish. Post oak and white oak are preferable to red oak, which can be slightly tannic.
Alder is the go-to for fish, especially salmon. Its light, neutral smoke doesn’t compete with delicate proteins.
For most backyard cooks, a bag of apple and a bag of hickory cover 90% of use cases. Buy chunks rather than chips for longer smokes, chips burn out in 20–30 minutes while chunks sustain smoke for 45–90 minutes per piece.
Source: Kansas State University Research and Extension, Smoking Meat, ksre.k-state.edu, catalogs wood varieties by flavor intensity and recommends seasoned hardwoods, cautioning against softwoods (pine, spruce) that produce sooty smoke from high resin content.
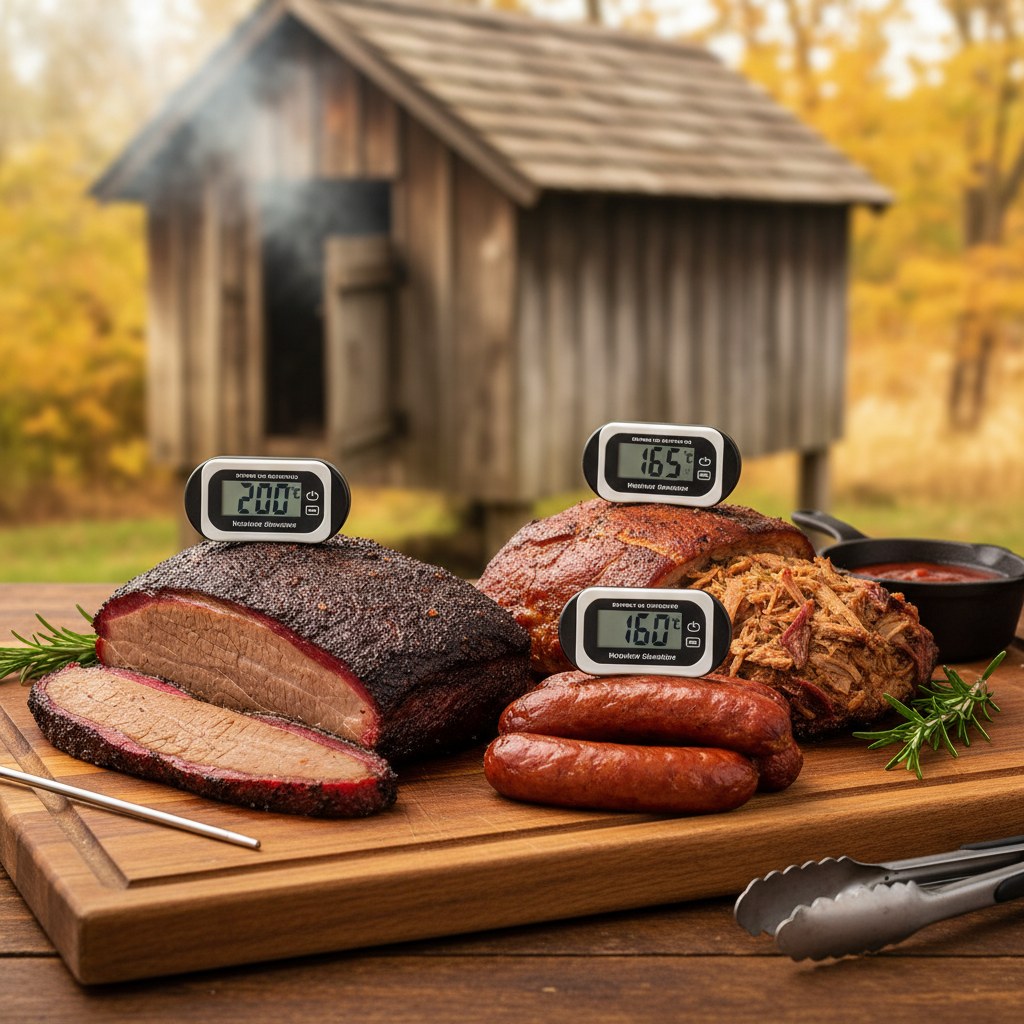
What Are the USDA Safe Internal Temperatures for Smoked Meat?
A smokehouse does not guarantee food safety on its own. Internal temperature is what kills pathogens, not smoke flavor, not color, not cook time. Use a calibrated instant-read thermometer inserted into the thickest part of the meat, away from bone, to confirm you’ve hit the target before pulling food from the smoke.
USDA safe minimum internal temperatures:
- Whole pork (chops, roast, loin): 145°F with a 3-minute rest
- Ground pork and ground beef: 160°F
- Poultry (chicken, turkey, duck, whole or parts): 165°F
- Beef steaks and roasts: 145°F with a 3-minute rest
- Fish and shellfish: 145°F
- Ham (fresh, raw): 145°F with a 3-minute rest
- Ham (pre-cooked, reheating): 140°F
Pork shoulder and brisket are often taken well above minimum safe temperatures, to 195–205°F, because the collagen breakdown that creates tenderness requires sustained heat above 180°F. Hitting 145°F in a brisket is safe, but it won’t be fork-tender. Safety and texture targets are different goals; meet both.
For cold-smoked foods that will not be cooked before eating, the burden of food safety shifts entirely to the cure. Salt and nitrite cures lower water activity and inhibit pathogen growth during the cold-smoke process. Do not cold-smoke raw, uncured meat and serve it as-is.
Source: USDA Food Safety and Inspection Service, Safe Minimum Internal Temperature Chart, fsis.usda.gov, the authoritative reference for all smoked and cooked meat internal temperature targets.
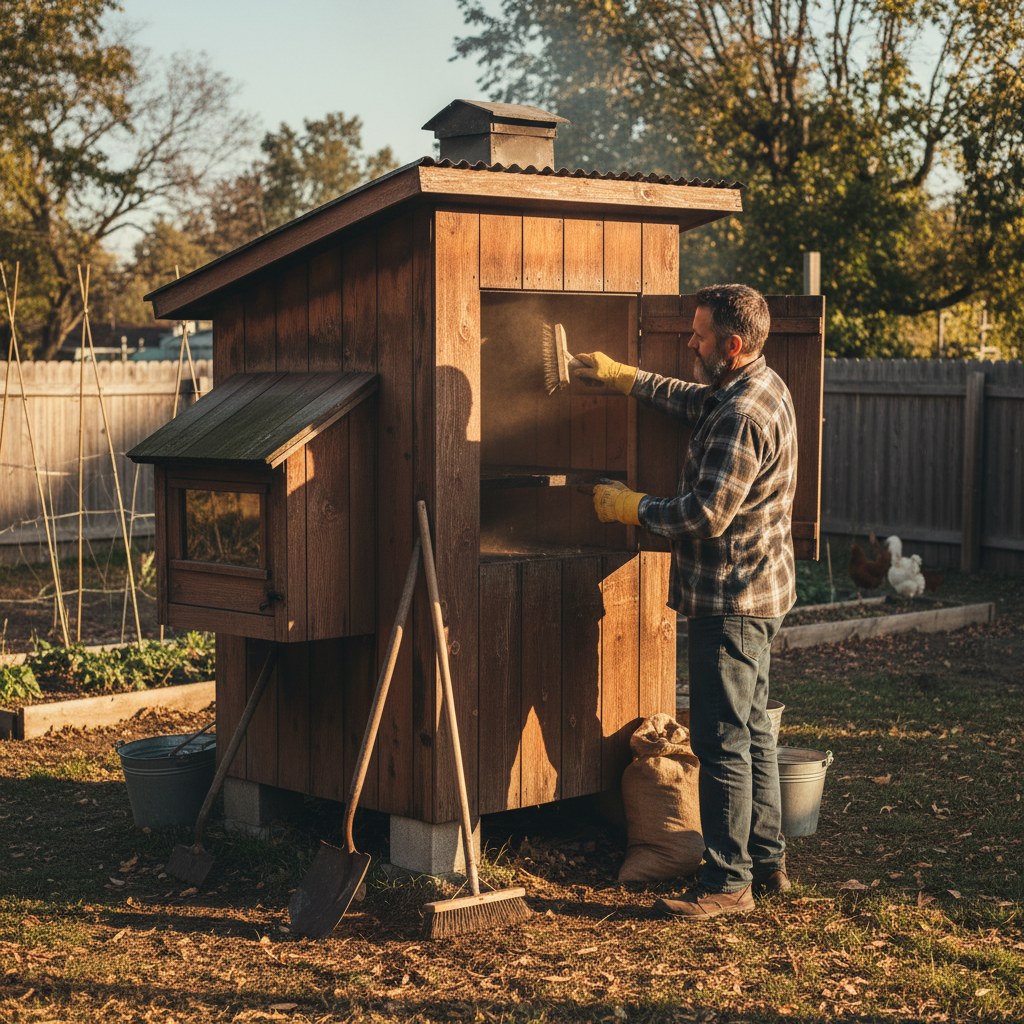
How Do You Maintain a Backyard Smokehouse?
A smokehouse is low-maintenance by design, but a few seasonal tasks keep it performing well and extend its life significantly.
After every use: Scrape ash from the firebox or charcoal grate. Wipe down hanging rods with a dry cloth. Leave the vent open slightly after the fire dies so residual moisture escapes rather than condensing on the walls.
Monthly (or after every 5–6 uses): Inspect the door seal and weatherstripping, a leaking door means inconsistent temperatures and wasted wood. Check the vent cap hardware for rust. Brush the interior walls with a stiff wire brush to remove flaking creosote buildup. Light buildup is normal and slightly protective; heavy buildup is a fire hazard.
Seasonally (spring and fall): For plywood smokehouses, check for water infiltration at the roof seams and re-seal with exterior wood sealant or flashing tape. Treat exterior surfaces with an exterior wood finish rated for high-heat proximity. Inspect floor joists or any contact points with soil for rot.
Annually: Re-season the smokehouse with two or three empty burns before your first heavy-use session of the year. This re-conditions the interior and reveals any cracks or gaps that developed over winter. For cinderblock smokehouses, check mortar joints for cracking, a masonry patching compound fixes hairline cracks before they let in water and freeze-cycle into larger problems.
A well-maintained plywood smokehouse lasts 8–12 years with minimal investment. A cinderblock or brick smokehouse maintained at the masonry level will outlast its builder.
Source: Purdue University Extension, Maintaining Backyard Smoking Equipment, extension.purdue.edu, recommends seasonal inspection and creosote management as the two highest-impact maintenance practices for long-term smokehouse function.
Frequently Asked Questions
Do I need a permit to build a backyard smokehouse?
It depends on your municipality. A permanent masonry smokehouse may require a building permit in areas with zoning codes for accessory structures. Temporary or portable builds (barrel or plywood) generally fall below permit thresholds. Check with your local planning department before pouring a concrete footer. Many rural and agricultural-zoned properties have no restrictions at all.
Can I use a backyard smokehouse in winter?
Yes, with adjustments. Cold ambient temperatures mean your firebox has to work harder to reach smoking temperature. Insulate a plywood smokehouse with rigid foam board wrapped around the exterior during winter use. Cold smoking is actually easier in winter because ambient temperatures help keep the smoke chamber below 90°F. Avoid smoking when temperatures drop below 20°F unless your firebox can sustain output, you’ll burn twice the wood for marginal results.
How long does it take to smoke a brisket in a backyard smokehouse?
At 225–250°F, plan roughly 1 to 1.5 hours per pound for a whole packer brisket. A 12-pound brisket takes 12–18 hours. The “stall”: where the internal temperature plateaus around 155–165°F while moisture evaporates from the surface, can add 2–4 hours to the process. Wrapping in butcher paper or foil at the stall helps push through it faster.
Is treated lumber safe to use inside a smokehouse?
No. Pressure-treated lumber contains copper compounds (modern ACQ or CA treatments) that release toxic fumes when heated. Use untreated exterior-grade plywood or cedar for any interior framing or surfaces. Cedar also has natural rot resistance and adds a mild pleasant aroma during early use before it gets coated with smoke residue.
How do I control temperature in a plywood smokehouse?
Temperature control comes down to three variables: fuel size, intake airflow, and exhaust airflow. More open vents = more oxygen = higher temperature. Larger fuel pieces burn longer and steadier; smaller pieces give you quicker temperature response. Use a $15 dial thermometer mounted in the door and check it every 20–30 minutes for the first few sessions until you develop a feel for your specific setup. A small notebook log of vent positions and fuel amounts per temperature range will make you consistent within a few uses.