Compost Tea: How to Brew Liquid Gold for Your Garden
nn
Key Takeaways
n
- n
- Compost tea is a water extract of finished compost, designed to multiply beneficial microorganisms and deliver them to your soil and plant surfaces.
- Actively aerated compost tea (AACT) is far more effective and safer than passive (non-aerated) steeping methods.
- You need just four things to brew: a 5-gallon bucket, an aquarium air pump, finished compost, and unsulfured molasses.
- Brew for 24-36 hours at 65-80°F, then apply immediately — compost tea begins losing microbial viability within hours of the pump turning off.
- Apply as a soil drench every 2-4 weeks during the growing season for the biggest impact on plant health and soil biology.
n
n
n
n
n
n
nn
If you’ve been composting for any length of time, you already know the magic of turning kitchen scraps and yard waste into dark, crumbly, sweet-smelling humus. Compost tea takes that magic and puts it on fast-forward. Instead of waiting for compost to slowly integrate into your soil over weeks and months, compost tea extracts the living microbial community from finished compost and lets you apply billions of beneficial bacteria, fungi, protozoa, and nematodes directly where your plants need them most.
nn
Is it a miracle cure? No. Nothing in gardening is. But when brewed correctly and applied consistently, compost tea is one of the most cost-effective tools for building soil health and supporting plant vigor. The emphasis is on “brewed correctly” — because done wrong, compost tea can be useless or even harmful.
nn
What Compost Tea Actually Is (And Isn’t)
nn
Let’s clear up a common confusion. Compost tea is not the brownish water that drains out of the bottom of your compost bin. That’s leachate, and it can contain harmful anaerobic bacteria and phytotoxins. Don’t use it on your garden without further processing.
nn
Real compost tea is made by steeping finished compost in water while actively aerating it, then feeding the extracted microbes with a simple sugar source (typically molasses) so they multiply rapidly. The goal isn’t to make a fertilizer — although compost tea does contain some dissolved nutrients. The goal is to create a concentrated living inoculant that introduces and supports beneficial microbial communities in your soil and on leaf surfaces.
nn
Dr. Elaine Ingham, a soil microbiologist who has spent decades studying compost tea, has documented that properly brewed aerated compost tea can contain bacterial populations exceeding one billion organisms per milliliter. Those microorganisms perform critical functions: breaking down organic matter into plant-available nutrients, suppressing disease-causing organisms through competition, and improving soil structure through the production of biological glues that bind soil particles into aggregates.
nn
Aerated vs. Non-Aerated: Why It Matters
nn
There are two basic approaches to making compost tea, and the difference between them is significant.
nn
Non-Aerated (Passive) Steeping
nn
The old-fashioned method: fill a burlap sack with compost, dunk it in a bucket of water, let it sit for a week or two, stirring occasionally. This produces a weakly microbial liquid that’s better than plain water but far less effective than the aerated version. The bigger concern is that without constant oxygen, anaerobic bacteria can proliferate. Some of these — like E. coli and Salmonella — are organisms you definitely don’t want on your lettuce.
nn
Actively Aerated Compost Tea (AACT)
nn
This is the method you want. By pumping air through the water continuously during brewing, you maintain high dissolved oxygen levels that favor beneficial aerobic organisms and suppress harmful anaerobic ones. The molasses feeds the microbes, and the oxygen lets them multiply explosively. A 24-36 hour AACT brew produces a vastly more potent and safer product than passive steeping.
nn
In my experience, there’s no reason to use the passive method unless you simply can’t get an air pump. The results aren’t comparable.
nn
Equipment You Need
nn
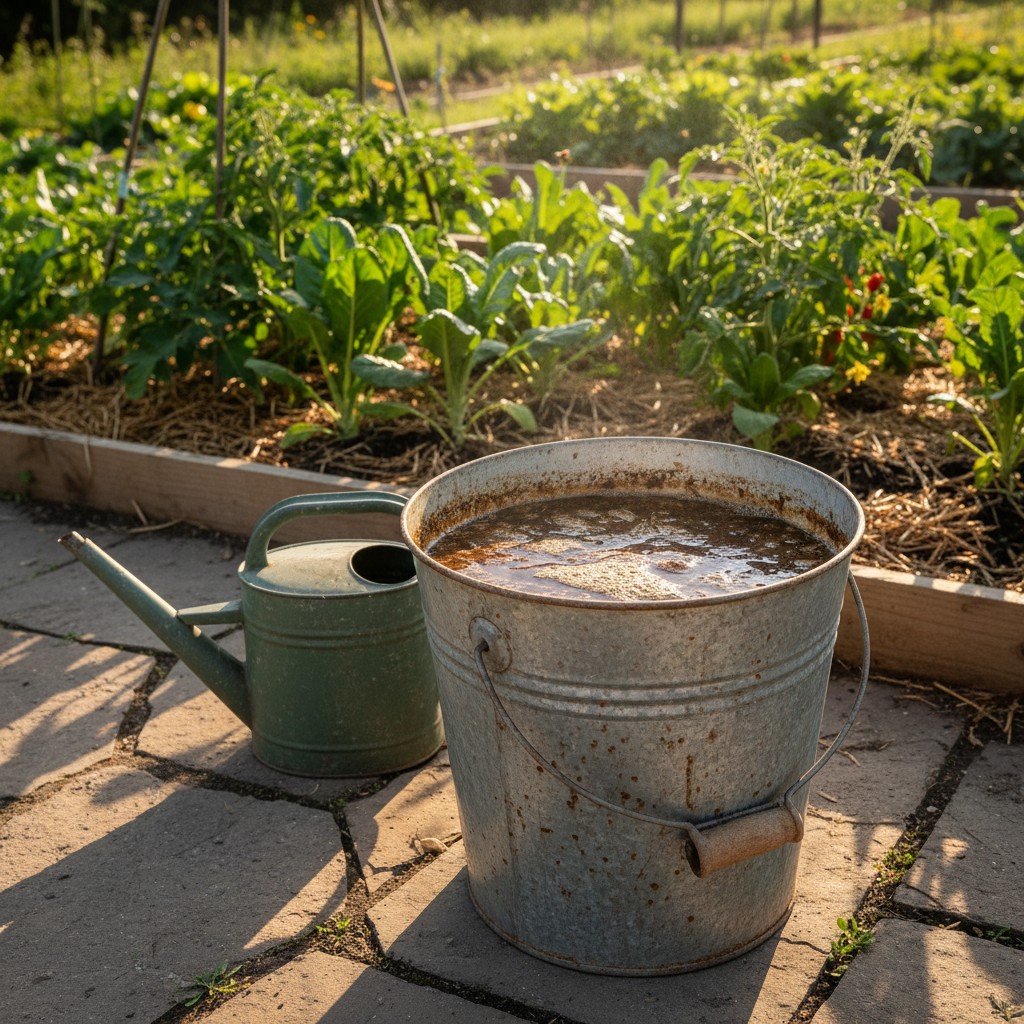
One of the best things about compost tea is how little equipment it requires. Here’s your shopping list:
nn
- n
- A 5-gallon bucket: Food-grade is ideal but any clean bucket works. Avoid buckets that previously held chemicals.
- An aquarium air pump: Don’t go cheap here. You need a pump rated for at least a 30-gallon tank to adequately aerate a 5-gallon brew. Models with two outlets are even better. Budget about $15-$30 for a decent one. Some growers prefer a small pond aerator for more volume — these run $40-$60 and are worth it if you brew regularly.
- Air tubing and air stones: Standard aquarium tubing connected to one or two air stones placed at the bottom of the bucket. Gang valve air stones that produce fine bubbles work best.
- A mesh bag or old pillowcase: To contain the compost and prevent clogging. An old nylon stocking also works. Some brewers skip the bag and strain the finished tea through cheesecloth before application — either approach is fine.
- Finished compost: The most important ingredient. It must be fully finished — dark, crumbly, earthy-smelling, with no identifiable original materials. The quality of your tea can never exceed the quality of your compost.
- Unsulfured blackstrap molasses: Available at most grocery stores. The sulfur in regular molasses can inhibit microbial growth, so unsulfured is essential. This serves as food for the microbes during brewing.
- Non-chlorinated water: Chlorine kills microorganisms, which defeats the entire purpose. If you’re on municipal water, fill your bucket and let it sit uncovered for 24 hours before brewing — the chlorine will off-gas. If your water is treated with chloramine (increasingly common), you’ll need a carbon filter or dechlorinating drops from a pet store, as chloramine doesn’t evaporate.
n
n
n
n
n
n
n
nn
The Brewing Process: Step by Step
nn
Step 1: Fill Your Bucket
n
Add about 4 gallons of non-chlorinated water to your 5-gallon bucket. Leave room at the top to prevent overflow from bubbling.
nn
Step 2: Add Compost
n
Place 4-6 cups of finished compost in your mesh bag and submerge it in the water. If you’re using vermicompost (worm castings), use 2-3 cups — it’s more concentrated.
nn
Step 3: Add Molasses
n
Stir in 1-2 tablespoons of unsulfured blackstrap molasses. This dissolves best in a cup of warm water first. The sugars in the molasses are simple carbohydrates that bacteria metabolize quickly, fueling rapid population growth.
nn
Step 4: Start the Air Pump
n
Place your air stones at the bottom of the bucket and turn on the pump. You should see vigorous bubbling — the surface of the water should be agitated. If the bubbling is weak and gentle, your pump isn’t strong enough.
nn
Step 5: Brew for 24-36 Hours
n
Keep the pump running continuously. The ideal temperature range is 65-80°F (18-27°C). Below 55°F, microbial activity slows dramatically. Above 90°F, you risk killing beneficial organisms. Brew in a shaded area during hot weather.
nn
Squeeze and agitate the compost bag a few times during brewing to release more microbes. You’ll notice the water turning a rich brown color and developing a foamy head — both are good signs. The finished tea should smell earthy and slightly sweet, like forest soil. If it smells sour, putrid, or like sulfur, something went wrong (usually a pump failure allowing anaerobic conditions). Dump it and start over.
nn
Step 6: Apply Immediately
n
This is critical. Once you turn off the air pump, the dissolved oxygen drops rapidly and the aerobic organisms begin dying. Use your compost tea within 4-6 hours of brewing for maximum benefit. Treat it like a perishable product, because it is.
nn
How to Apply Compost Tea
nn
Soil Drench
n
The simplest method. Remove the compost bag, and pour or ladle the tea directly onto the soil around your plants. You can dilute it up to 1:4 with non-chlorinated water to cover more ground, or apply it full strength for maximum impact. A 5-gallon batch, undiluted, covers roughly 50-100 square feet of garden bed.
nn
Foliar Spray
n
Strain the tea through cheesecloth or a fine mesh strainer to remove particles that would clog your sprayer. Transfer to a pump sprayer and mist the tops and undersides of leaves. The beneficial microbes colonize leaf surfaces and can help suppress foliar diseases through competitive exclusion — they essentially crowd out the bad guys.
nn
Apply foliar sprays in the early morning or late evening, not during midday heat. UV radiation from direct sunlight is hard on the microbes.
nn
Application Frequency
n
For general garden maintenance, apply compost tea every 2-4 weeks during the growing season. For transplants, a soil drench at planting time helps establish beneficial microbiology in the root zone immediately. For plants showing signs of stress or disease pressure, weekly applications for 3-4 weeks can provide noticeable improvement.
nn
Common Mistakes to Avoid
nn
- n
- Using unfinished compost: Half-decomposed compost can introduce pathogens and weed seeds into your tea. The compost must be fully mature.
- Letting the pump die mid-brew: Even a few hours without aeration can shift the microbial population toward anaerobic organisms. If your pump fails during brewing, dump the batch and start fresh.
- Storing finished tea: It’s not shelf-stable. Don’t brew on Monday and apply on Thursday. Brew it and use it the same day.
- Over-feeding with molasses: More is not better. Excess sugar can cause bacterial populations to explode so aggressively that they consume all the oxygen, crashing the brew into anaerobic territory. Stick to 1-2 tablespoons per 5 gallons.
- Using chlorinated water: This is the most basic mistake and the most damaging. Chlorine and chloramine are designed to kill microorganisms. If your water smells like a swimming pool, treat it before brewing.
- Applying to edible crops right before harvest: While properly brewed AACT is considered safe, it’s good practice to apply to edible crops at least a few days before harvesting, especially for leafy greens eaten raw. Rinse all produce as you normally would.
n
n
n
n
n
n
nn
What About Store-Bought Compost Tea?
nn
You’ll find bottled “compost tea” or “compost extract” products at garden centers. Be skeptical. Remember that compost tea’s value comes from living organisms, and those organisms start dying the moment aeration stops. A product that’s been bottled, shipped, and sitting on a shelf for weeks or months may contain some residual nutrients, but the living microbial community that makes real compost tea valuable is long gone.
nn
Some products labeled as “compost tea” are actually compost extracts or humic acid solutions — different products with different (and more modest) benefits. They aren’t bad, but they aren’t compost tea. Brewing your own takes 5 minutes of setup time and costs pennies per batch. It’s one of those things that’s genuinely better homemade.
nn
Frequently Asked Questions
nn
Can I use compost tea on houseplants?
n
Absolutely. Dilute it 1:4 with non-chlorinated water and use it as a soil drench when you water. Houseplants in potting mix often have depleted microbial communities, so they respond especially well. Just apply it in a well-ventilated area — the earthy smell is pleasant outdoors but can be strong in an enclosed room.
nn
Is compost tea a fertilizer?
n
Not in the traditional sense. It contains some dissolved nutrients, but the concentrations are low compared to commercial fertilizers. Its real value is biological, not chemical. Think of it as a soil probiotic rather than a soil multivitamin. It helps your soil process and deliver the nutrients that are already there (or that you add through compost and amendments) more efficiently.
nn
How do I know if my brew was successful?
n
Use your nose. Finished AACT should smell earthy, yeasty, and pleasant — like a forest floor or fresh bread. A foamy surface is a good indicator of active microbial populations. If it smells foul, like rotten eggs, sewage, or vinegar, the brew went anaerobic and should be discarded. With practice, you’ll learn to read the signs quickly.
nn
Can I add other ingredients besides molasses?
n
Some brewers add kelp meal, fish hydrolysate, or humic acid to feed different microbial groups. Kelp supports fungal growth, while molasses primarily feeds bacteria. If you want a more fungally-dominated tea (better for perennials, trees, and established beds), try replacing half the molasses with kelp meal. For vegetable gardens, a bacterially-dominated tea (standard molasses recipe) is generally preferred.
nn