Growing Sweet Potatoes: From Slips to Harvest
Key Takeaways
- Sweet potatoes need warm soil (at least 65°F) and a long growing season of 90–120 frost-free days to produce well.
- You can easily grow your own slips from a single organic sweet potato using the water or soil method — no need to buy them.
- Mounding or raised rows improve drainage and warm the soil faster, both critical for sweet potato success.
- Harvest before the first frost, then cure tubers at 80–85°F with high humidity for 7–10 days to convert starches to sugars and toughen the skin for storage.
- Properly cured sweet potatoes can store for 6–8 months in a cool, dark location, making them an outstanding winter food crop.
Sweet potatoes are one of the most rewarding crops you can grow at home, and yet a lot of gardeners in temperate climates assume they can’t grow them. That assumption is wrong. With the right techniques — warm soil, proper slip starting, and good timing — sweet potatoes produce impressive yields even in regions with shorter summers.
What makes sweet potatoes especially appealing for homesteaders is the full package: high caloric density, excellent nutrition (they’re loaded with beta-carotene and fiber), long storage life, and the fact that you can grow next year’s planting stock from this year’s harvest. Once you start growing sweet potatoes, you never need to buy seed or starts again.
Understanding Sweet Potatoes
First, a common point of confusion: sweet potatoes are not yams. True yams are a completely different plant from the genus Dioscorea, native to Africa and Asia. What American grocery stores label as “yams” are almost always just orange-fleshed sweet potatoes. Real yams have rough, bark-like skin and starchy white flesh.
Sweet potatoes (Ipomoea batatas) are in the morning glory family. They’re tropical plants native to Central and South America, which explains their love of heat. Unlike regular potatoes that grow from seed potatoes (tuber pieces), sweet potatoes grow from slips — small shoots grown from a mature tuber.
Variety Selection
- Beauregard — The standard commercial variety and an excellent choice for home growers. Orange flesh, reliable yields, matures in about 100 days. Performs well across a wide range of growing conditions.
- Covington — Slightly sweeter than Beauregard with good disease resistance. Developed by North Carolina State University and quickly becoming a gardener favorite.
- Georgia Jet — One of the earliest-maturing varieties at around 90 days. An excellent choice for northern gardeners with shorter seasons.
- Japanese (Murasaki) — Purple skin with white flesh. Less sweet, more starchy — wonderful roasted or in stir-fries. A nice change from the standard orange types.
- Vardaman — Compact bush-type vines that work well in small gardens and containers. Purple-tinted foliage is ornamental too.
If you’re in a northern climate (zones 4–6), stick with shorter-season varieties like Georgia Jet or Beauregard. You can also extend the season with black plastic mulch, which we’ll cover below.
Growing Your Own Slips
Here’s what most guides won’t tell you: growing slips from a store-bought sweet potato is almost embarrassingly easy, and it saves you a significant amount of money. A single sweet potato can produce 10–15 slips. That’s potentially a whole garden row from one tuber that cost you a dollar.
One important note: buy organic sweet potatoes for slip production. Conventionally grown sweet potatoes are often treated with sprout inhibitors that make them reluctant or unable to produce slips.
Water Method
- Take a healthy, unblemished sweet potato and insert three or four toothpicks around the middle to suspend it over a jar or glass of water.
- Submerge the bottom third of the potato in water. Place it in a warm location (75–80°F is ideal) with indirect light.
- Change the water every few days to prevent bacterial growth.
- Within 2–4 weeks, you’ll see roots forming at the bottom and green shoots (slips) sprouting from the top.
- When slips are 6–8 inches tall with several leaves, gently twist them off the mother potato.
- Place the detached slips in a glass of water until they develop their own roots — usually 5–7 days.
Soil Method
- Fill a shallow tray or container with moist potting mix or sand.
- Lay the sweet potato on its side and press it halfway into the medium.
- Keep it warm (75–80°F) and consistently moist. A heat mat helps enormously.
- Slips will emerge from the eyes within 3–4 weeks.
- When slips are 6–8 inches tall, pull them gently from the potato and root them in water or directly plant them.
Start this process 6–8 weeks before your last expected frost date. In my experience, the soil method produces sturdier slips, but the water method is more fun to watch — especially if you have kids who want to see the process.
Preparing Your Planting Site
Sweet potatoes demand three things from their growing site: warmth, loose soil, and good drainage. Deliver all three and they’ll reward you generously.
Soil Preparation
Loose, sandy loam is the gold standard. Heavy clay soil produces misshapen tubers and makes harvest a nightmare. If your soil is clay-heavy, raised beds or mounded rows are the solution.
Build raised mounds or ridges about 8–10 inches high and 12 inches wide. Space rows 3–4 feet apart. The mounding serves multiple purposes: it warms faster in spring, improves drainage, and gives tubers room to expand without resistance.
Go easy on nitrogen. Unlike leafy crops, sweet potatoes fertilized with too much nitrogen produce gorgeous vines and disappointing tubers. A soil that’s moderately fertile with good phosphorus and potassium levels is ideal. Compost worked into the mounds at planting time is usually sufficient.
Warming the Soil
Sweet potatoes won’t grow — at all — in cold soil. The soil temperature needs to be at least 65°F, and 70°F+ is where things really take off. In cooler climates, lay black plastic mulch over your mounds two weeks before planting. This can raise soil temperature by 5–10°F, which makes a genuine difference.
Cut X-shaped slits in the plastic for planting, and leave it in place all season. It doubles as weed control.
Planting Slips
Wait until at least two weeks after your last frost date. Soil should be consistently at 65°F or warmer. Don’t rush this — cold soil will set slips back severely, and they may never recover.
- Plant slips 12–18 inches apart along the top of your mounded rows.
- Bury the stem so that only the top cluster of leaves sits above the soil line. Roots will form along the buried stem nodes.
- Water well immediately after planting.
- Slips will look wilted and pathetic for the first week. Don’t panic. They’re establishing roots and will perk up once they settle in.
If you’re planting on a cloudy day or in the late afternoon, slips transplant with less stress. Full midday sun on freshly planted slips is tough on them.
Growing Season Care
Watering
Sweet potatoes need about an inch of water per week during the growing season. They’re more drought-tolerant than many crops once established, thanks to their deep root system. The critical period for water is the first month after planting while roots establish, and during tuber formation (roughly 60–90 days after planting).
Reduce watering in the last 3–4 weeks before harvest. Excess moisture late in the season can cause tubers to crack or develop a watery texture. It also increases the risk of rot in storage.
Vine Management
Sweet potato vines will spread aggressively — 10 feet or more in every direction from a single plant. This is normal and actually beneficial, as the dense leaf canopy suppresses weeds. Some gardeners lift and redirect vines that wander out of bounds, but don’t cut them unless they’re encroaching on other crops.
There’s a common piece of advice to “turn” vines so they don’t root at the nodes and form small secondary tubers. Honestly, in a home garden, this matters less than in commercial production. Let the vines do their thing.
Fertilizing
If you amended the soil with compost before planting, sweet potatoes rarely need additional fertilization. If your plants seem sluggish, a side-dressing of potassium-rich fertilizer (like wood ash or kelp meal) at the midpoint of the season can boost tuber development. Again, avoid high-nitrogen fertilizers.
When and How to Harvest
Timing the harvest is crucial. Sweet potatoes must come out of the ground before the first frost. Frost kills the vines, which is cosmetic, but if the cold reaches the tubers in the soil, it can damage them and drastically reduce their storage life.
Most varieties are ready 90–120 days after transplanting slips. Signs of readiness include:
- Yellowing lower leaves on the vines
- Tuber shoulders poking out of the soil at the base of the plant
- Calendar math — count back from your average first frost date and plant accordingly
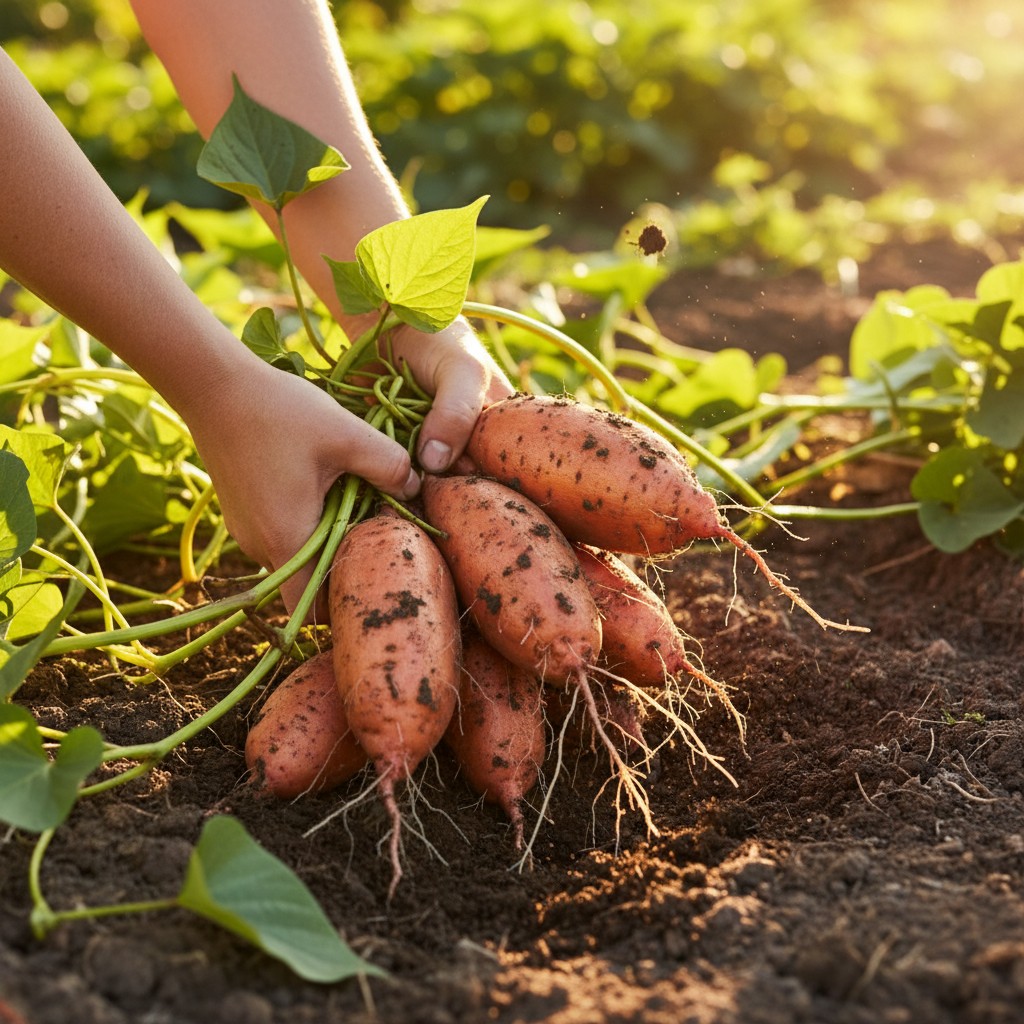
Digging Sweet Potatoes
This is where things get delicate. Sweet potato skin is paper-thin at harvest and bruises or cuts easily. Every wound reduces storage life.
- Cut the vines back to about 6 inches above the soil line.
- Using a digging fork (not a shovel), start 12–18 inches out from the plant base and work inward carefully. Tubers can extend surprisingly far from the stem.
- Lift the entire root mass gently. Shake off loose soil but don’t wash the tubers.
- Handle every tuber like an egg. Seriously. A cut or gouge that seems minor will become a rot entry point in storage.
In my experience, the biggest mistake people make is digging too close to the plant. Sweet potato tubers spread out in unpredictable directions. Go wide and dig carefully.
Curing: The Step You Cannot Skip
Freshly harvested sweet potatoes taste starchy and bland. Curing is what transforms them into the sweet, creamy tubers we love. This is not optional.
Curing does two things: it converts starches into sugars (dramatically improving flavor), and it allows small wounds and cuts in the skin to heal over, creating a tougher skin that protects during storage.
How to Cure
- Place unwashed tubers in a warm location — 80–85°F with 85–90% humidity. A bathroom with a space heater, a greenhouse, or even a covered porch in warm weather works.
- Spread tubers in a single layer on newspaper or wire racks so air circulates around them. Don’t stack them.
- Cure for 7–10 days.
- After curing, move tubers to long-term storage conditions.
If you can’t achieve those exact conditions, don’t stress. Even curing at 70–75°F with moderate humidity for two weeks will improve flavor and storage quality. Just do the best you can.
Long-Term Storage
After curing, store sweet potatoes in a cool, dark, well-ventilated space at 55–60°F with moderate humidity. A basement, root cellar, or unheated closet often works well. Don’t refrigerate — temperatures below 50°F cause chilling injury that develops hard spots in the flesh and off-flavors.
Properly cured and stored sweet potatoes will last 6–8 months, getting you well into winter and early spring. Check stored tubers periodically and remove any that show signs of soft spots or rot before they spread to neighbors.
One tuber from your best-performing plants can produce all the slips you need for next year. Set aside a few prime specimens specifically for slip production, and you’ll never need to buy sweet potato starts again.
Frequently Asked Questions
Can I grow sweet potatoes in containers?
Yes, and it works surprisingly well. Use at least a 20-gallon container — larger is better. Fill with loose, well-draining potting mix. Plant one slip per container. Black or dark-colored containers absorb heat, which sweet potatoes love. Container-grown sweet potatoes typically produce smaller but still respectable yields. Just remember that containers dry out faster and may need daily watering in hot weather.
My sweet potatoes cracked during growing. What happened?
Cracking is almost always caused by inconsistent watering — specifically, a heavy rain or deep watering after a dry spell. The tuber absorbs water and expands faster than the skin can stretch. Maintain consistent soil moisture through the growing season and taper off watering near harvest time. Mulching helps enormously with moisture consistency.
Can I eat sweet potato leaves and shoots?
Absolutely. Sweet potato greens are a nutritious, commonly eaten vegetable across much of Asia, Africa, and the Caribbean. The young leaves and shoot tips can be sauteed like spinach, added to soups, or eaten raw in salads. They’re rich in vitamins A and C, iron, and protein. Growing sweet potatoes for dual harvest — greens all summer and tubers in fall — is one of the best calorie-per-square-foot strategies for a home garden.
Why did my sweet potatoes come out long and stringy instead of plump?
Long, thin sweet potatoes are usually the result of heavy or compacted soil that resists tuber expansion. Sweet potatoes need loose, friable soil to form those plump, rounded shapes. Mounding, raised beds, and generous amendments of compost and sand (in clay soils) will fix this for next season. Overcrowding — planting slips too close together — can also cause thin, elongated tubers.