Smoking Meat for Beginners: Your First Brisket
Key Takeaways
- Start with a whole packer brisket (12–15 pounds) for the most forgiving cook, or a flat if you want something smaller.
- Low and slow is the rule, maintain your smoker between 225°F and 250°F throughout the cook.
- Expect “the stall” around 150–170°F internal temperature. It’s normal and can last for hours.
- The brisket is done when it reaches 195–205°F internal temperature and a probe slides in like butter.
- Resting for at least one hour (preferably two) is not optional, it’s where the magic happens.
Brisket: The Mountain Every Pitmaster Must Climb
Brisket is the final boss of backyard smoking. It’s large, tough, expensive, and unforgiving of shortcuts. It demands patience measured not in minutes but in hours, sometimes 12 to 16 of them. Get it right and you’ll produce something that rivals any barbecue restaurant. Get it wrong and you’ve got a $70 piece of shoe leather.
But here’s the thing: brisket isn’t actually complicated. It’s just slow. The technique is straightforward, the ingredients are minimal, and the smoker does most of the work. What separates a great brisket from a mediocre one is attention to a handful of details and the willingness to not rush the process.
This guide walks you through everything from buying your first brisket to slicing and serving it. If you’ve smoked ribs or pork shoulder, you already have the foundational skills. Brisket just asks for a bit more precision.
Understanding the Brisket
A whole brisket (called a “packer”) comes from the lower chest of the steer. It’s a heavily worked muscle, which means it’s packed with connective tissue, primarily collagen. That collagen is your enemy at low temperatures and your best friend at high ones. Above 160°F, collagen begins to break down into gelatin, which is what gives properly smoked brisket its melt-in-your-mouth tenderness and rich mouthfeel.
A packer brisket has two distinct muscles:
- The flat: The larger, leaner, more uniform section. This is what you get when you buy just a “brisket flat” at the grocery store. It slices beautifully but can dry out more easily.
- The point: The smaller, fattier, more irregularly shaped section that sits on top of the flat. It’s more forgiving because of the intramuscular fat, and it’s what gets chopped for burnt ends.
For your first cook, I recommend a full packer brisket in the 12- to 15-pound range. It sounds counterintuitive, shouldn’t a beginner start small?, but the fat cap and the point provide insurance against drying out. A standalone flat is much less forgiving.
Choosing Your Brisket
Look for a brisket that’s flexible. Pick it up from one end, if it bends and drapes easily, the meat is well-marbled and will render down nicely. A stiff brisket has less intramuscular fat and is harder to cook tender.
USDA Choice is the sweet spot for value. USDA Prime has more marbling and is more forgiving, but it costs significantly more. Select grade is lean and challenging, skip it for your first attempt. If you can find a Certified Angus Beef brisket, that’s a reliable option.
Budget about $4 to $6 per pound for Choice, $7 to $10 for Prime.
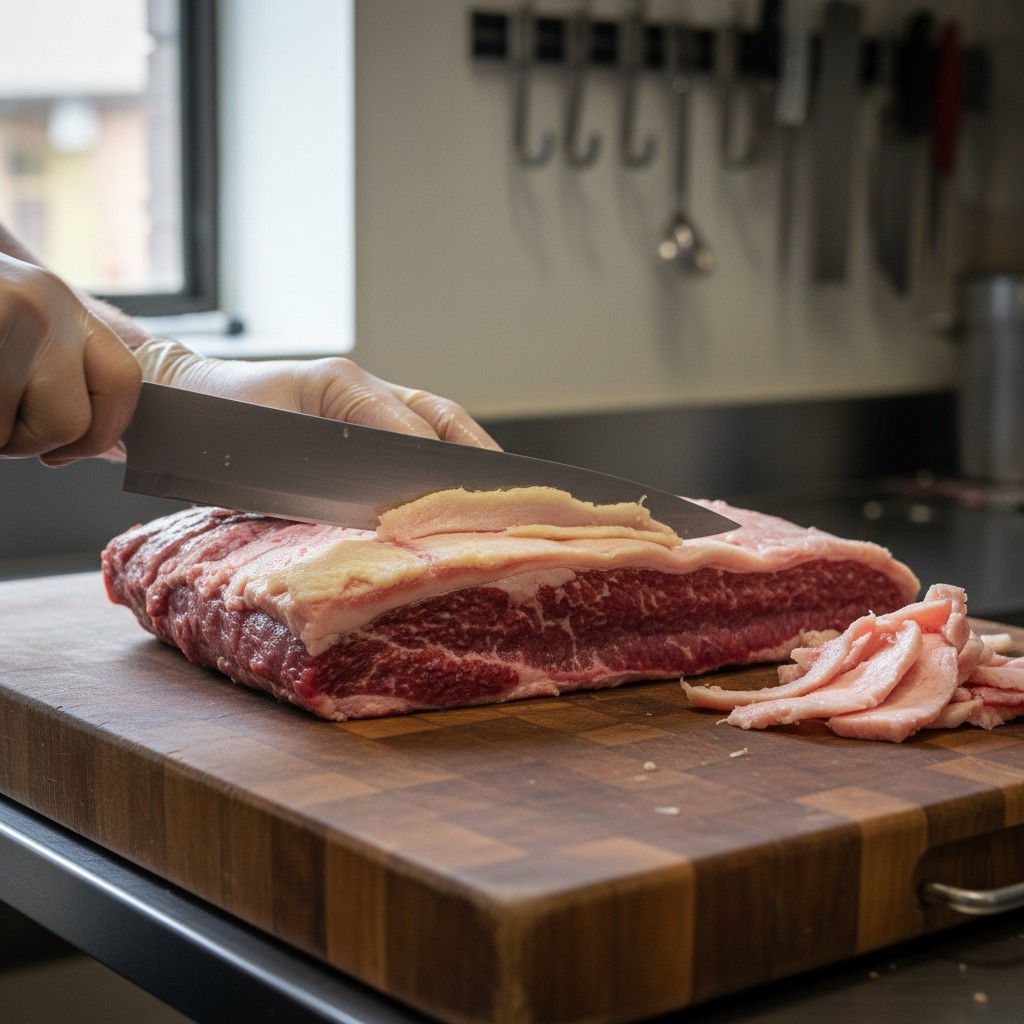
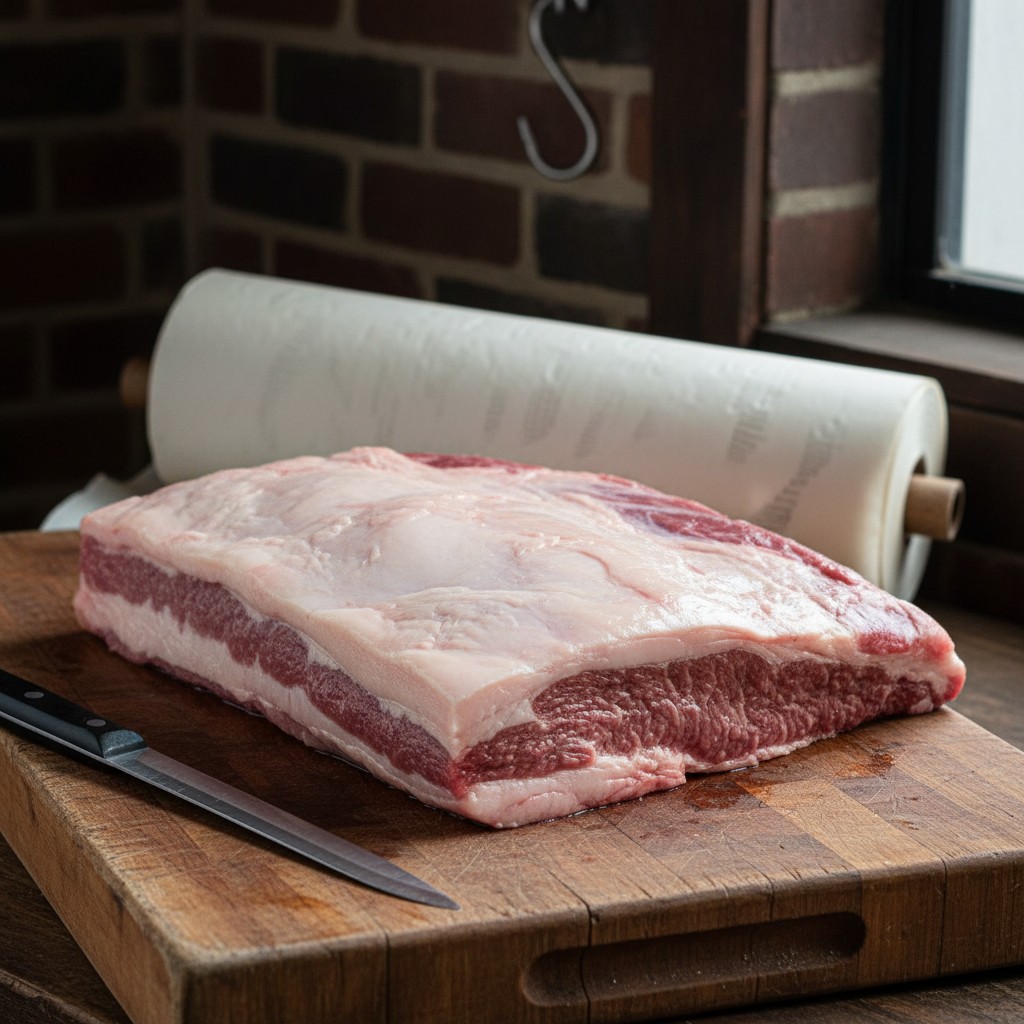
Trimming the Brisket
Don’t skip this step. A well-trimmed brisket cooks more evenly, develops a better bark, and renders fat more efficiently.
Take the brisket out of the packaging and place it fat-cap up on a large cutting board. Using a sharp, stiff boning knife or a long slicing knife:
- Trim the fat cap down to about ¼ inch thick. You want some fat for moisture protection, but thick chunks of fat won’t render during the cook, they’ll just sit there.
- Remove any hard, waxy-looking fat. This is found especially where the flat and point meet. It won’t render. Get rid of it.
- Square off the edges of the flat. Thin, tapered edges will overcook and dry out long before the center is done. Trim them so the flat is a relatively uniform thickness.
- Remove the silver skin on the bottom of the flat, that thin, tough membrane that won’t break down during cooking.
Save the trimmings. Beef fat trimmings can be rendered into tallow for cooking or ground into burger meat.
A sharp knife makes trimming dramatically easier. If your knife can’t shave a thin layer of fat cleanly, sharpen it before you start.
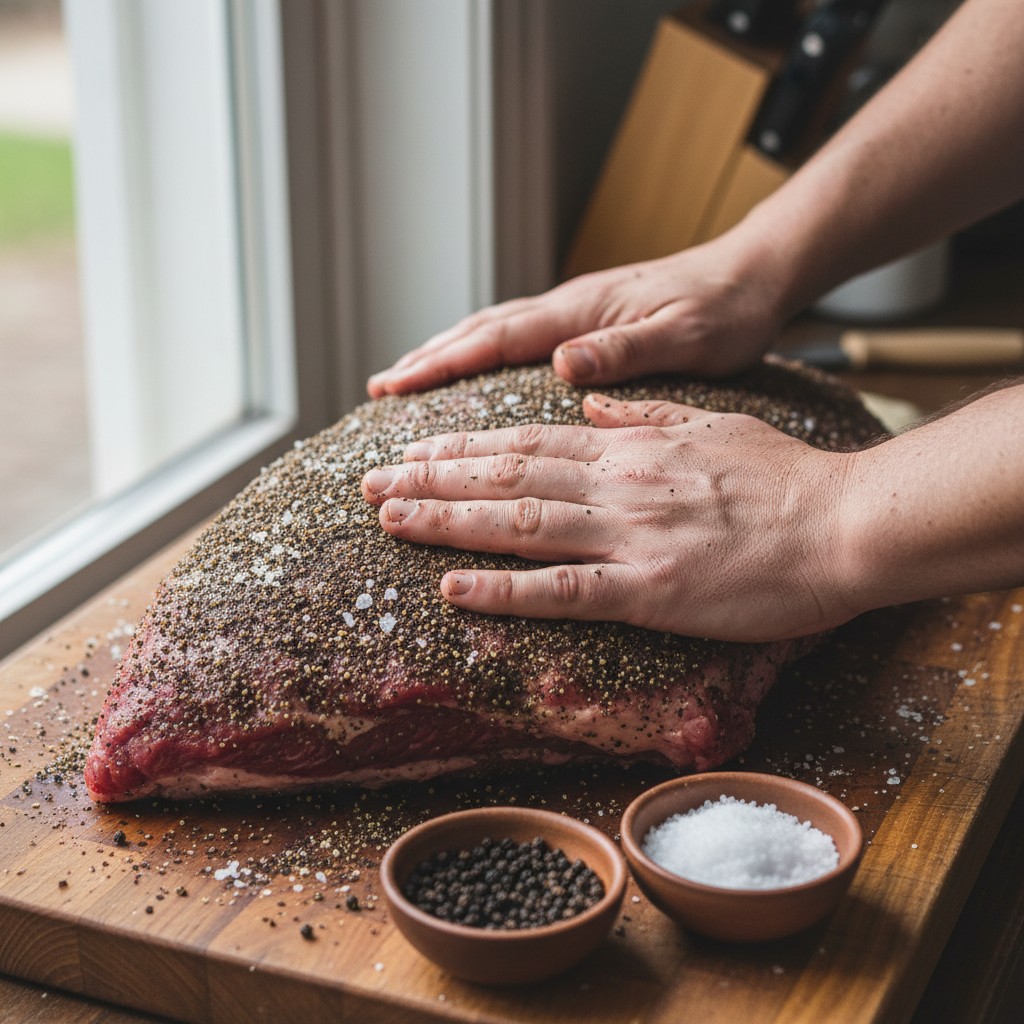
The Dry Rub
Texas-style brisket keeps it simple: coarse black pepper and kosher salt, roughly 50/50 by volume. This is called a “Dalmatian rub” (black and white, like the dog). It lets the beef flavor shine and builds a spectacular bark.
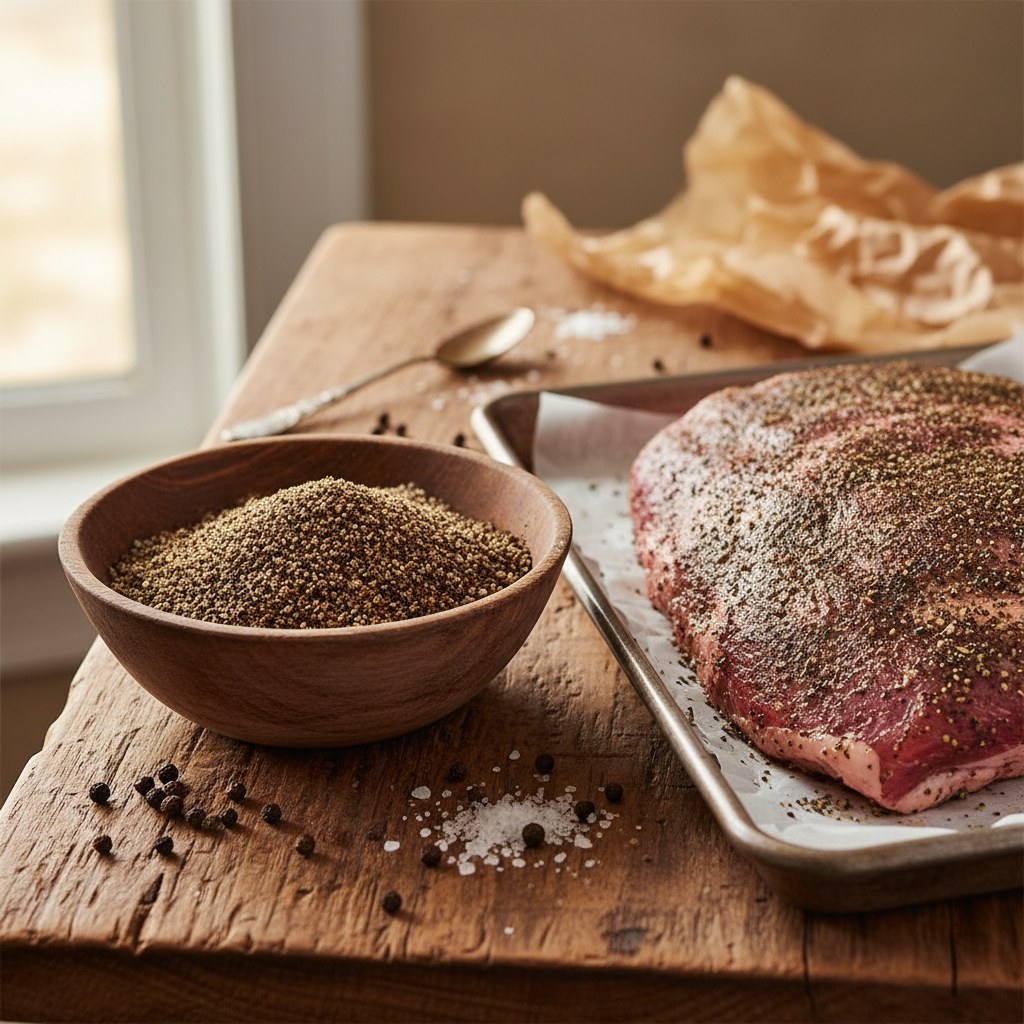
Use coarse-ground black pepper, the 16-mesh grind from a restaurant supply store is ideal. Pre-ground fine pepper will taste harsh. If you’re grinding your own, set the grinder to its coarsest setting.
Apply the rub generously on all sides. You want a thick, even coating that looks like almost too much. It’s not. As the brisket cooks, the bark compresses and the fat renders through it. What looks like an excessive amount of rub on raw meat becomes the perfect amount on the finished product.
Optional Rub Add-Ins
- Garlic powder: 2 tablespoons adds a savory depth
- Onion powder: 1 tablespoon for sweetness
- Paprika, 1 tablespoon for color
- Cayenne: ½ teaspoon for just a whisper of heat
Apply the rub at least 1 hour before cooking, or the night before. Salting overnight (dry-brining) draws moisture to the surface, dissolves the salt into the meat, and produces better seasoning throughout.
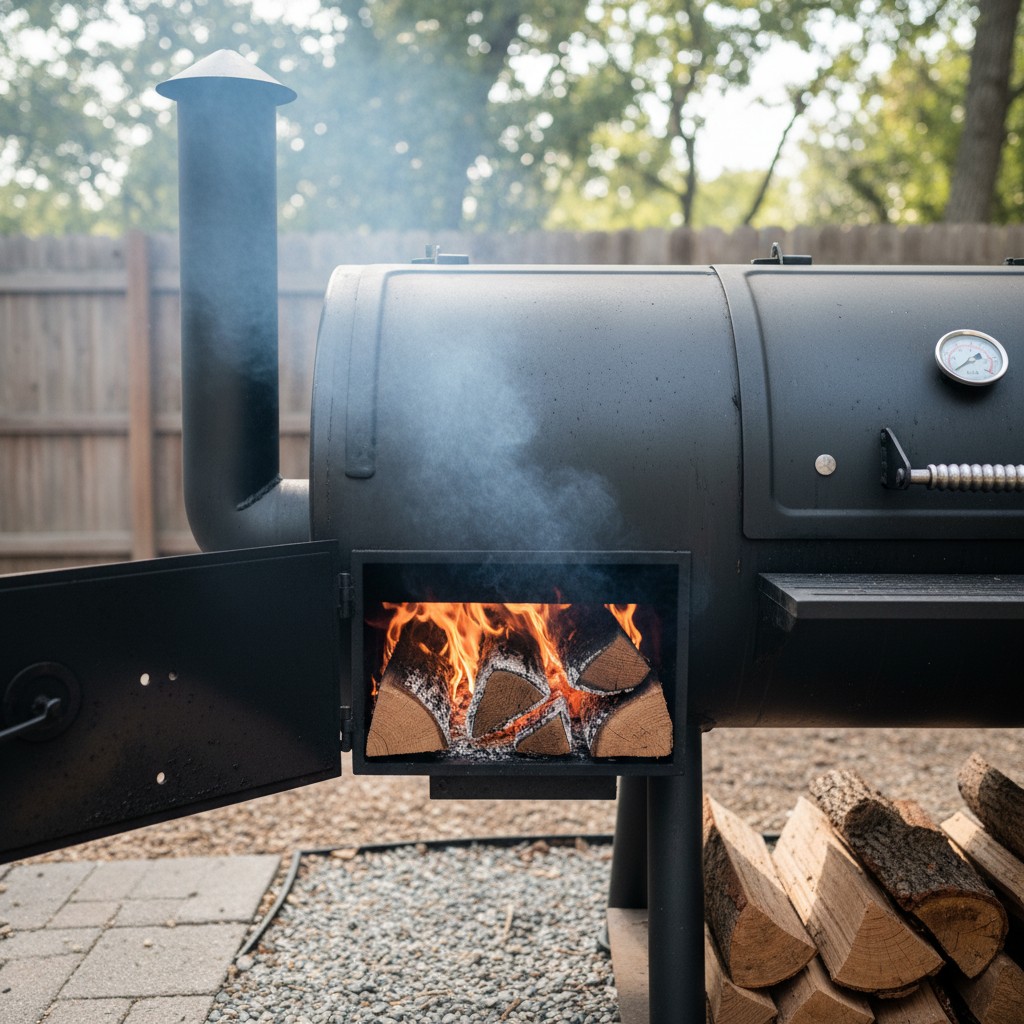
Smoker Setup
Any smoker that can hold a steady temperature between 225°F and 250°F for 12+ hours will produce great brisket. Here’s how the common types perform:
- Offset smoker: The classic. Burns wood or charcoal plus wood. Requires more attention to maintain temperature but produces incredible flavor.
- Pellet smoker: Set-and-forget convenience. Less hands-on but makes very good brisket. Ideal for a first cook.
- Kamado (Big Green Egg, Kamado Joe). Excellent heat retention. Burns charcoal with wood chunks for smoke.
- Weber Smokey Mountain. Affordable water smoker that holds temperature surprisingly well. A favorite of competition cooks.
Wood Choice
Oak is the standard for brisket. It burns clean and long, providing a medium smoke flavor that complements beef without overpowering it. Post oak is the traditional Texas choice.
Hickory works well but can turn bitter if you use too much. Cherry adds a subtle sweetness and beautiful color to the bark. Mesquite burns hot and strong, use it sparingly or mix it with milder wood.
Homesteader note on cherry wood: seasoned, dried cherry chunks are safe and excellent for smoking. However, wilting or freshly cut cherry leaves and green branches contain cyanogenic glycosides that are toxic to livestock, particularly dangerous to horses, cattle, and goats that graze near cherry trees after windstorms or pruning. If you source cherry wood from your own property, keep pruned branches away from animals until fully dry, and never use green wood for smoking in any case (it produces acrid, sooty smoke regardless of species).
Avoid pine, cedar, or any resinous softwood. They’ll produce acrid, unpleasant smoke.
Never use the following as smoking fuel: oleander (Nerium oleander), all parts are highly toxic and burning it releases those toxins into smoke; yew (Taxus), toxic alkaloids survive combustion; eucalyptus, contains compounds that produce medicinal off-flavors and can cause headaches at enclosed-space concentrations; pressure-treated or painted lumber of any kind, pressure-treated wood contains copper-based preservatives (formerly arsenic) and painted wood releases heavy-metal pigment residues; and any wood you cannot positively identify. The principle is simple: if it wouldn’t be safe to eat the bark, don’t burn it near food.
The Cook
Getting Started
Bring your smoker to a stable 225°F to 250°F before putting the brisket on. Place the brisket fat-cap up or down, opinions differ fiercely on this. A reasonable starting point: fat-cap toward your primary heat source. If the heat comes from below, fat-cap down to protect the meat. If from above or the side, fat-cap up.
Insert a leave-in meat thermometer into the thickest part of the flat, avoiding fat pockets. If you don’t own a leave-in thermometer, buy one. Seriously. Trying to smoke a brisket without monitoring internal temperature is like driving blindfolded.
The First Phase (Room Temperature to 150°F)
For the first several hours, the brisket absorbs smoke and builds bark. The internal temperature climbs steadily. Don’t open the smoker unless you need to manage your fire. Every time you open the lid, you lose heat and extend the cook.
Light, thin smoke is what you’re after, often described as “thin blue smoke.” Billowing white smoke means your fire is smoldering and will deposit creosote, making the bark bitter.
The Stall (150°F to 170°F)
At some point, usually around 150°F to 170°F internal temperature, the brisket’s temperature will stop climbing. It may even drop a degree or two. This is “the stall,” and it can last anywhere from 2 to 6 hours.
What’s happening is evaporative cooling. Moisture from inside the meat reaches the surface and evaporates, cooling the brisket at the same rate the smoker is heating it. It’s the same principle as sweating. The stall ends when enough moisture has evaporated that the heating rate overtakes the cooling rate.
You have two options:
- Wait it out. Just maintain your temperature and be patient. This produces the best bark but adds hours to the cook.
- Wrap the brisket (the “Texas crutch”). Wrapping in butcher paper or aluminum foil stops evaporation and pushes through the stall faster. Butcher paper is the preferred choice, it’s porous enough to let some moisture escape, preserving more bark texture than foil. Foil works but can make the bark soggy.
For your first brisket, I recommend wrapping in butcher paper when the internal temperature hits 165°F. It shortens the cook by 2 to 4 hours and still produces great results.
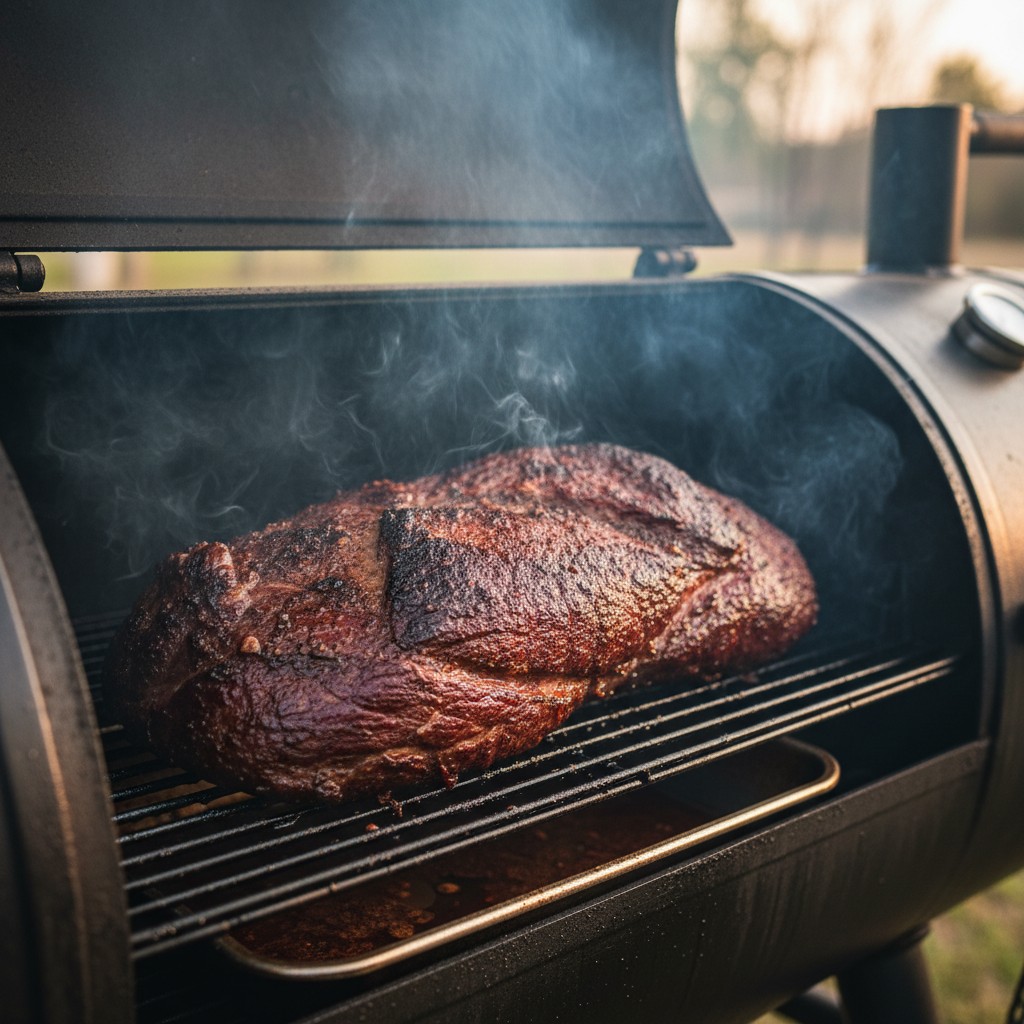
The Final Push (170°F to 205°F)
After wrapping (or after the stall breaks naturally), the temperature resumes climbing. This is when collagen is converting to gelatin and the brisket is becoming tender.
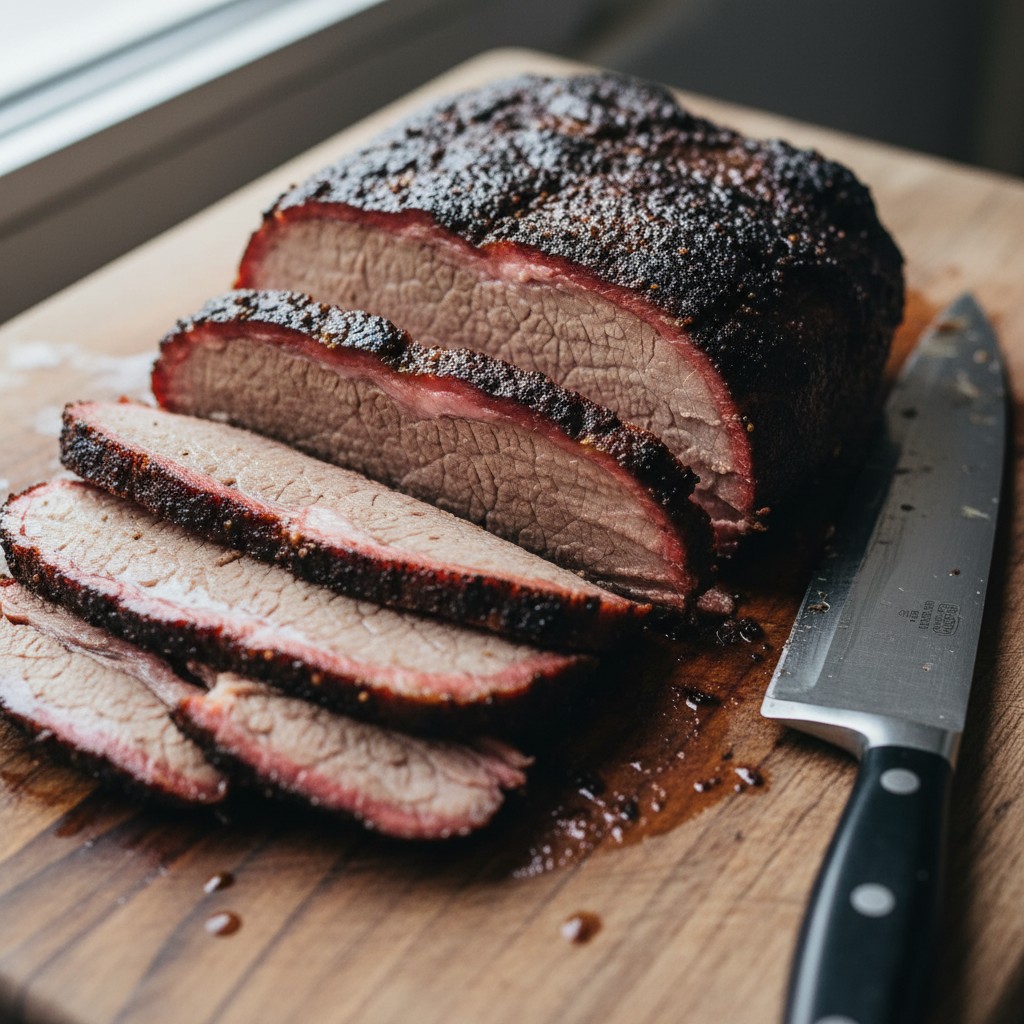
Start checking for doneness at 195°F. The classic test: insert a thermometer probe or toothpick into the thickest part of the flat. It should slide in with almost no resistance, like poking a stick of room-temperature butter. If there’s any grab or toughness, keep cooking.
Most briskets finish between 200°F and 205°F, but doneness is about feel, not a specific number. Some briskets probe tender at 197°F; others need 208°F. Trust the probe test over the thermometer reading.
Resting: The Step That Makes or Breaks Your Brisket
This is not optional. Do not slice into a brisket straight off the smoker. You’ll lose all the rendered fat and juices, and the meat will be drier than it should be.
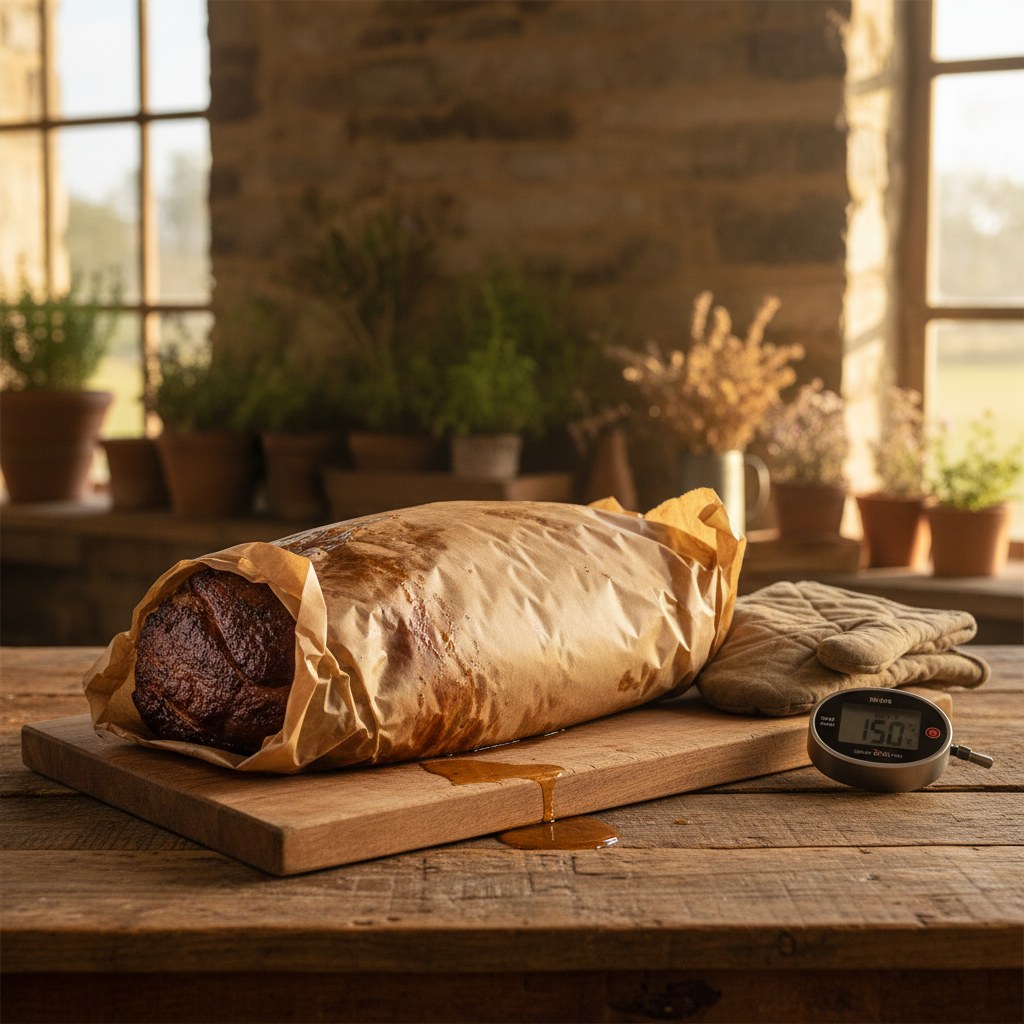
If the brisket is wrapped, leave the wrap on. If it’s unwrapped, wrap it now in butcher paper or a couple of layers of towels. Place it in a dry cooler (no ice) and close the lid. The insulated cooler will hold the temperature safely above 140°F for up to 4 hours.
Rest for a minimum of 1 hour. Two hours is better. Some competition pitmasters rest for up to 4 hours and swear by it.
During the rest, the muscle fibers relax and reabsorb juices. The internal temperature slowly drops from the 200°F range to about 145°F to 155°F, which is the ideal serving temperature.
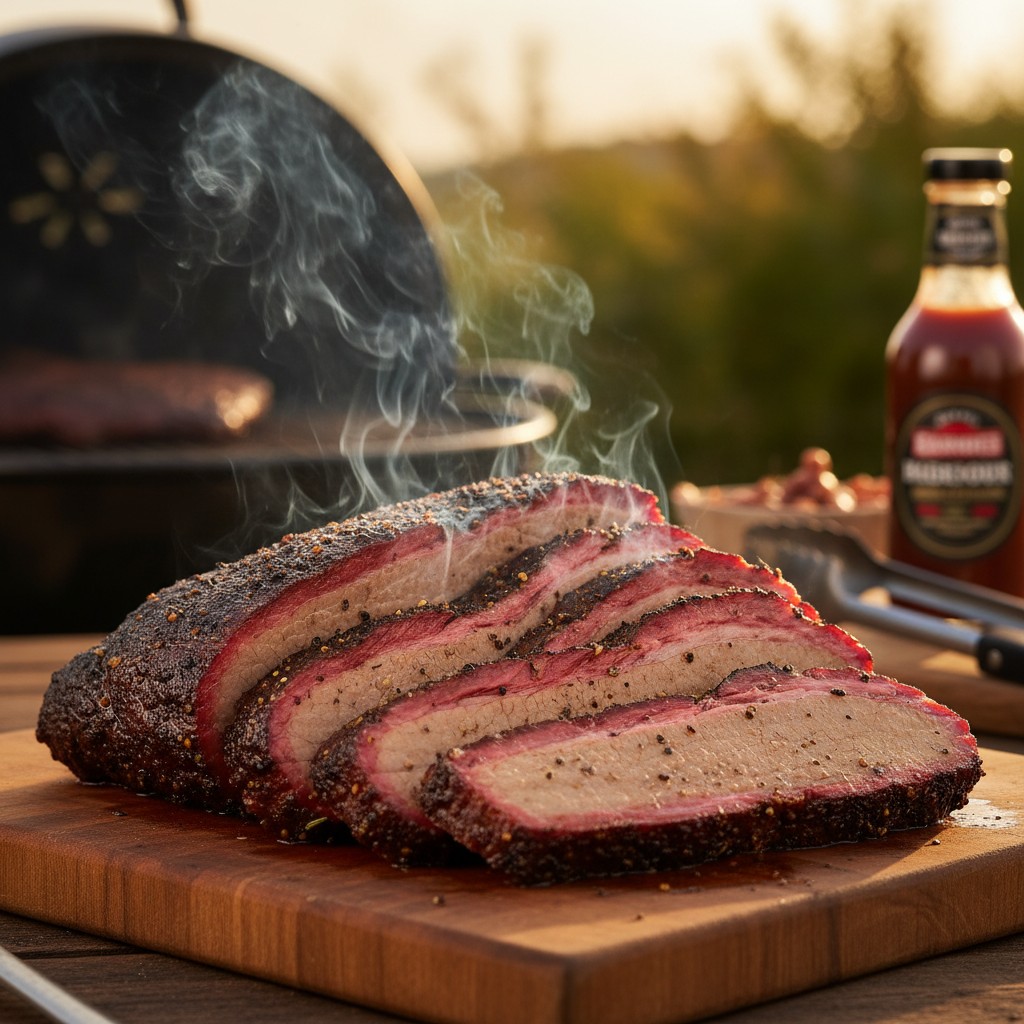
Slicing and Serving
Always slice against the grain. This is crucial. The grain direction in the flat runs one way, and the grain in the point runs roughly perpendicular to it. Before you start cutting, identify the grain direction in both muscles.
Slice the flat first. Cut across the grain in slices about the thickness of a pencil, roughly ¼ inch. A properly cooked flat will hold together when you pick up a slice but pull apart easily with a gentle tug.
The point can be sliced the same way (remember, the grain runs differently) or cubed into burnt ends, chunks tossed in sauce and returned to the smoker for another hour.
Use a long, sharp slicing knife. A dull knife shreds the bark and tears the meat.
Common Mistakes to Avoid
- Cooking too hot. Temperatures above 275°F cook the outside faster than the collagen can break down inside. The result: dry, tough brisket with a nice bark. Not worth it.
- Not enough seasoning. When in doubt, add more salt and pepper. The bark can absorb a lot.
- Opening the smoker too often. Check your fire management and thermometer, then walk away.
- Panicking during the stall. It’s normal. Walk the dog. Mow the lawn. Read a book.
- Skipping the rest. I can’t say this enough. Rest your brisket.
- Slicing with the grain. Against the grain. Always against the grain.
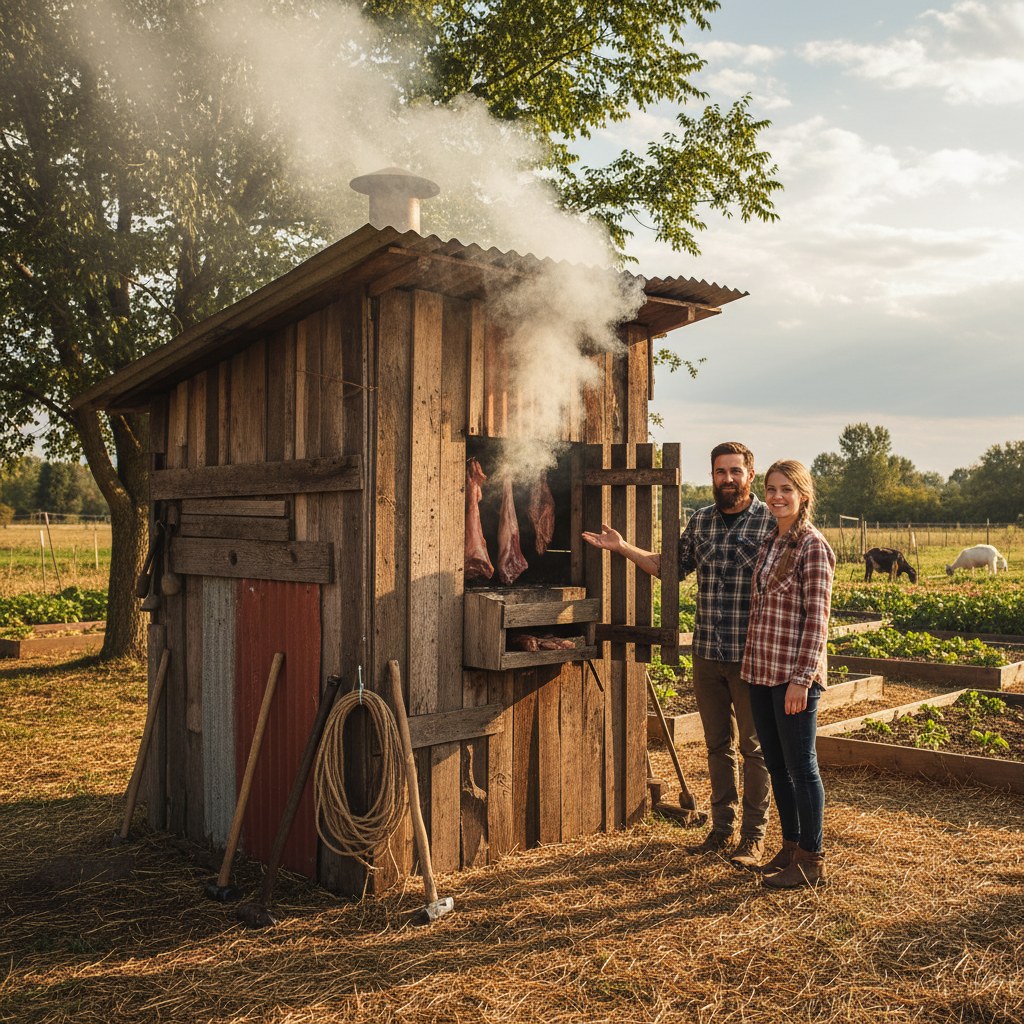
🌱 From Our Homestead
Smoking meat was something I thought required expensive equipment until we built a simple smokehouse from scrap lumber. Our first smoked pork shoulder took twelve hours and the flavor was incredible, we have been smoking everything from bacon to salmon ever since.
Frequently Asked Questions
How long does it take to smoke a brisket?
Plan for roughly 1 to 1.5 hours per pound at 225°F to 250°F, plus resting time. A 14-pound packer brisket typically takes 14 to 18 hours total, including the stall. Some cooks take even longer. Start early: a brisket that finishes ahead of schedule can rest in a cooler for hours without losing quality. A brisket that isn’t done when guests arrive is a problem with no good solution.
Fat side up or fat side down?
This is one of barbecue’s great debates. Fat-cap down protects the meat from direct heat in smokers where the heat source is below (like an offset or a pellet smoker). Fat-cap up lets the rendered fat baste the surface. Try fat-cap toward the heat source for your first cook and adjust from there based on your results.
Can I smoke a brisket on a regular charcoal grill?
Yes, using a two-zone setup. Bank your charcoal on one side and place the brisket on the other, as far from the coals as possible. Add a couple of wood chunks to the charcoal for smoke. The challenge is maintaining low temperature for 12+ hours, you’ll need to add charcoal every 45 to 60 minutes. It works, but it’s labor-intensive. A dedicated smoker makes the process much more manageable.
What do I do with leftover brisket?
Leftover brisket reheats beautifully. Slice it, wrap it tightly in foil with a splash of beef broth, and warm it in a 250°F oven for 30 minutes. It also makes incredible tacos, sandwiches, chili, baked potatoes, and fried rice. Chopped brisket freezes well for up to 3 months, vacuum seal it with some of the pan juices for best results.