Fall Garden Cleanup: What to Do (and What to Leave)
Key Takeaways
- Remove diseased plant material (tomato blight, powdery mildew, squash vine borer-affected stems) — these should not go in your compost pile.
- Leave healthy perennial stems, leaf litter, and seed heads standing through winter to provide habitat for beneficial insects and overwintering pollinators.
- Fall is the ideal time to plant cover crops, add compost, and mulch beds for winter — you’re setting next year’s garden up for success.
- Clean, sharpen, and oil garden tools before storage. Fifteen minutes of tool maintenance in fall saves money and frustration in spring.
- The old advice to strip gardens bare in fall is outdated. A balanced approach — removing disease risks while preserving beneficial habitat — produces healthier gardens.
There’s a particular kind of satisfaction in putting your garden to bed for the winter. The frenzy of the growing season is over. The canning is done. And now there’s this quiet window where you get to take care of the space that’s been taking care of you all year.
But fall garden cleanup is also where a lot of well-meaning gardeners get it wrong. The traditional advice was to strip everything to bare soil — pull every plant, rake every leaf, leave the garden looking like a blank slate. That approach is tidy, but it’s ecologically destructive. You’re removing insect habitat, exposing soil to erosion, and throwing away organic matter that your garden actually needs.
Modern understanding of garden ecology calls for a more nuanced approach. Some things need to come out. Other things should stay right where they are. Let me help you sort out which is which.
What to Remove: The Non-Negotiables
Diseased Plant Material
This is the one area where aggressive cleanup is absolutely the right call. Disease organisms survive winter on infected plant debris and come roaring back the following spring to reinfect your new plants.
Remove and dispose of (do not compost) any plants affected by:
- Tomato and potato blight (early blight and late blight) — The Phytophthora and Alternaria fungi that cause blight overwinter on plant debris. Pull every stem, leaf, and dropped fruit. Bag it and send it to the landfill, or burn it if your area allows.
- Powdery mildew-affected squash and cucumber vines — While powdery mildew is less devastating than blight, leaving heavily infected vines ensures a head start for mildew next season. Remove them.
- Clubroot-affected brassicas — This soil-borne disease persists for years. Remove all root material carefully.
- Squash vine borer-infested stems — Borer larvae are still inside those stems. Remove and destroy them before the larvae pupate in the soil.
- Any plant with bacterial or viral disease — Bacterial wilt, mosaic virus, fusarium — if the plant was sick, get it out.
Here’s what most guides won’t tell you: your home compost pile almost certainly doesn’t get hot enough to kill disease organisms. Commercial composting facilities do, but backyard piles typically don’t sustain the 140°F+ temperatures needed. Don’t risk reintroducing pathogens by composting diseased material. Trash it.
Annual Vegetable Plants That Are Done
Spent tomato cages draped with dead vines, collapsed bean plants, rotting pepper stems — even if they’re disease-free, these don’t serve much purpose standing in the garden over winter. Pull them, chop them up, and add them to your compost pile (assuming they’re healthy). Clear the bed space so you can add compost and mulch.
Weeds — Especially Seed-Bearing Weeds
Any weed that went to seed needs to come out now. A single pigweed plant can produce over 100,000 seeds. A lamb’s-quarter plant can produce 70,000. Every seed-bearing weed you leave standing is investing in a much larger weed problem next spring. Pull them, bag the seed heads, and compost only the green, non-seeding portions.
What to Leave: The Surprising Part
This is where the conversation has shifted significantly in recent years, and for good reason. Research from organizations like the Xerces Society for Invertebrate Conservation has shown that leaving some garden debris standing through winter is critically important for beneficial insect populations.
Standing Perennial Stems
Many native bee species — including mason bees, leafcutter bees, and small carpenter bees — overwinter inside hollow plant stems. When you cut every stem to the ground in fall, you’re destroying their winter habitat. Leave the standing stems of perennials like echinacea, rudbeckia, bee balm, and sunflowers through winter. Cut them back in late spring when you see new growth emerging and daytime temperatures are consistently above 50°F.
Fallen Leaves (With a Caveat)
A light layer of fallen leaves on garden beds is beneficial. Leaves suppress weeds, insulate soil, protect overwintering beneficial insects, and break down into leaf mold — one of the finest soil amendments nature produces.
The caveat: thick mats of whole leaves (particularly large leaves like oak and maple) can smother plants and create soggy, anaerobic conditions. The solution is simple. Run your mower over leaves to shred them before using them as garden mulch. Shredded leaves break down faster, stay in place better, and don’t mat into impenetrable layers.
In my experience, 2–3 inches of shredded leaves makes an outstanding winter mulch for garden beds. By spring, much of it has broken down and can be worked into the soil during bed preparation.
Seed Heads for Birds
Coneflower, sunflower, rudbeckia, and ornamental grass seed heads are winter food sources for goldfinches, chickadees, and other songbirds. Leaving them standing adds winter interest to the garden and supports wildlife through the lean months. This is one of those cases where “messy” is actually better for the ecosystem.
Root Systems of Healthy Plants
The roots of pulled annual plants leave channels in the soil that improve drainage and aeration. But the roots of living perennials and cover crops do even more — they hold soil in place over winter, feed soil organisms, and maintain soil structure. Don’t rip out everything just for the sake of a clean-looking bed.
Planting Cover Crops
Cover crops are one of the smartest things you can do in the fall garden. They protect bare soil from erosion, suppress winter weeds, feed soil biology, and — depending on the species — add nitrogen for next year’s crops.
Best Fall Cover Crops for Home Gardens
- Crimson clover — A nitrogen-fixing legume that adds fertility to the soil. Beautiful red flowers in spring before you turn it under. Sow 6–8 weeks before your first frost date.
- Winter rye — The toughest, most cold-hardy cover crop. Germinates quickly, establishes even in cool soil, and produces massive root systems that break up compaction. Sow up to 4 weeks before first frost. Note: it can be difficult to turn under in spring if it gets too tall — mow it before it heads out.
- Daikon radish (tillage radish) — Grows a large taproot that punches through compacted soil layers, then winterkills and decomposes, leaving deep channels for water and air. Sow 4–6 weeks before first frost.
- Field peas and oats mix — A classic combination. Peas fix nitrogen; oats provide biomass and soil protection. Both winterkill in cold climates, leaving an easy-to-manage mulch in spring.
Scatter seed, rake it in lightly, water if rain isn’t expected, and let the cover crop do its thing all winter. In spring, mow or cut the cover crop 2–3 weeks before you want to plant, then either turn it into the soil or leave it as surface mulch.
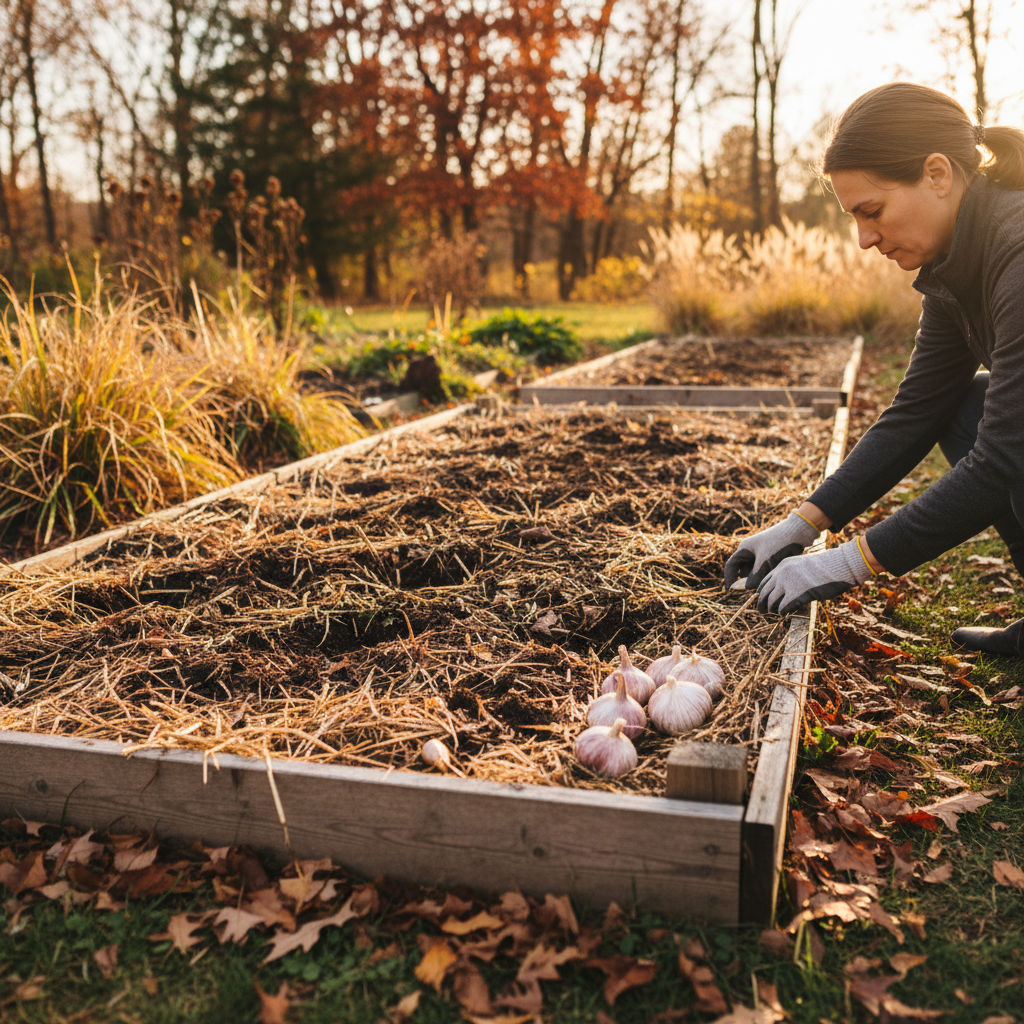
Putting Beds to Sleep: The Process
Here’s my fall bed preparation routine, and it takes surprisingly little time once you develop the habit.
- Remove all diseased material and dispose of it off-site.
- Pull spent annual crops that are finished producing. Chop and compost healthy material.
- Weed thoroughly. Fall weeding pays dividends in spring. Get the roots out, not just the tops.
- Add compost. Spread 2–3 inches of finished compost over the bare bed surface. Don’t dig it in — let the freeze-thaw cycles and soil organisms work it down naturally over winter.
- Mulch or plant cover crops. Either spread a 3–4 inch layer of shredded leaves, straw, or wood chips, or sow a cover crop (see above). Bare soil is vulnerable to erosion, compaction, and weed invasion.
- Note what went where. Take five minutes to record what you planted in each bed this year. This makes crop rotation planning in spring dramatically easier. A phone photo of each bed works fine.
Tool Maintenance
Fall is tool maintenance time. The fifteen minutes you spend now will extend the life of your tools by years and make spring gardening noticeably more pleasant.
For Shovels, Hoes, and Trowels
- Knock off dried soil with a stiff brush or putty knife.
- Wash with water and dry completely.
- Sharpen blades with a flat file. Sharpen on one side only, maintaining the existing bevel angle. A sharp hoe cuts weeds instead of pushing them around. A sharp shovel slides into soil instead of requiring brute force.
- Wipe metal surfaces with a rag dampened with boiled linseed oil or a thin coat of WD-40 to prevent rust.
- Sand wooden handles lightly and rub with linseed oil to prevent cracking and splinters.
For Pruners and Loppers
- Clean blades with rubbing alcohol or a 10% bleach solution to remove any disease organisms.
- Sharpen with a whetstone or diamond file.
- Oil the pivot point and spring mechanism.
- Check screws and tighten as needed.
For Hoses
Drain completely — water left in a hose will freeze and crack it. Coil loosely and store inside, off the ground. Replace worn washers now so you’re not dealing with leaky connections in spring.
Saving Seeds
Fall cleanup is naturally paired with seed saving. As you clear the garden, keep an eye out for mature seed heads worth collecting.
Good candidates for easy seed saving include: tomatoes (ferment the seeds), peppers (dry seeds from fully ripe fruit), beans and peas (let pods dry on the vine), lettuce (collect fluffy seed heads), and annual flowers like marigolds, zinnias, and sunflowers.
Remember that seeds saved from hybrid (F1) varieties won’t come true to the parent plant. Save seeds only from open-pollinated and heirloom varieties for reliable results. Label everything with the variety name, date, and any notes about performance. Store in a cool, dry place — a sealed jar in the back of the refrigerator works well.
The Bigger Picture
Fall garden cleanup isn’t just about tidying up. It’s about setting the stage for next year while supporting the ecosystem that makes your garden work. The beneficial insects overwintering in those stems will be your pest control allies next summer. The compost you spread now will feed your soil biology through winter. The cover crop holding the soil in place is preventing the loss of topsoil you spent years building.
Think of fall cleanup as an investment, not a chore. A garden put to bed thoughtfully wakes up stronger in spring.
Frequently Asked Questions
Should I till my garden in the fall?
In most cases, no. Fall tilling disrupts soil structure, destroys beneficial fungal networks, brings dormant weed seeds to the surface where they’ll germinate in spring, and kills overwintering beneficial insects. The exceptions are if you need to work in large amounts of amendment (heavy lime application, for example) or break up severely compacted new ground. For established gardens, top-dressing with compost and mulching is more effective and less destructive than tilling.
When should I cut back my perennials?
Wait until late spring, when new growth is emerging at the base and daytime temperatures are consistently above 50°F. This timing allows overwintering insects to emerge before you remove their habitat. Cut old stems to 12–15 inches rather than ground level — many beneficial insects nest in the lower portions of stems. The main exception: diseased perennials should be cut back and removed in fall to prevent disease carryover.
Can I leave my tomato cages in the garden over winter?
Metal cages won’t be harmed by winter weather, but it’s better to remove, clean, and store them. This lets you access the bed for composting and cover cropping. More importantly, any disease organisms clinging to the cages get cleaned off before next season. Wipe cages down with a 10% bleach solution before storing, especially if your tomatoes had any disease issues.
What if I didn’t get to fall cleanup before the ground froze?
Don’t stress. The world won’t end. The most critical task — removing diseased material — can still be done in early spring before new growth starts. Compost can be spread on frozen ground; it won’t go anywhere, and the freeze-thaw cycle will work it in. Cover crops missed their window, but a thick mulch of straw or leaves applied even on frozen ground still protects soil over the remaining winter months. Better late than never truly applies to fall garden tasks.