How to Build a Backyard Duck Pond on a Budget
- Ducks need water for feather maintenance, mating, foraging, and temperature regulation, a simple splash bucket is not enough.
- The cheapest option is a stock tank or hard plastic kiddie pool ($15–$60), which works well for small flocks of 2–6 ducks.
- A DIY in-ground pond using an EPDM rubber liner costs $150–$400 and gives your flock a permanent, naturalized water feature.
- Natural filtration with bog filters, aquatic plants, and beneficial bacteria can keep water cleaner longer and slash maintenance time.
- Drain pond water into your garden, duck waste is rich in nitrogen and makes an outstanding free fertilizer.
- Budget range: $15 for a basic kiddie pool setup to roughly $500 for a fully lined, filtered in-ground pond.
If you have ever watched ducks hit fresh water for the first time each morning, you already know the truth: ducks without water are ducks that are merely surviving. They need to submerge their heads, splash their feathers, dabble for food, and regulate their body temperature, and they need to do it every single day. A backyard duck pond is not a luxury. It is among the most fundamental pieces of infrastructure on any homestead that keeps waterfowl.
The good news is that building a functional duck pond does not require a contractor, heavy machinery, or thousands of dollars. Whether you are working with a $20 bill and a free afternoon or planning a more permanent in-ground installation, there is an approach that fits your budget and flock size. This guide walks through every option, from the simplest kiddie pool setup to a naturally filtered in-ground pond, so you can give your ducks the water access they need without draining your wallet.
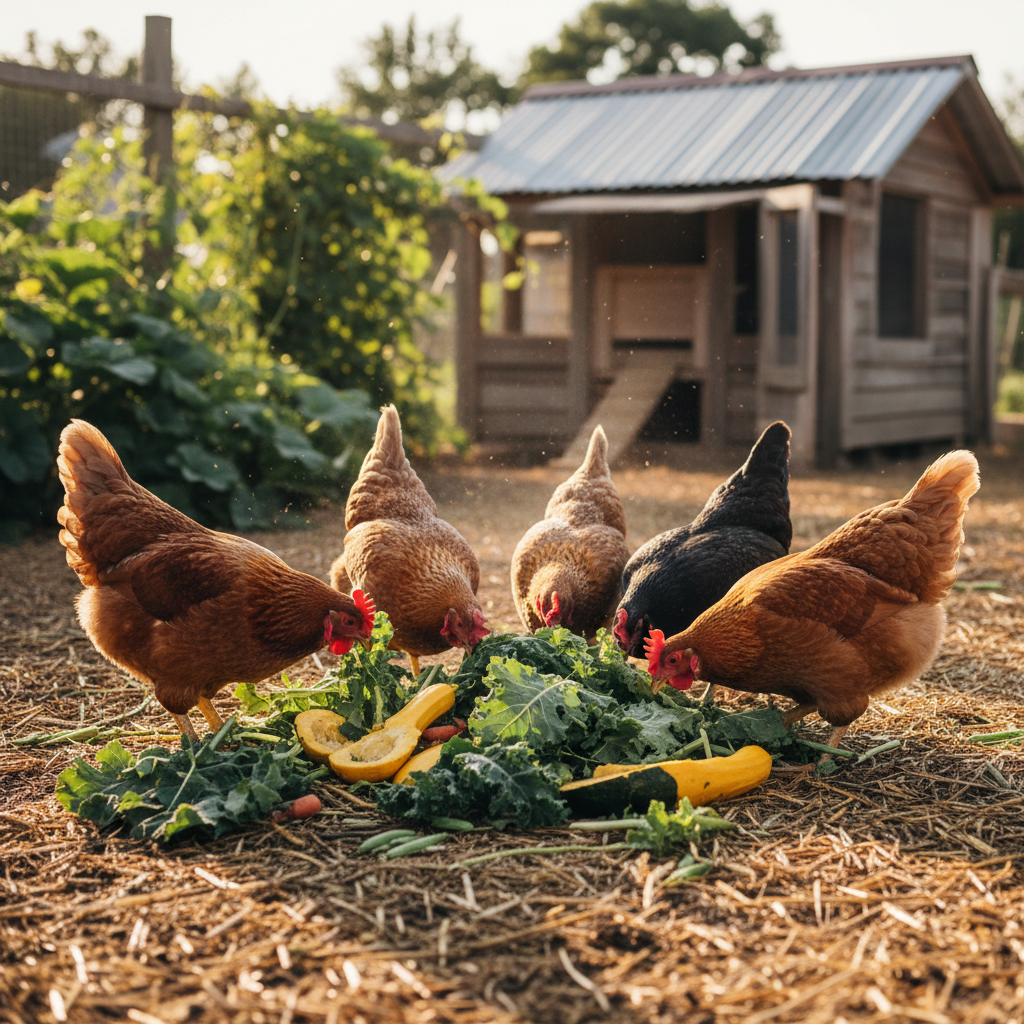
If you are still deciding whether ducks are right for your homestead, our guide to raising ducks vs. Chickens covers the key differences to help you decide.
Why Do Ducks Actually Need a Pond?
Ducks are waterfowl, and access to swimmable water is essential for their feather health, mating behavior, foraging instincts, and ability to regulate body temperature. This is not simply about making your birds happy, though that matters, it is about keeping them physically healthy and productive. Ducks that lack adequate water access develop a range of problems that most new duck keepers never anticipate.
Feather maintenance is the most critical reason. Ducks have a preen gland (uropygial gland) near the base of their tail that produces oil. When they bathe, they spread this oil across their feathers in a process called preening. This oil is what makes duck feathers waterproof and insulating. Without regular access to water deep enough for full submersion, their feathers lose their protective quality, leaving ducks vulnerable to cold, rain, and skin conditions. According to Cooperative Extension poultry resources, waterfowl that cannot bathe regularly are significantly more prone to external parasites and feather degradation.
Mating is another major factor. Many duck breeds, particularly heavier breeds like Pekins and Rouens, struggle to mate successfully on land. Water provides the buoyancy they need, and without it, fertility rates drop sharply. If you are breeding your flock or relying on natural flock replacement, a pond is not optional.
Foraging and feeding are also tied to water. Ducks are dabbling animals. They sift through mud and water for insects, larvae, snails, and plant matter. This natural behavior supplements their diet with protein and nutrients that bagged feed alone cannot provide. Ducks with pond access tend to eat less commercial feed, which saves you money over time.
Temperature regulation rounds out the list. Ducks do not sweat, and they rely on water to cool down during hot weather. In summer, a pond can be the difference between a thriving flock and heat-stressed birds. They also use water to clean their nostrils and eyes, which helps prevent respiratory infections.
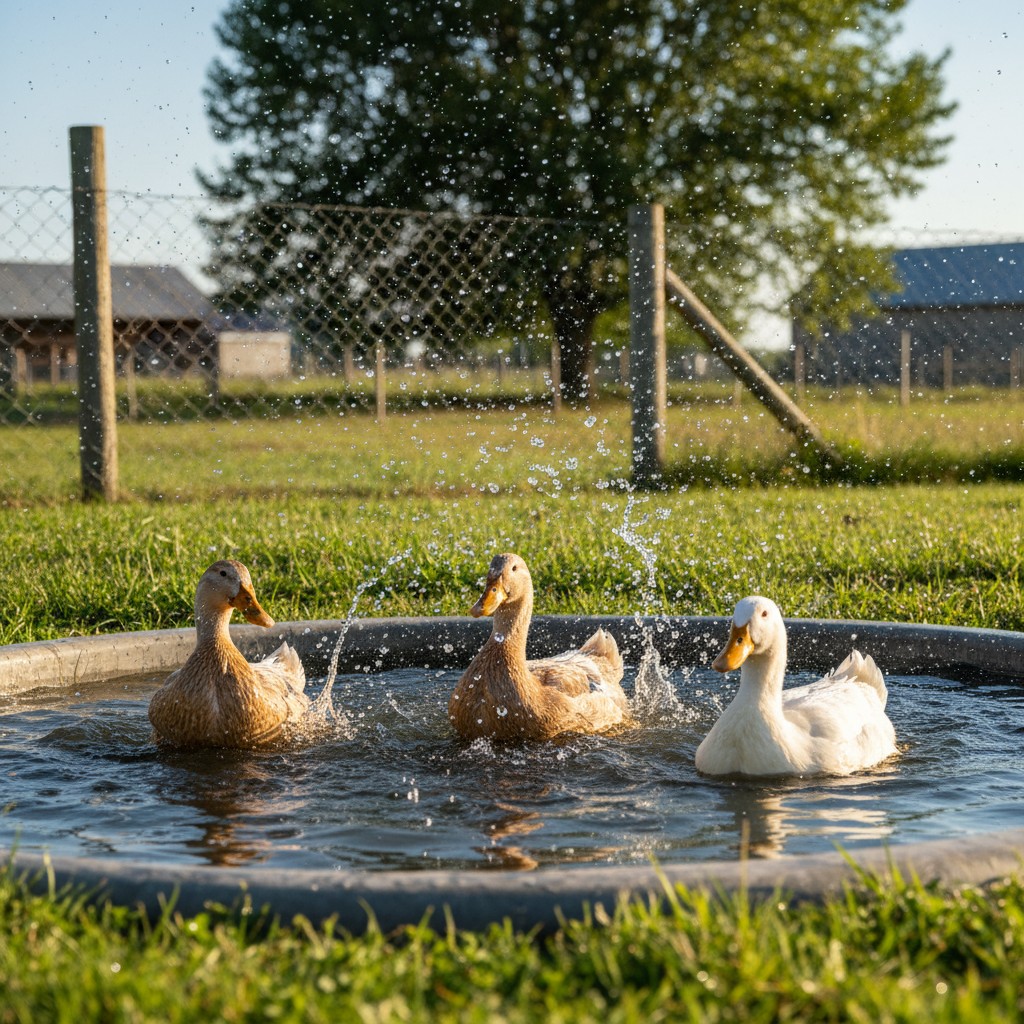
What Is the Simplest and Cheapest Duck Pond Option?
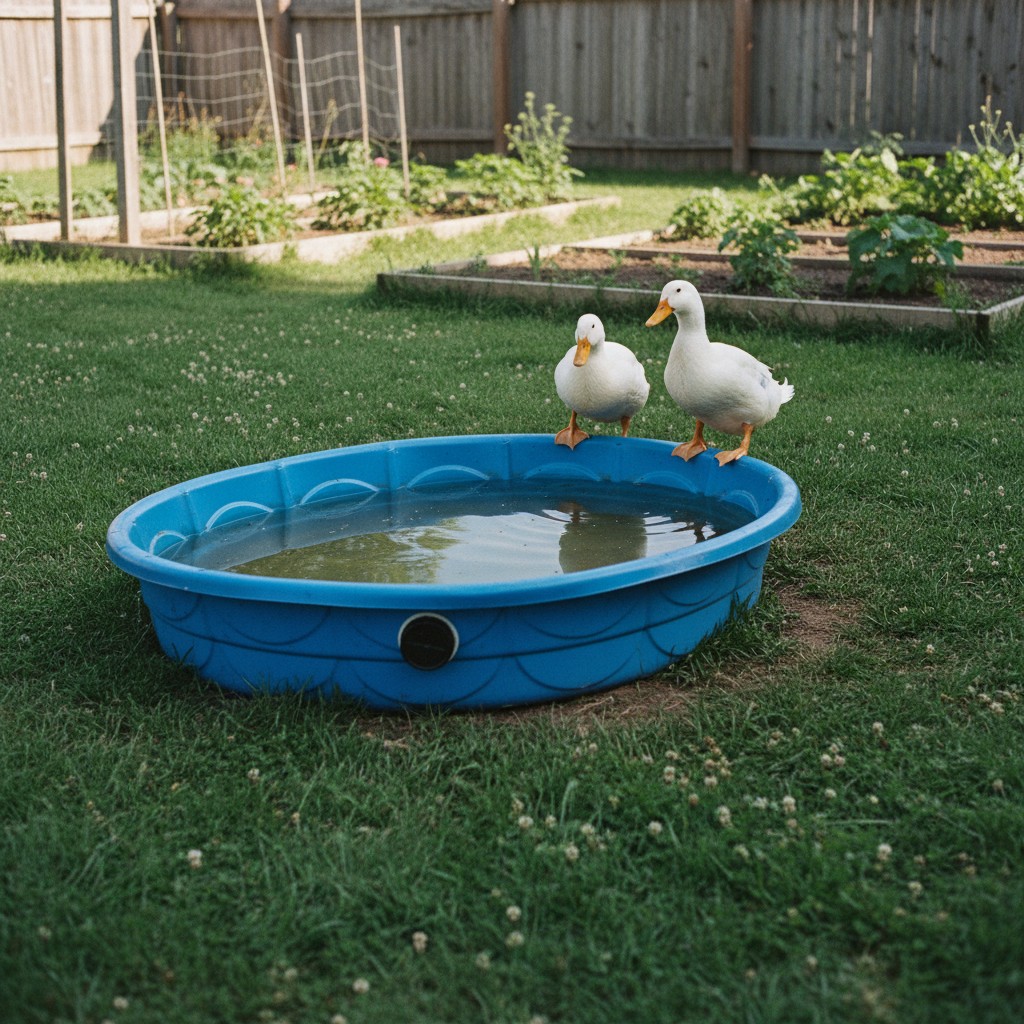
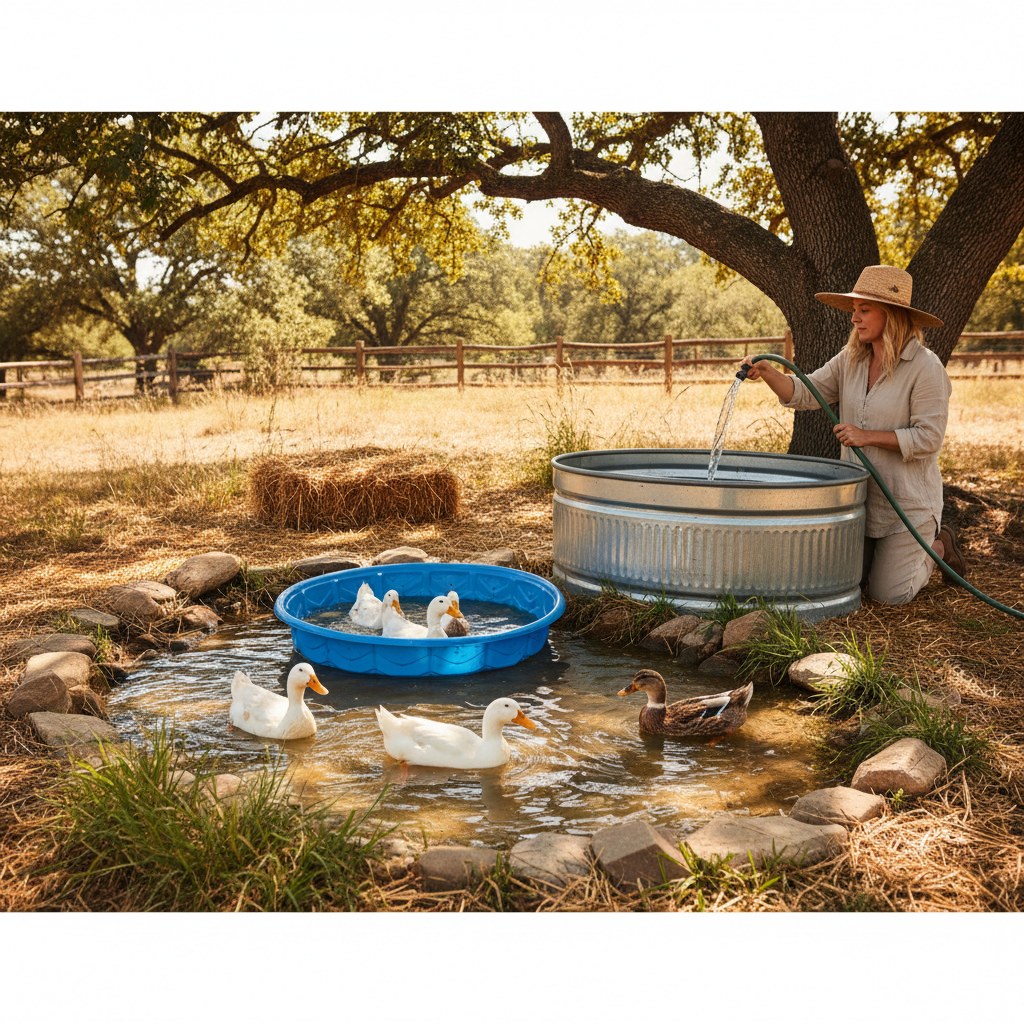
A hard plastic kiddie pool or a galvanized stock tank is the fastest, cheapest, and most beginner-friendly way to give your ducks water access, and for small flocks, it works remarkably well. Do not let anyone tell you that a “real” pond is the only valid option. Plenty of experienced duck keepers use stock tanks for years with healthy, productive flocks.
A hard-shell plastic kiddie pool (not the inflatable kind, ducks will destroy those within hours) costs between $15 and $40 at most hardware or big-box stores. Look for pools that are at least 8 inches deep, which allows ducks to fully submerge their heads and splash effectively. For a flock of 2 to 4 ducks, a standard 4-foot kiddie pool is adequate.
Galvanized stock tanks are the more durable upgrade, typically running $40 to $120 depending on size. A 50-gallon Rubbermaid stock tank is an extremely popular choice among homesteaders because it is nearly indestructible, easy to dump and clean, and large enough for 4 to 6 ducks. The 100-gallon and 150-gallon models work well for larger flocks.
The main downside of above-ground pools and tanks is maintenance. Ducks are messy: spectacularly messy. They will turn clean water into a murky, greenish-brown soup within hours. A kiddie pool for 4 ducks typically needs to be dumped and refilled every 1 to 2 days. Stock tanks can sometimes stretch to 2 to 3 days depending on your flock size and weather conditions. You should plan for this reality before choosing this route.
Pro tip: Place your kiddie pool or stock tank near your garden beds. When you dump the dirty water, direct it toward your plants. Duck water is loaded with nitrogen and makes an excellent free fertilizer. If you have a rainwater harvesting system, you can use collected rainwater to refill the pool and keep your water bill in check.
To help your ducks get in and out safely, lean a wide board, a concrete block stairway, or a flat rock ramp against the side. Ducks can injure their legs jumping from the rim of a tall stock tank, and ducklings can drown if they get in but cannot climb out. Duckling safety warning: Ducklings under 3–4 weeks old lack the preen oil that waterproofs adult ducks and can become waterlogged and drown even with a ramp. Never leave young ducklings unsupervised near open water, and provide only a very shallow shallow-sided dish for drinking and dipping until they are fully feathered.
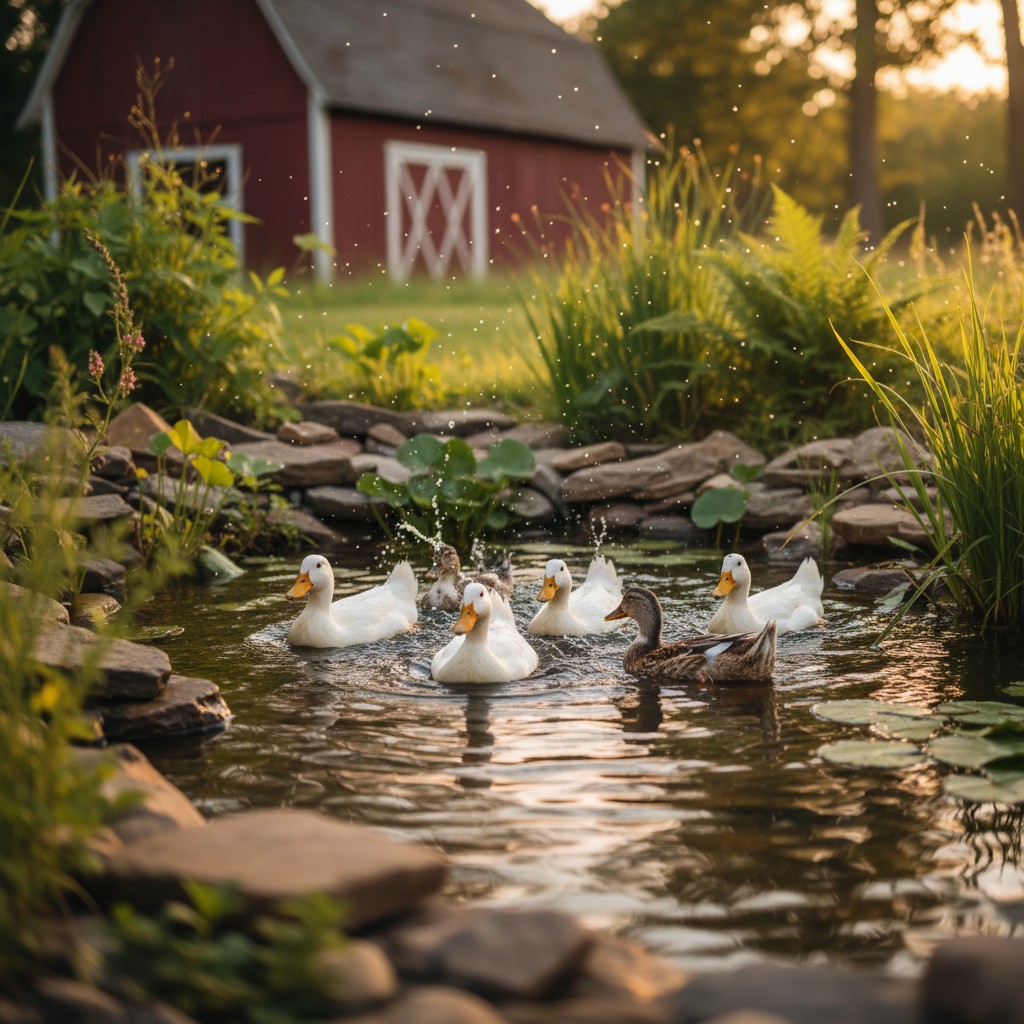
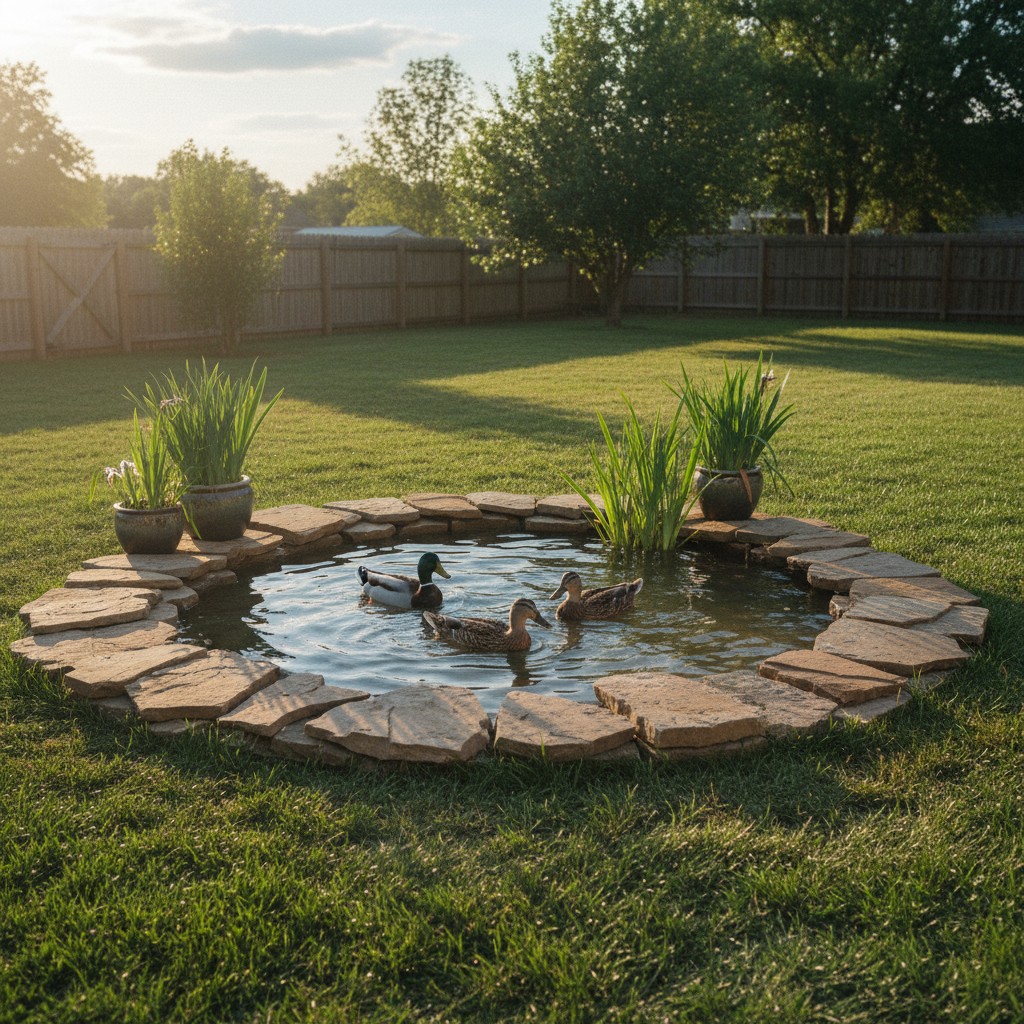
How Do You Build a DIY In-Ground Duck Pond?
An in-ground pond is the gold standard for backyard duck keeping, it gives your flock the most natural water experience while adding a permanent, attractive feature to your homestead. The process involves choosing a location, digging the hole, installing a liner, and building a drainage system. It sounds like a big project, but most homesteaders can complete it in a single weekend with basic tools.
Choosing the right location is your first decision. Pick a spot that is:
- Close enough to your duck coop or run for easy daily access
- Slightly downhill from your coop (not uphill, or your yard will become a mud pit)
- Away from large trees whose roots could puncture the liner and whose leaves will clog the water
- Visible from your house so you can monitor for predators
- In partial shade if possible, to slow algae growth in summer
Sizing your pond depends on your flock. The general rule is 4 to 6 square feet of water surface area per duck, with a depth of 18 to 24 inches. For a flock of 6 ducks, a pond roughly 6 feet by 4 feet and 20 inches deep works well. That translates to about 200 gallons, which is manageable for water changes and filtration. These sizing guidelines are consistent with general small-scale backyard poultry recommendations, though some sources suggest a more generous 6–9 square feet per duck.
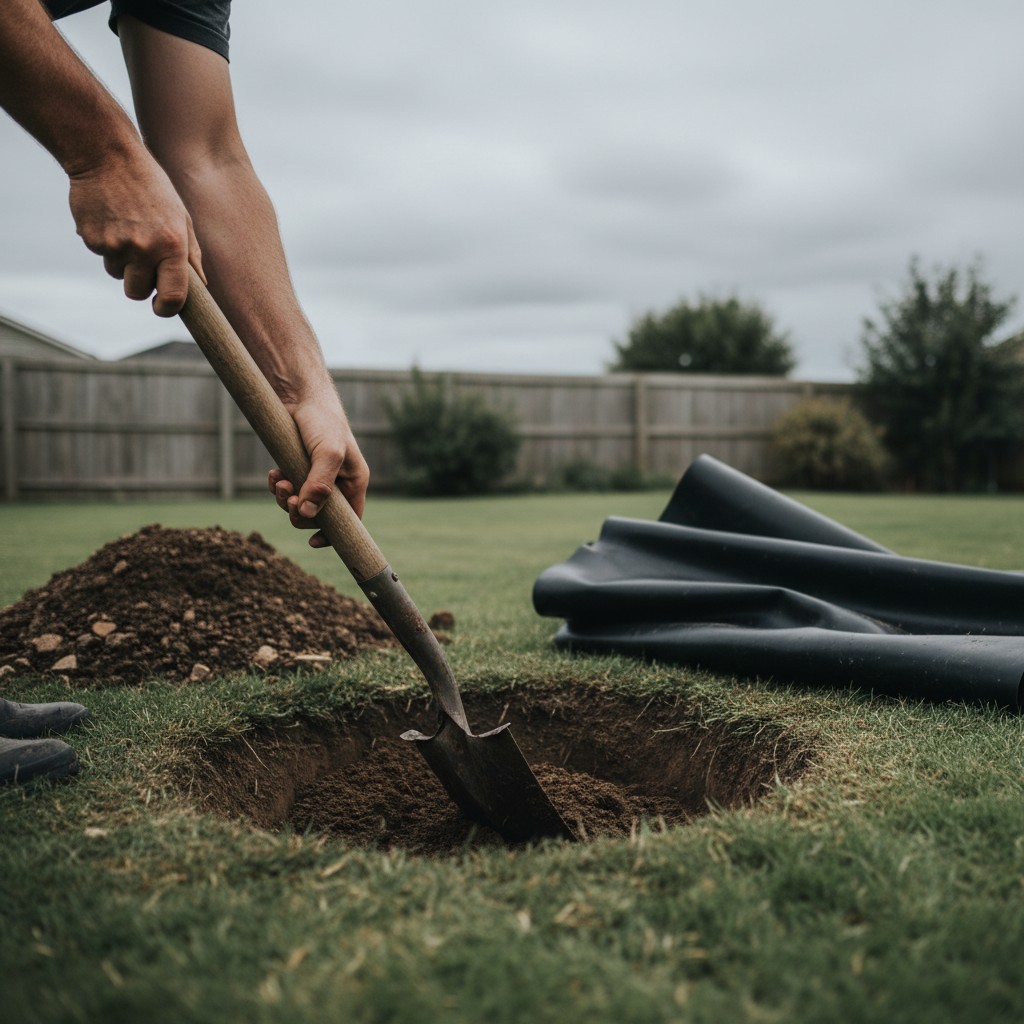
Digging the hole is the most labor-intensive part. Dig with gently sloping sides, a 45-degree angle or shallower, so ducks can easily walk in and out. Create a shallow shelf area (4 to 6 inches deep) around part of the perimeter for wading, dabbling, and eventually for aquatic plants. The center should be your deepest point at 18 to 24 inches. Remove any sharp rocks, roots, or debris from the hole, then add a 2-inch layer of sand on the bottom for extra liner protection.
EPDM rubber liner is the material of choice. A 45-mil pond-grade EPDM liner is flexible, UV-resistant, fish-safe (and duck-safe), and will last 20+ years. Important safety warning: Use only pond-grade / fish-safe EPDM (such as Firestone PondGard). Roofing-grade EPDM contains mildewcides that are toxic to fish and ducks and should never be used in a pond. Expect to pay roughly $0.90 to $1.50 per square foot for pond-grade liner at small-roll retail. Calculate your liner size by measuring the length, width, and depth of your hole, then adding 2 feet extra on each side for overlap. For our 6×4-foot pond at 20 inches deep, you would need a liner roughly 11 by 9 feet.
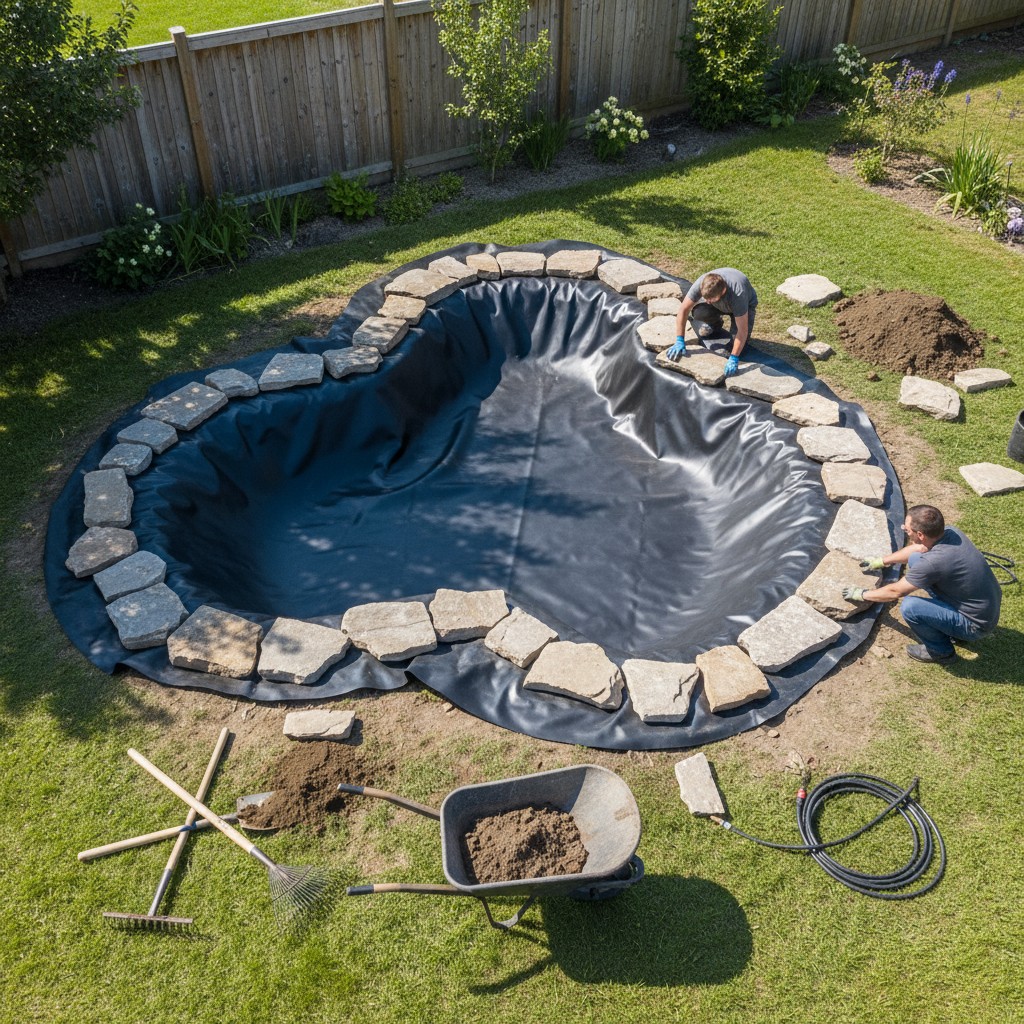
Lay the liner over the hole, pressing it into the contours of the shape. Leave the excess draped over the edges, you will trim and secure it later with flat stones, pavers, or sod. Avoid using PVC pond liners for a duck pond; they are less durable and can become brittle in cold weather. EPDM stays flexible even in freezing temperatures.
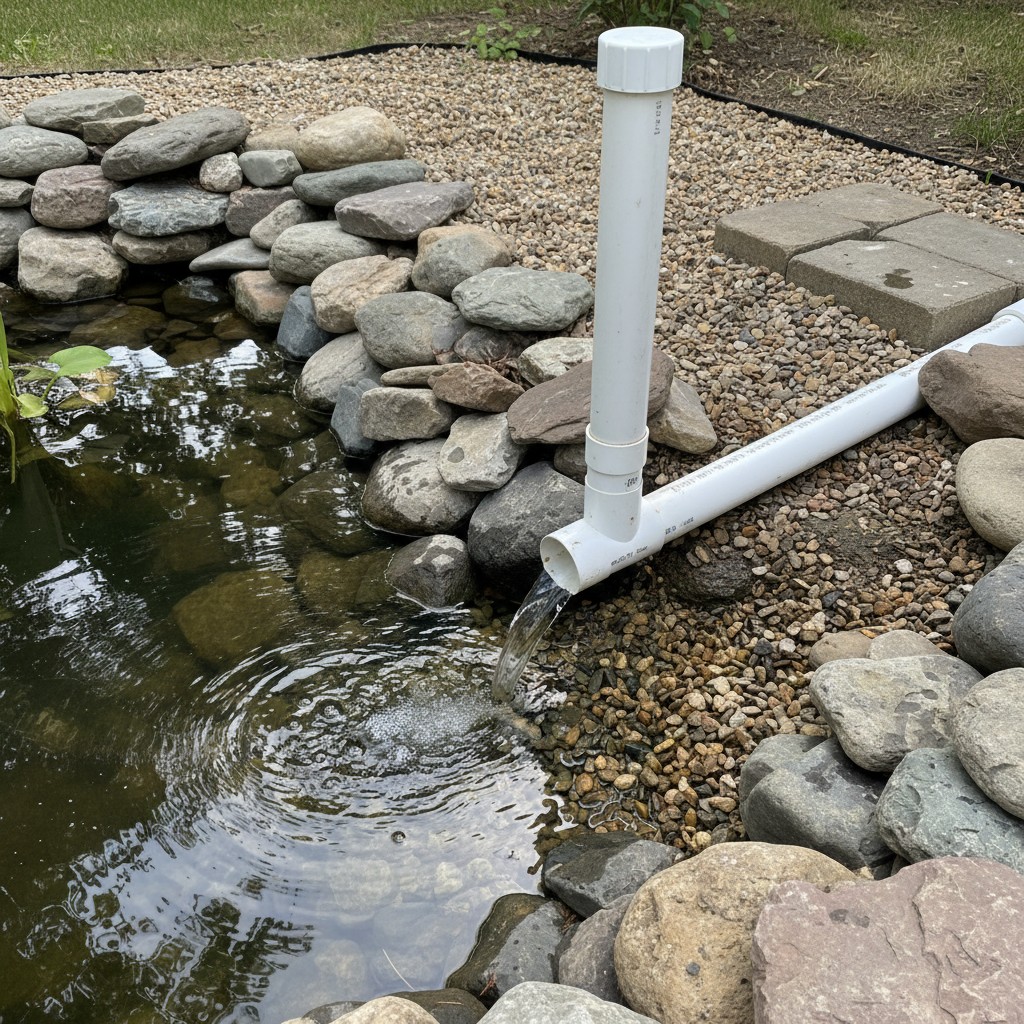
Adding a drainage system is what separates a great duck pond from a frustrating one. Install a bulkhead fitting or a standpipe drain at the lowest point of the pond before filling. Connect it to a PVC pipe that runs underground to a garden bed, a gravel-filled dry well, or a lower section of your property. A simple ball valve lets you open and close the drain. This way, you can empty the pond by gravity without hauling a single bucket. If your pond is not on a slope, a small sump pump ($30–$60 at any hardware store) connected to a garden hose will do the job.
Homestead tip: Every time you drain your duck pond, you are dumping liquid gold on your property. Duck pond water is rich in nitrogen, phosphorus, and beneficial microorganisms. Route your drain line directly to a garden bed, a pollinator garden, or even fruit trees. Many homesteaders report noticeably better yields from garden beds irrigated with duck pond water, it is free fertilizer on autopilot.
Can You Use Natural Filtration to Keep a Duck Pond Clean?
Yes: a bog filter combined with the right aquatic plants and beneficial bacteria can dramatically reduce how often you need to drain and refill your duck pond. Natural filtration will not make the water crystal clear (ducks will always muddy things up), but it can extend water changes from every 2 days to every 1 to 2 weeks, depending on flock size and pond volume.
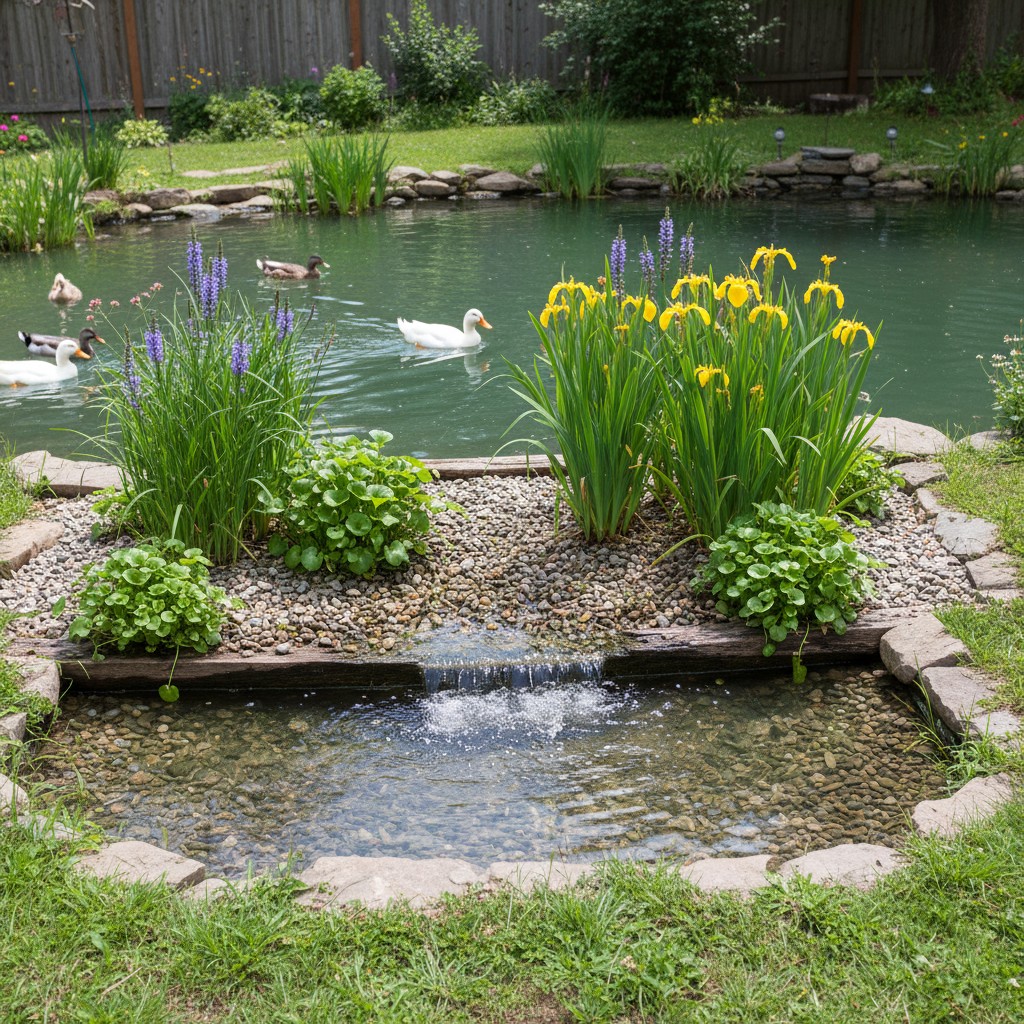
A bog filter is the most effective natural filtration method for a duck pond. It is a shallow, gravel-filled basin adjacent to or connected to your pond. Water is pumped from the pond into the bog filter, where it flows through layers of gravel. Beneficial bacteria that colonize the gravel surfaces break down ammonia and nitrites (from duck waste) into nitrates, which are then absorbed by plants growing in the bog. The filtered water returns to the pond by gravity. This is the same biological principle used in small-scale aquaculture and koi-pond biofilters.
To build a basic bog filter, dig a shallow basin (6 to 12 inches deep) next to your pond, line it with the same EPDM liner, fill it with pea gravel or lava rock, and plant it with heavy-feeding water-loving plants like cattails, iris, water mint, or horsetail. A small pond pump (200–400 GPH, costing $20–$40) circulates the water. The bog filter should be roughly 10 to 30 percent of your pond’s total surface area for adequate filtration.
Aquatic plants in the pond itself also help. Hardy species like water lettuce, duckweed (the irony is not lost), and water hyacinth absorb excess nutrients directly from the water column. However, ducks will eat many aquatic plants with enthusiasm, so you may need to protect new plantings with a submerged cage or wire frame until they are established. Some keepers grow duckweed in a separate container and add it to the pond periodically as both filtration and a supplemental food source.
Beneficial bacteria products are available commercially and can be added to your pond to jumpstart the biological filtration cycle. These are the same bacteria cultures used in koi ponds and aquariums, they are completely safe for ducks. Add them when you first fill the pond and again after each full water change. Within a few weeks, your pond will develop a natural bacterial colony that continuously processes waste.
Even with all of these filtration methods working together, you will still need to do periodic full water changes. Duck ponds are not koi ponds, ducks produce far more waste relative to water volume. But natural filtration can turn what would be an every-other-day chore into a biweekly one, and that time savings adds up fast.
What Are the Best Drainage Solutions for a Duck Pond?
The right drainage system is arguably more important than the pond itself, because a duck pond without easy drainage is a duck pond you will grow to resent. There are three main approaches: gravity drains, sump pumps, and overflow systems. The best choice depends on your terrain, budget, and pond location.
Gravity drains are the gold standard because they require no electricity and no pumping. If your pond is on even a slight slope, you can install a drain at the bottom that runs through a buried PVC pipe to a lower point on your property. A 1.5-inch or 2-inch bulkhead fitting with a ball valve gives you complete control. Open the valve, walk away, and the pond empties itself in 30 to 60 minutes. The initial installation takes a couple of hours but saves you countless hours of labor over the years.
Sump pumps are the answer when gravity is not on your side. A basic submersible utility pump ($30–$60) drops into the deepest part of your pond and pushes water through a garden hose to wherever you want it. Most homesteaders run the hose directly to a garden bed. A typical $30–60 utility sump pump (1,200–2,000 GPH) will empty a 200-gallon pond in roughly 6–10 minutes. Keep the pump stored indoors between uses to extend its life.
Overflow systems handle excess water from rain. A standpipe at your desired water level lets excess water drain automatically during heavy rain so your pond does not flood the surrounding area. This is especially important if your pond is near your coop, duck house, or garden beds. If you are already managing water flow on your property with a rainwater harvesting setup, you can integrate your pond overflow into that system.
Route that water to your garden. This cannot be emphasized enough. Every gallon of dirty duck pond water is a gallon of nitrogen-rich fertilizer. Duck manure is commonly cited at approximately 2.8% nitrogen, 2.3% phosphorus, and 1.7% potassium NPK in homesteading references, an excellent ratio for vegetable gardens and fruit trees. If you are draining your pond every week, that is hundreds of gallons of free liquid fertilizer every month.
How Often Should You Change the Water in a Duck Pond?
Without filtration, plan on a full water change every 1 to 3 days for a small kiddie pool or stock tank, and every 4 to 7 days for a larger in-ground pond. With a working bog filter and aquatic plants, you can stretch in-ground pond changes to every 1 to 2 weeks. The exact frequency depends on your flock size, pond volume, weather, and how much your personal tolerance for murky water can handle.
Here are the signs it is time for a water change:
- Strong ammonia or sulfur smell when standing near the pond
- Thick green algae coating the surface or liner walls
- Visible sludge buildup on the bottom that does not settle
- Ducks are reluctant to enter the water (they know when it is too dirty)
- Foam or scum forming on the surface
Partial water changes are an underused strategy. Instead of draining the entire pond, drain 30 to 50 percent of the water and refill. This preserves the beneficial bacteria colony in your pond while removing the worst of the accumulated waste. Many experienced duck keepers do a partial change midweek and a full change on the weekend, which keeps water quality high without excessive water use.
Barley straw is a traditional and surprisingly effective tool for controlling algae in duck ponds. When barley straw decomposes in water, it releases compounds that inhibit algae growth. Toss a small mesh bag of barley straw into your pond (about one bale per 1,000 gallons, scaled down accordingly) and replace it every 2 to 3 months. It will not clear existing algae, but it slows new growth significantly. Researchers at the UK Centre for Aquatic Plant Management (Dr. Jonathan Newman’s research) were among the first to document the anti-algal properties of decomposing barley straw in ponds.
How Do You Predator-Proof a Duck Pond Area?
Ducks on water are vulnerable, they are focused on bathing and foraging, their escape options are limited, and a pond attracts predators who also want that water. Raccoons, foxes, mink, weasels, hawks, and owls are all threats to ducks at a pond, and your predator-proofing strategy needs to account for both ground and aerial predators.
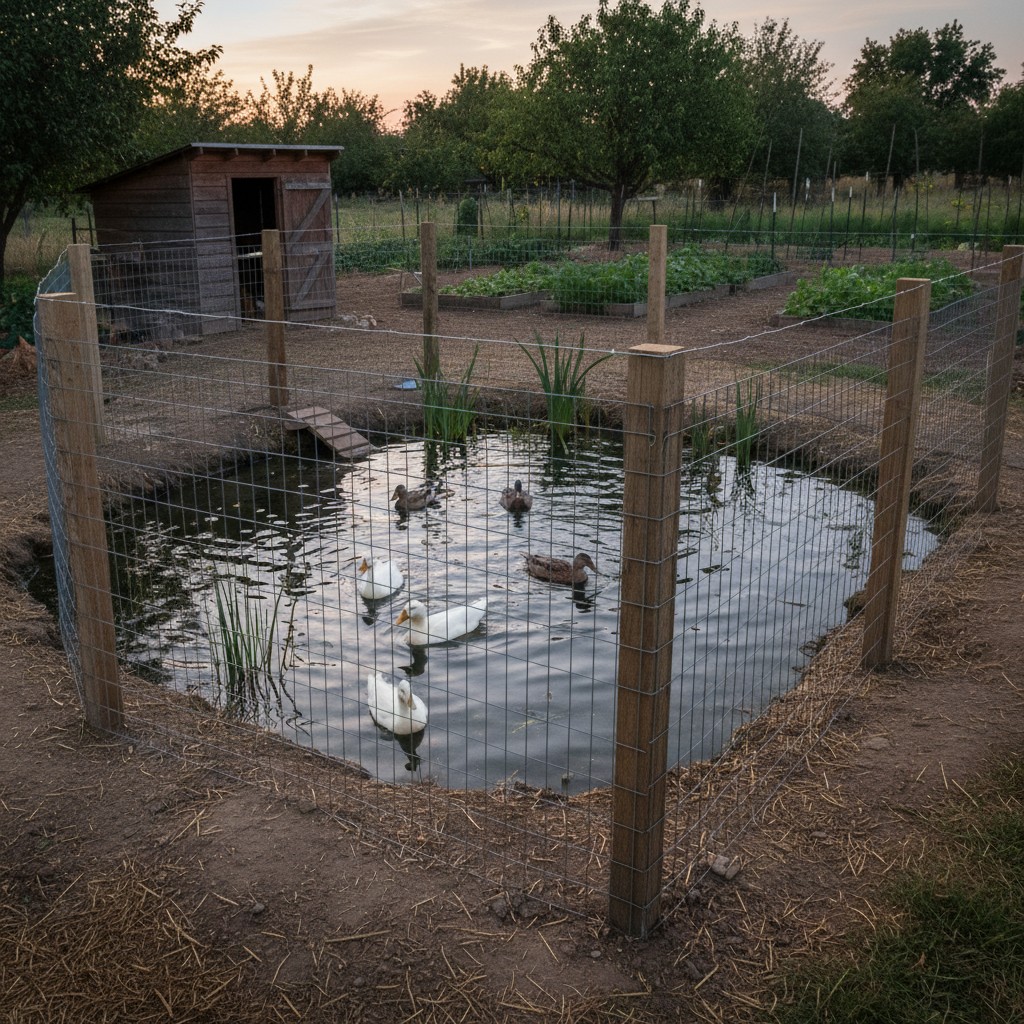
Fencing is your first line of defense. Surround the pond area with at least 4-foot welded wire fencing with openings no larger than 1 inch by 2 inches. Bury the bottom 12 inches of fencing or bend it outward in an L-shape along the ground to prevent digging predators from going under. Hardware cloth (1/2-inch) is ideal for the bottom 24 inches where mink and weasels might try to squeeze through. Our guide to building a predator-proof run covers fencing techniques in detail, and the same principles apply to a pond enclosure.
Overhead protection matters too. Hawks and owls are real threats, especially for smaller duck breeds and young ducks. Bird netting stretched over the pond area is the simplest solution. Alternatively, you can run fishing line in a grid pattern (18-inch spacing) over the pond to deter aerial predators. Some homesteaders use a combination of strategically placed shrubs, overhead branches, and a partially covered loafing area to give ducks places to hide if a raptor appears.
Nighttime security is non-negotiable. Always lock your ducks in a secure coop or duck house at night. Most duck predator losses happen after dark, and no amount of pond fencing will protect against a determined raccoon or fox at 2 AM. Use an automatic coop door on a timer if you are not always home at dusk. The USDA APHIS recommends that all backyard poultry be secured in predator-resistant housing from dusk to dawn.
If deer are also a concern on your property, the same area fencing that protects your ducks can help, but you may need taller fencing. Our article on building a deer-proof garden fence has strategies that overlap with duck pond protection.
How Much Does Each Type of Duck Pond Cost?
The total cost of a duck pond ranges from under $20 for a basic kiddie pool to around $500 for a fully equipped in-ground pond with natural filtration, far less than most people expect. Here is a breakdown of the most common approaches:
| Pond Type | Estimated Cost | Best Flock Size | Durability | Water Change Frequency |
|---|---|---|---|---|
| Hard plastic kiddie pool | $15–$40 | 2–4 ducks | 1–2 seasons | Every 1–2 days |
| Galvanized stock tank (50–100 gal) | $40–$120 | 4–8 ducks | 10+ years | Every 2–3 days |
| Preformed plastic pond | $80–$200 | 4–6 ducks | 5–10 years | Every 3–5 days |
| DIY EPDM-lined in-ground pond | $150–$300 | 6–12 ducks | 20+ years | Every 5–7 days |
| In-ground pond with bog filter | $250–$500 | 6–15 ducks | 20+ years | Every 1–2 weeks |
These cost estimates include the basic setup materials only. Add $20–$60 for a sump pump if you need one, $10–$30 for a ramp or entry rocks, and $20–$40 for initial aquatic plants if you are going the natural filtration route. Even the most complete setup comes in well under what many homesteaders spend on their chicken coop.
And remember: those ducks are earning their keep. Duck eggs are prized by bakers for their higher fat content and richer flavor, and a happy flock with proper water access lays more consistently than a stressed one.
What Does a Duck Pond Maintenance Calendar Look Like?
Duck pond maintenance is not complicated, but it is ongoing, a simple seasonal schedule keeps the work manageable and prevents small issues from becoming big ones. Here is what to plan for throughout the year:
Daily tasks (5 minutes):
- Check water level and top off if needed
- Remove any large debris (leaves, feathers, sticks)
- Observe ducks using the pond, changes in behavior can indicate water quality problems
Weekly tasks (30–60 minutes):
- Full or partial water change (timing depends on your setup, see table above)
- Scrub algae from pond walls, stock tank sides, or kiddie pool
- Check drain valves, pumps, and fittings for clogs or damage
- Inspect fencing and netting for holes or weak spots
Spring tasks:
- Full drain and deep clean of the pond
- Inspect the liner for cracks, punctures, or UV damage
- Replenish barley straw for algae control
- Add fresh beneficial bacteria culture
- Plant or divide aquatic plants in your bog filter
- Check and clean your pump, replace the impeller if flow has dropped
Summer tasks:
- Monitor water temperature, add shade structures if water exceeds 75°F regularly
- Increase water change frequency during hot weather
- Add extra fresh water for evaporation losses
- Watch for mosquito larvae, ducks eat most of them, but standing water in bog filters may need attention
- Trim back aquatic plants that are overtaking the pond
Fall tasks:
- Install leaf netting over the pond if you have deciduous trees nearby
- Cut back dying aquatic plants to prevent decaying matter from fouling the water
- Clean and store your pump if you will not run it through winter
- Do a final deep clean before cold weather arrives
Winter tasks:
- Keep a section of the pond ice-free using a floating de-icer or heated base ($30–$50)
- Ducks still need daily water access in winter, they do not hibernate
- Check that drain lines are not frozen
- Reduce water change frequency if your flock spends less time in the water
- Inspect and repair fencing that may have been damaged by snow or ice
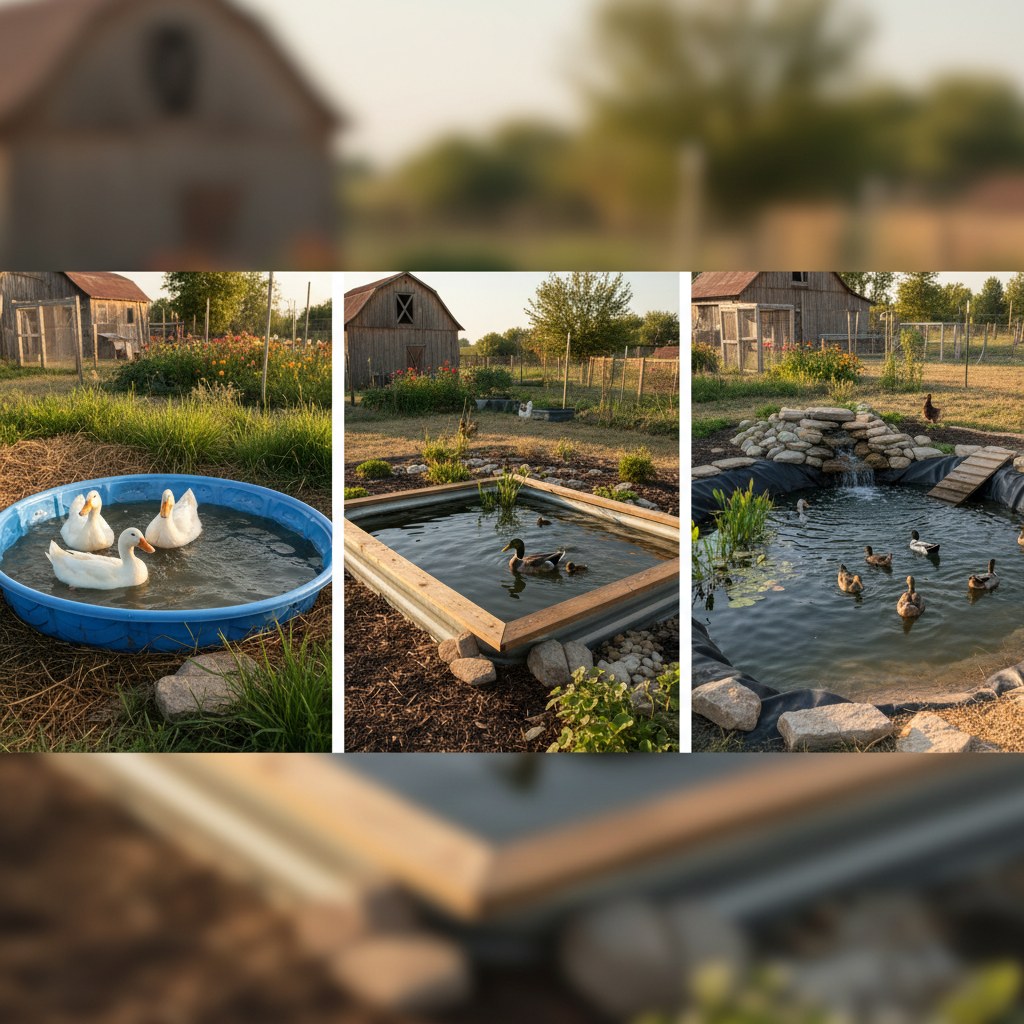
What Is the Best Duck Pond Setup for a Beginner?
If you are just starting out with ducks, begin with a stock tank and a simple gravity-drain plan, then upgrade to an in-ground pond once you know your flock size, your routine, and your property’s drainage patterns. Most experienced duck keepers will tell you the same thing: start simple and improve as you learn.
A 100-gallon Rubbermaid stock tank with a ramp, a hose nearby for filling, and a drain spot next to your garden beds is a perfectly adequate setup for a flock of 4 to 6 ducks. You will spend about $50–$80 total and can have it running in an afternoon. Use it for a full season, pay attention to how your ducks use it, where the water drains, and how your yard handles the mud, then plan your in-ground pond based on what you have learned.
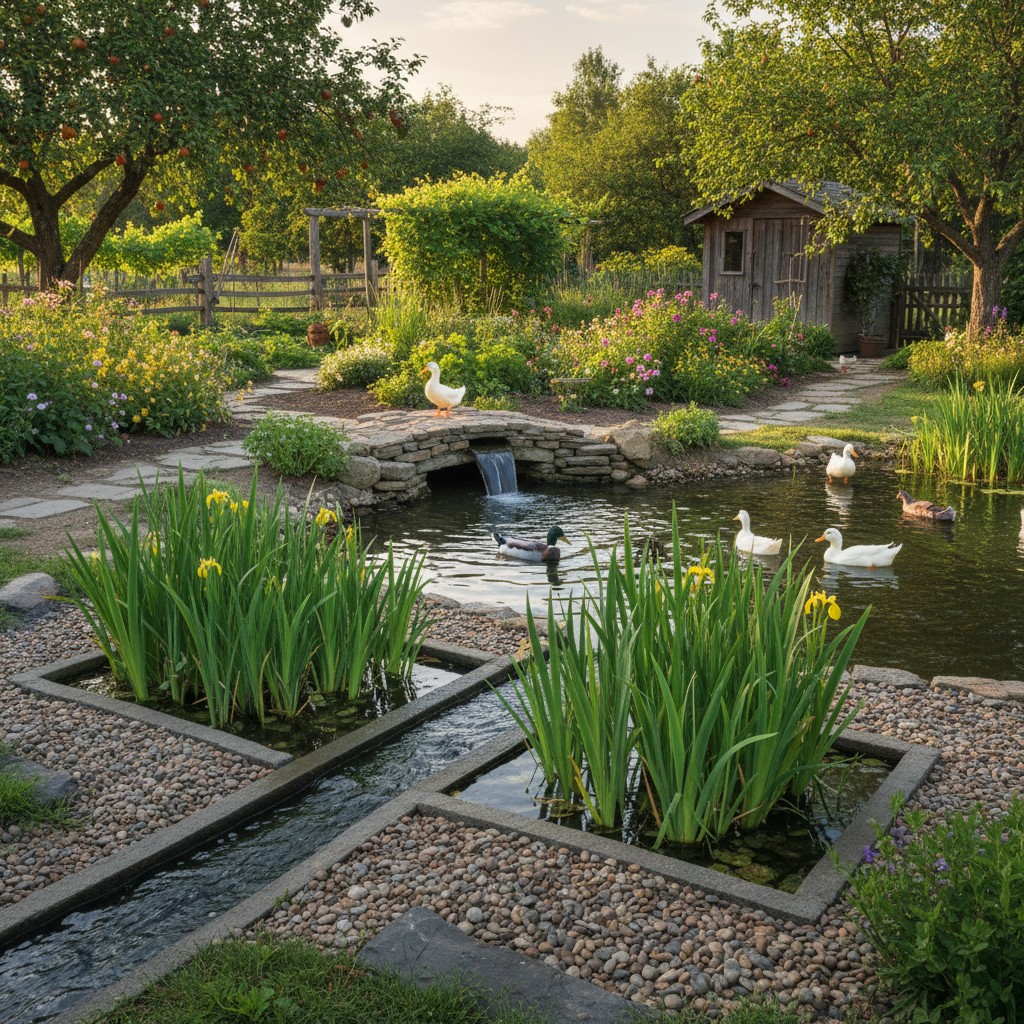
When you are ready to upgrade, a 6-by-4-foot EPDM-lined pond with a bottom drain, a small bog filter, and a few aquatic plants will change your duck keeping experience. Your ducks will be healthier. Your eggs will be more consistent. Your maintenance time will drop. And your garden will thrive on the nutrient-rich runoff. That is the kind of closed-loop system that makes homesteading work, every element feeding into the next.
Ducks are some of the most rewarding animals to raise on a homestead. They are hardy, funny, excellent foragers, and prolific layers. If you are still weighing your options, our comparison of raising ducks vs. Chickens can help you decide. And once your flock is settled and your pond is running, do not be surprised if it becomes the favorite spot on your entire property, for the ducks and for you.
Frequently Asked Questions
A depth of 18 to 24 inches is ideal for most backyard duck ponds. This is deep enough for ducks to fully submerge, dabble, and mate successfully, but shallow enough to drain easily and keep maintenance manageable. Include a gradual slope and a shallow shelf area (4 to 6 inches) so ducks can wade in and out comfortably.
You can, but it is generally not recommended for most homesteaders. Concrete ponds are expensive to build, prone to cracking in areas with freeze-thaw cycles, and much harder to clean than lined ponds. They also lack the natural feel of an EPDM-lined pond and can abrade duck feet over time. An EPDM liner gives you equal durability at a fraction of the cost.
A pond with active ducks in it is actually a mosquito control system. Ducks eat mosquito larvae voraciously, it is one of their favorite snacks. Problems only arise if you have standing water areas (like the edges of a bog filter) where ducks cannot reach. Adding a small pump to keep water moving in your bog filter eliminates most mosquito breeding habitat. According to the CDC, eliminating standing water and introducing biological controls (like waterfowl) are effective mosquito management strategies.
It is possible but challenging. Ducks produce a lot of waste, which leads to high ammonia levels that stress most fish. If you want to try it, the pond needs to be significantly larger (500+ gallons minimum), heavily filtered, and stocked with hardy species like goldfish or mosquitofish. Do not add expensive koi to a duck pond, the water quality will never support them well.
Install a standpipe or overflow fitting at your desired maximum water level. This is simply a vertical pipe set at the height you want the water to stay at, when rain pushes the water above that point, excess flows out through the pipe and into a drain line. Route the overflow to a dry well, a rain garden, or a lower area of your yard. If you already have a rainwater harvesting system, you may be able to integrate the overflow into your existing drainage plan.
Duck pond water is excellent for gardens and is widely used by homesteaders as a natural liquid fertilizer. However, as with any animal manure, avoid applying it directly to the edible parts of crops that are close to harvest, especially leafy greens and root vegetables. Apply it to the soil around the base of plants, use it on fruiting crops (tomatoes, peppers, squash), or apply it to beds between growing seasons. The University of Minnesota Extension recommends a 90-to-120 day waiting period between applying raw animal waste and harvesting edible crops grown in contact with the soil.
Ducks still need daily water access in winter for drinking, cleaning their nostrils and eyes, and basic feather maintenance. A full swimming pond is not strictly necessary during the coldest months, but at minimum, provide a deep bucket or small tub of fresh water daily. If you keep your pond accessible, use a floating pond de-icer ($30–$50) to maintain an ice-free area. Most cold-hardy duck breeds will happily splash in near-freezing water, they are far more tolerant of cold than heat.