Beekeeping Month by Month: Your Complete First-Year Guide
Beekeeping Month by Month: Your Complete First-Year Guide
Key Takeaways
- Beekeeping follows a seasonal rhythm, understanding what your bees need each month is key to hive health and honey production
- Spring (March-May) is the busiest season: installing packages, managing swarm prevention, and building up colonies
- Summer focuses on monitoring for pests, adding supers for honey storage, and ensuring adequate water
- Fall is critical for winter preparation: mite treatment, feeding if needed, and reducing entrances
- Winter is hands-off except for periodic checks that hives have sufficient food stores
When I started beekeeping, I was overwhelmed by the sheer number of things I was supposed to be doing, and when. Every book seemed to assume I already knew the seasonal rhythm. This guide is what I wished I’d had: a straightforward, month-by-month calendar telling you exactly what to focus on throughout your first year with bees. A heads-up before you dive in: the timing in this guide is calibrated for a moderate four-season climate (roughly USDA zones 5–7), if you’re in the Deep South shift spring tasks 3–4 weeks earlier, and if you’re in the far North shift them later.
A quick note: beekeeping is highly regional. The timing below is based on a moderate, four-season climate (roughly USDA zones 5-7). If you’re in the deep South, shift spring tasks earlier by 3-4 weeks. If you’re in the far North, shift them later. Your local beekeeping association is your best resource for fine-tuning these timelines.
A quick note on bee biology: A healthy queen lives 2–3 years. Summer worker bees live only about 6 weeks because they literally work themselves out, their wings wear and their flight muscles fail. Winter workers, by contrast, live 4–6 months because their task load is reduced and their bodies are physiologically different (fat-body enriched). Knowing these lifespans helps you understand why a colony’s needs shift so dramatically from month to month.
January: Planning and Learning
January is a quiet month for bees, they’re clustered tightly in the hive, conserving warmth, and eating through their honey stores. For you, it’s the perfect time to prepare.
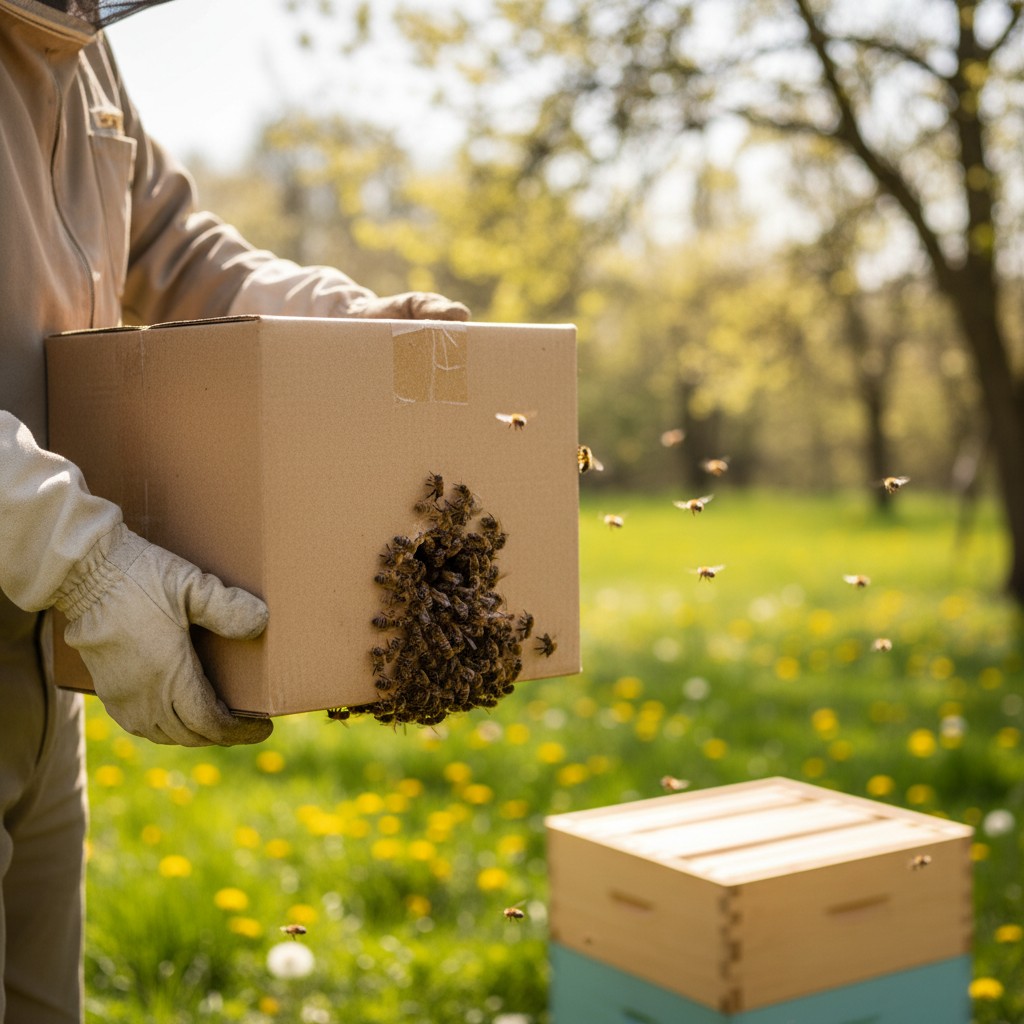
- Order bees. Package bees and nucs sell out fast. Place your order in January for spring delivery. Nucs (nucleus colonies) are generally easier for beginners than packages because they come with an established, laying queen and frames of brood.
- Order or build equipment. You need at minimum: one hive body with frames, a bottom board, inner cover, outer cover, feeder, smoker, hive tool, and a bee suit or jacket with veil.
- Read and study. Take a local beekeeping class if available. Join your county or state beekeeping association, the mentorship from experienced beekeepers is invaluable.
- On warm days (above 40°F), briefly check that hives from last season still feel heavy (indicating adequate food stores). Do not open the hive.
February: Final Preparations
The bees are still in their winter cluster, but activity increases on warm days as scouts search for early pollen sources like skunk cabbage and maple buds.
- Assemble equipment. Paint hive bodies with exterior latex paint (light colors reflect heat). Assemble frames and install foundation.
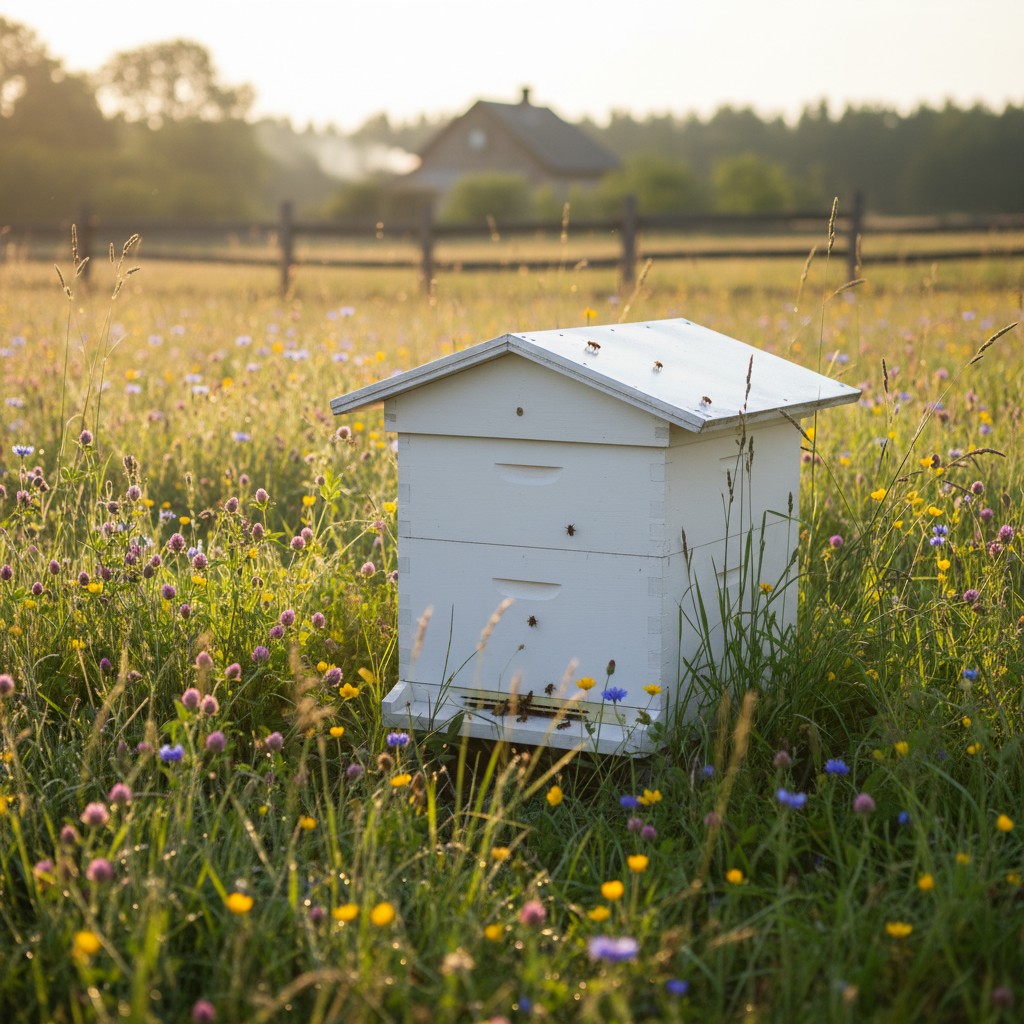
- Prepare the hive location. Ideally: faces south or southeast, receives morning sun, has a windbreak to the north, and is near a water source. Elevate hives off the ground on stands or cinder blocks.
- Emergency feeding. If established hives feel light (low on stores), you may need to add a fondant candy board or sugar cake as emergency food. Opening the hive for liquid feed is too cold, solid sugar is the winter option.
- Start planning your pollinator garden, the blooms you plant will feed your bees all season.
March: Spring Awakening
March is when things start moving. Bees are flying on warm days, the queen is increasing her egg-laying rate, and the colony is growing. This is also when winter losses become apparent.
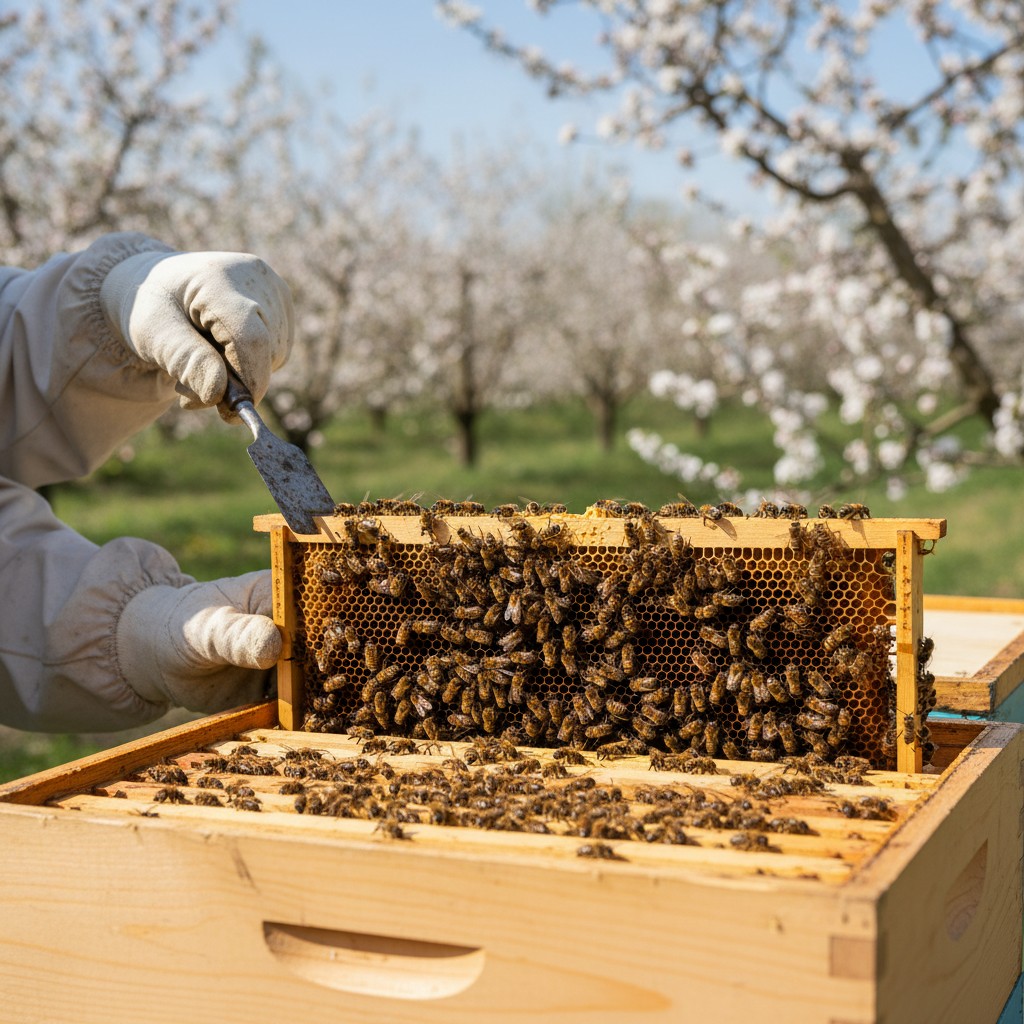
- First inspections. On a warm day (above 55°F, ideally 60°F+), do your first hive inspection. Look for: a laying queen (or evidence of eggs/young brood), adequate food stores, and general colony health.
- Clean bottom boards. Remove accumulated dead bees and debris from the winter months.
- Feed if necessary. If stores are low and natural nectar isn’t flowing yet, feed 1:1 sugar syrup (equal parts sugar and water by weight) to stimulate brood rearing.
- Check for disease. Look for signs of American foulbrood (sunken, perforated cappings), nosema (dysentery streaks on the hive exterior), and other issues.
My first March inspection was both thrilling and terrifying. I pulled my first frame and saw a beautiful pattern of capped brood, but I had no idea what I was looking at. I actually called my mentor and described it over the phone. She laughed gently and told me it was exactly what a healthy hive looks like. If you’re new to this, having someone experienced walk you through your first few inspections is worth its weight in honey.
April: Building Up

April is go-time for many beekeepers. Nectar starts flowing from dandelions, fruit trees, and spring wildflowers. Colonies are growing rapidly.
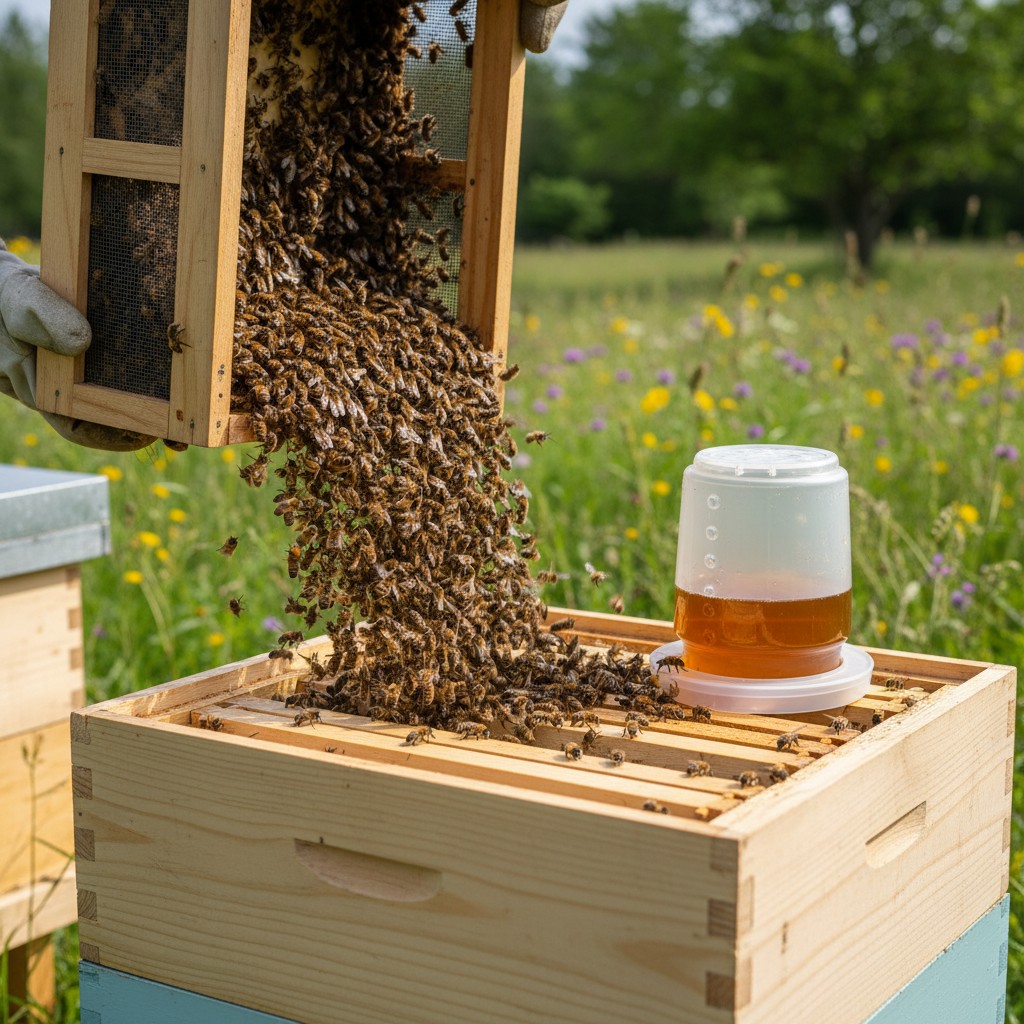
- Install packages or nucs. If you’re starting new hives, April is prime installation time in most moderate climates. Follow the supplier’s instructions for installation, and feed new colonies 1:1 sugar syrup until they’re drawing out comb.
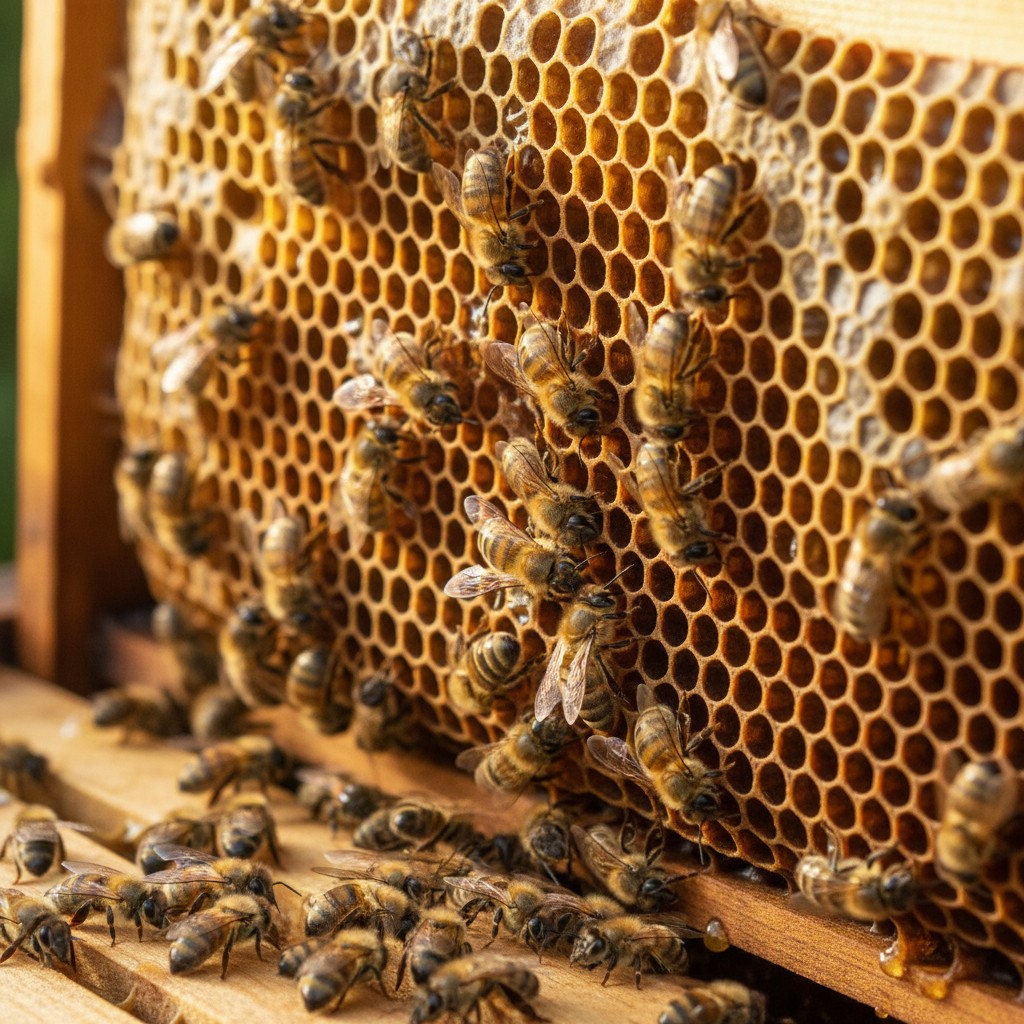
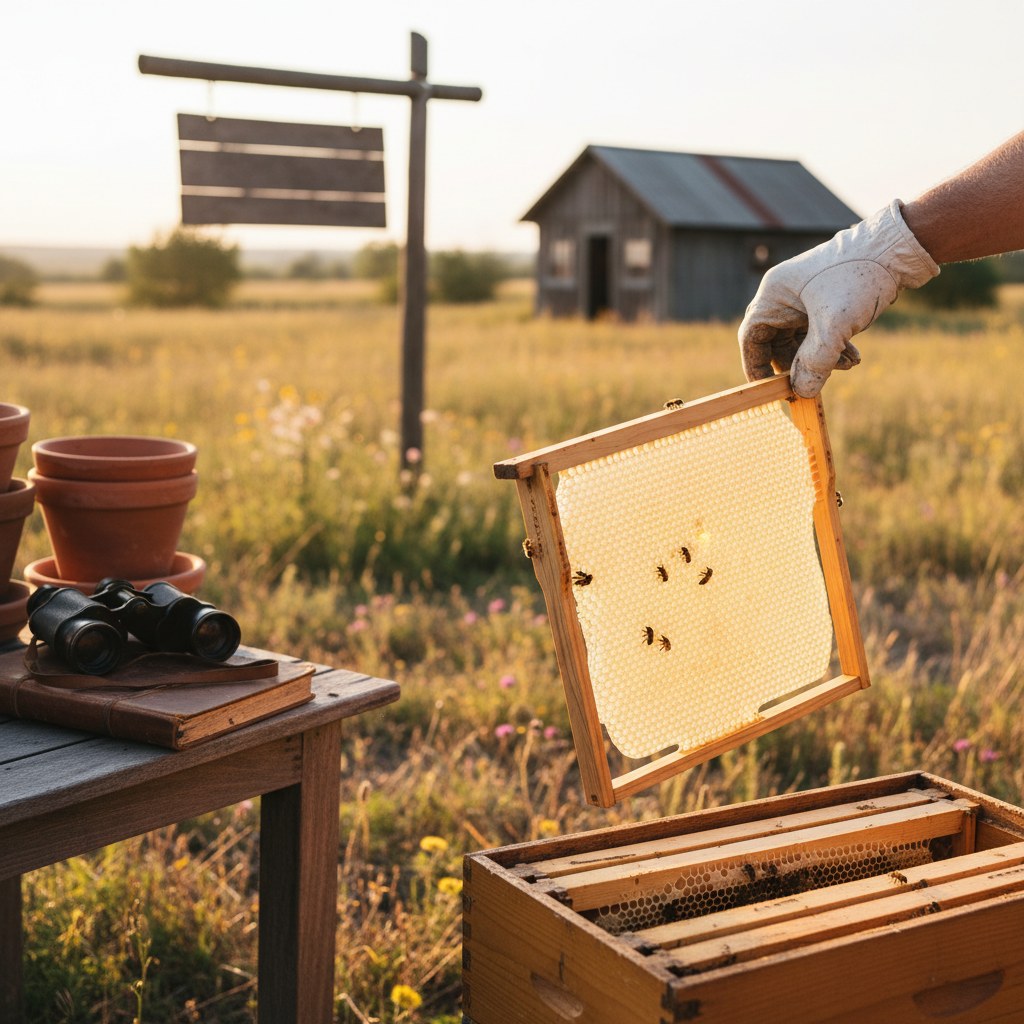
- Inspect every 7-10 days. Look for eggs (the queen is laying), a good brood pattern (solid, not spotty), and signs of queen cells (which can indicate swarm preparation).
- Swarm prevention begins. Ensure the brood nest isn’t congested. If the colony is packed and backfilling brood frames with nectar, add another box. Swarms happen when bees feel crowded.
- Plant for bees. If you have fruit trees, they’ll be blooming now and providing critical early forage.
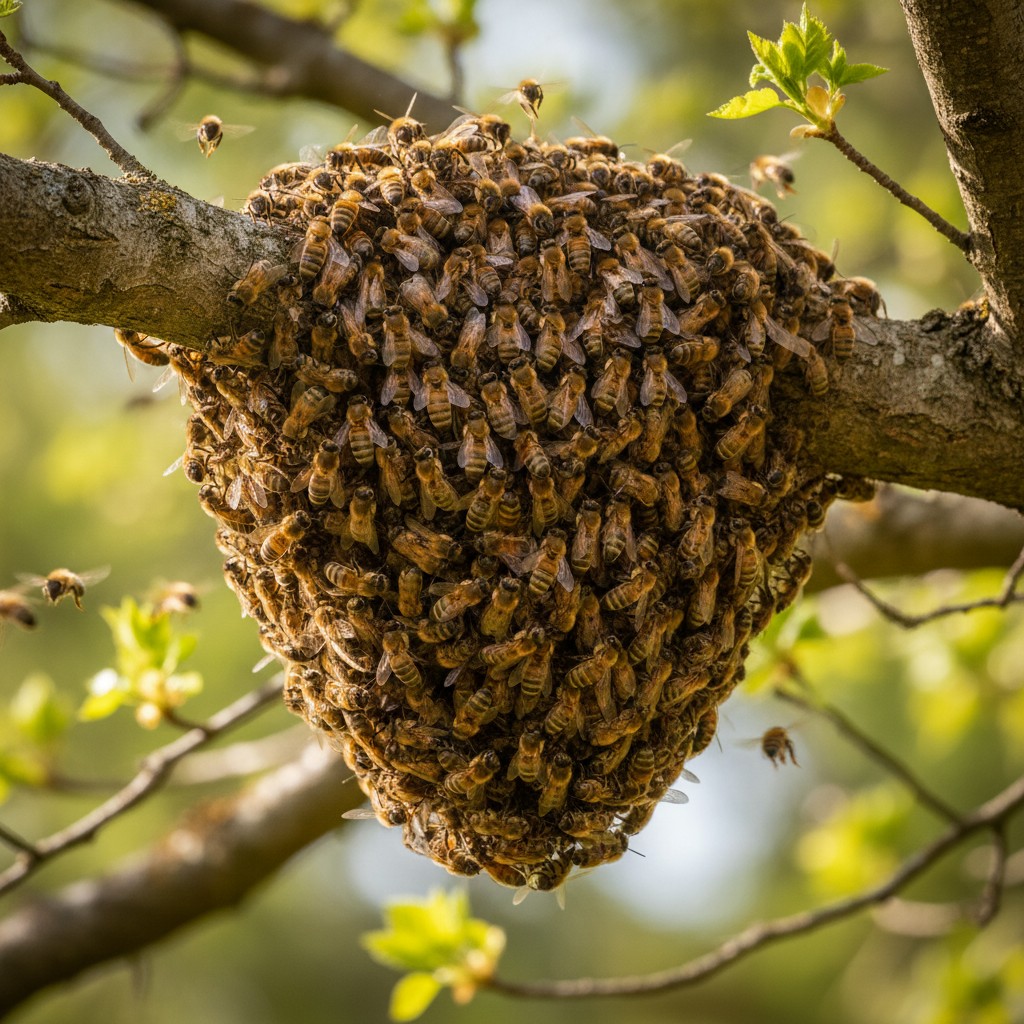
May: Swarm Season
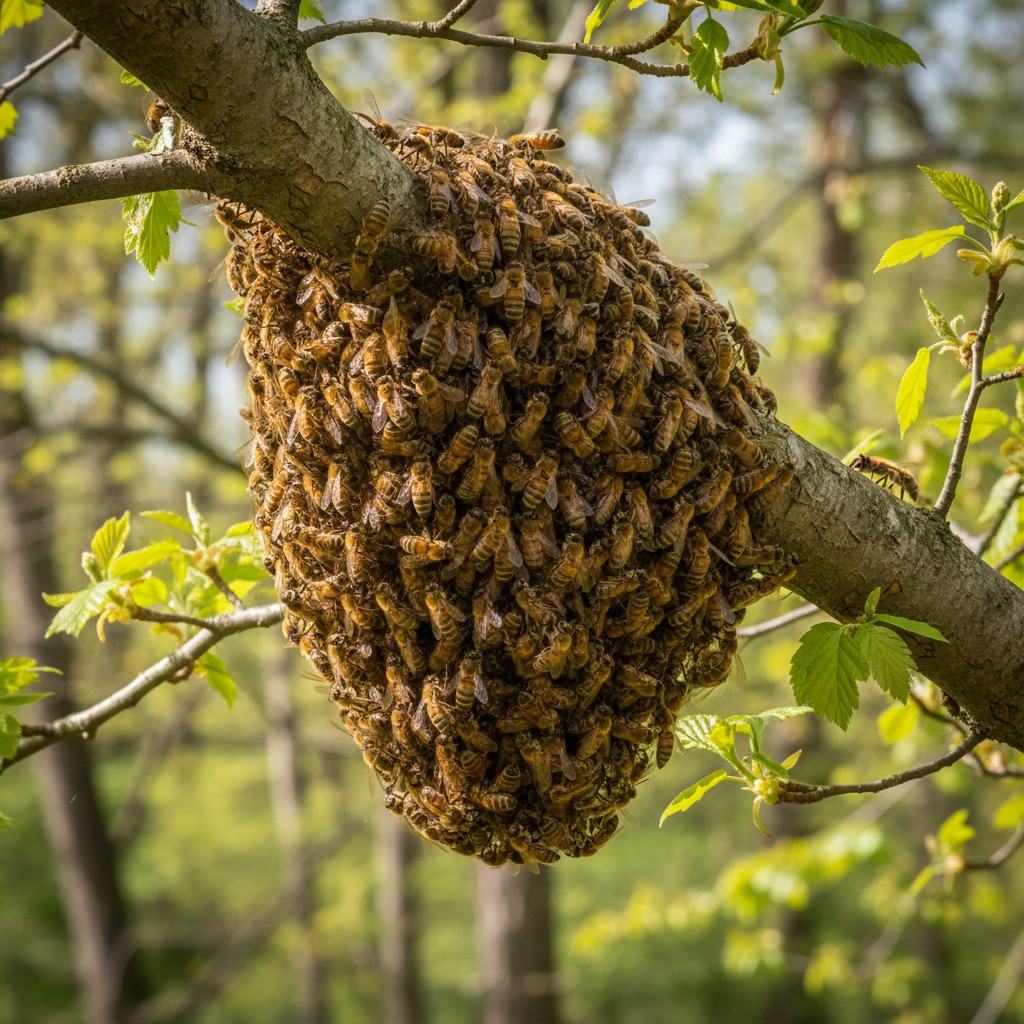
May is peak swarm season in most areas. Colonies are at full strength, and their biological impulse to reproduce (by swarming) is strong. This is also when the nectar flow often hits its stride.
- Manage for swarms. Look for swarm cells (queen cells on the bottom edges of frames) during every inspection. If you find them: you can split the hive (making a new colony from the original), destroy the cells (a temporary fix at best), or add space. Splitting is the most reliable method.
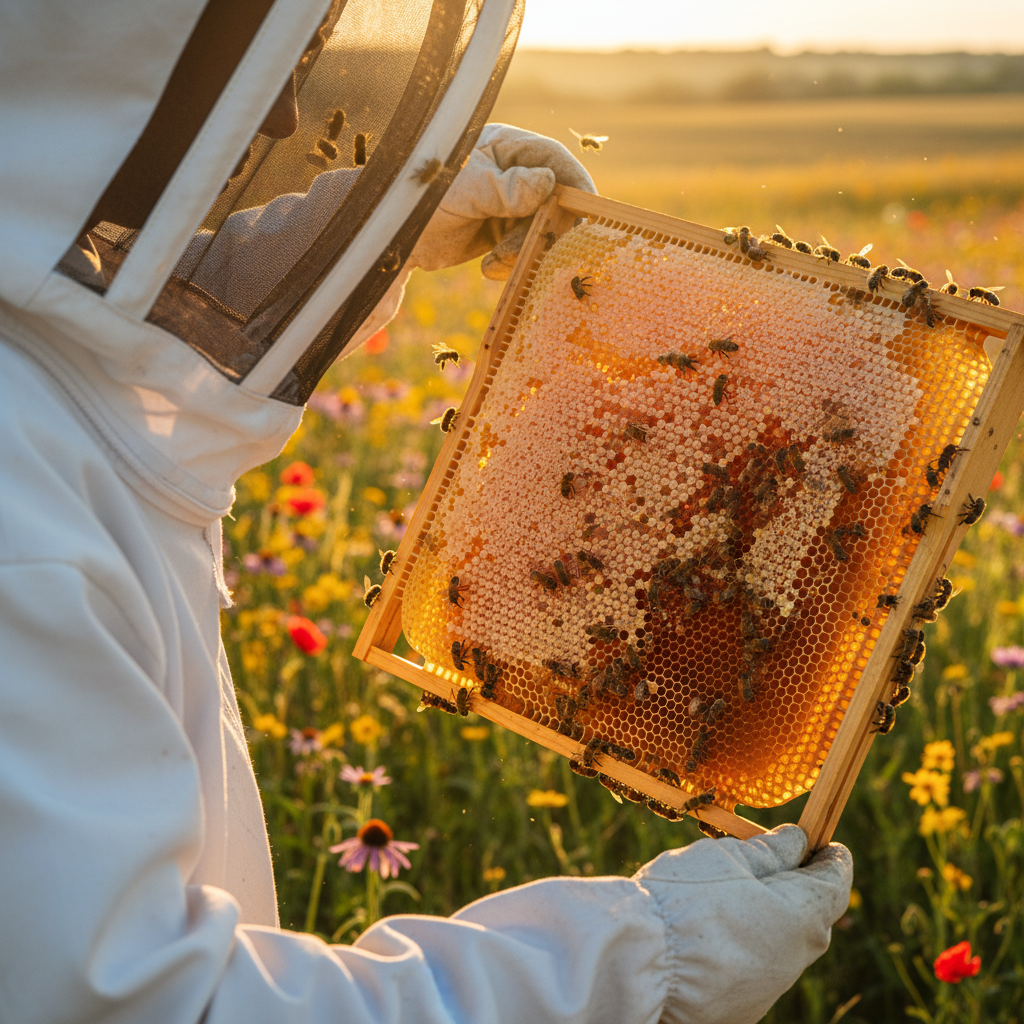
- Add honey supers. When the brood boxes are 70-80% full and nectar is flowing, add your first honey super with a queen excluder underneath. This is where your harvestable honey will be stored.
- Continue feeding new colonies until they’ve drawn out at least one full brood box of comb.
- Monitor for pests. Start doing varroa mite counts using a sugar roll or alcohol wash. Knowing your mite load early helps you plan treatments.
June: The Nectar Flow
June is typically the month of maximum nectar flow, clover, wildflowers, and garden plants are blooming prolifically. This is when bees do their most productive work.
- Add supers as needed. When the current super is 60-70% drawn and filled, add another on top. Don’t let bees run out of storage space, or they’ll backfill the brood nest (which leads to swarming) or simply stop foraging.
- Keep inspecting. Every 10-14 days, check brood health, queen status, and space. This can be a quicker inspection than spring, you’re mainly checking that things are progressing normally.
- Water source. Ensure bees have access to a reliable water source. A shallow dish with pebbles or corks for landing spots works well. Bees will find your neighbor’s pool if you don’t provide an alternative.
- Consider making splits from strong colonies to increase your apiary or replace winter losses.
| Month | Primary Focus | Inspection Frequency |
|---|---|---|
| Jan–Feb | Planning, ordering, preparation | None (external check only) |
| Mar–Apr | Spring buildup, installing new bees | Every 7–10 days |
| May–Jun | Swarm management, honey supers | Every 7–14 days |
| Jul–Aug | Honey harvest, mite management | Every 14 days |
| Sep–Oct | Winter preparation, fall feeding | Every 14–21 days |
| Nov–Dec | Hands-off monitoring | External only |
July: Monitoring and Maintenance
July often marks the beginning of the nectar dearth in many areas, the main flow has passed, and blooming plants become fewer. Bees shift from expansion mode to consolidation.
- Monitor honey supers. Check if supers are capped (at least 80% of cells sealed with wax). Fully capped honey is ready for harvest.
- Varroa mite treatment. Late July through August is the critical treatment window. Mite populations have been building all season and can crash a colony by fall if left unchecked. Popular treatments include formic acid (Formic Pro), oxalic acid, and thymol-based products (Apiguard).
- Robbing prevention. As nectar becomes scarce, stronger colonies may rob weaker ones. Reduce entrances on weaker hives, and avoid spilling sugar syrup near hives.
- Heat management. Ensure hives have adequate ventilation. Bees will beard (cluster outside the entrance) on hot evenings, this is normal cooling behavior, not a sign of swarming.
Varroa Action Threshold: Test, Then Treat
Monitor varroa levels monthly using a sugar roll or alcohol wash test (sampling ~300 bees). The Honey Bee Health Coalition‘s action threshold is 2–3 mites per 100 bees (2–3%), treat immediately when you hit it. Waiting until you see mites on bees means the infestation is already severe. For the late-July/August treatment window, proven options include Formic Pro (formic acid, works through cappings), oxalic acid vaporization (best on broodless colonies), and Apiguard (thymol gel, temperature-sensitive). Always follow label directions for your daytime temperatures.

August: Honey Harvest
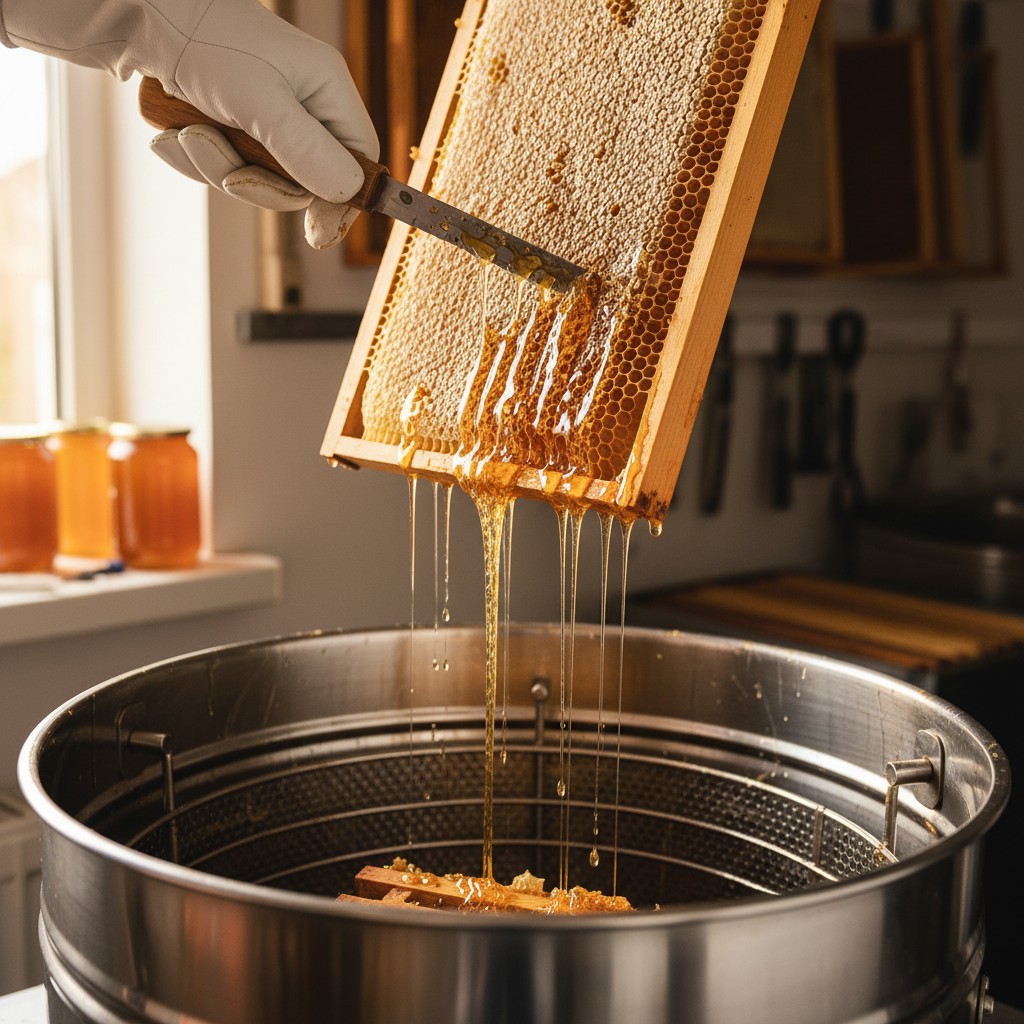
August is harvest time for most first-year beekeepers. There’s nothing quite like extracting your own honey, it’s the culmination of months of work (mostly by the bees, but you played a part too).
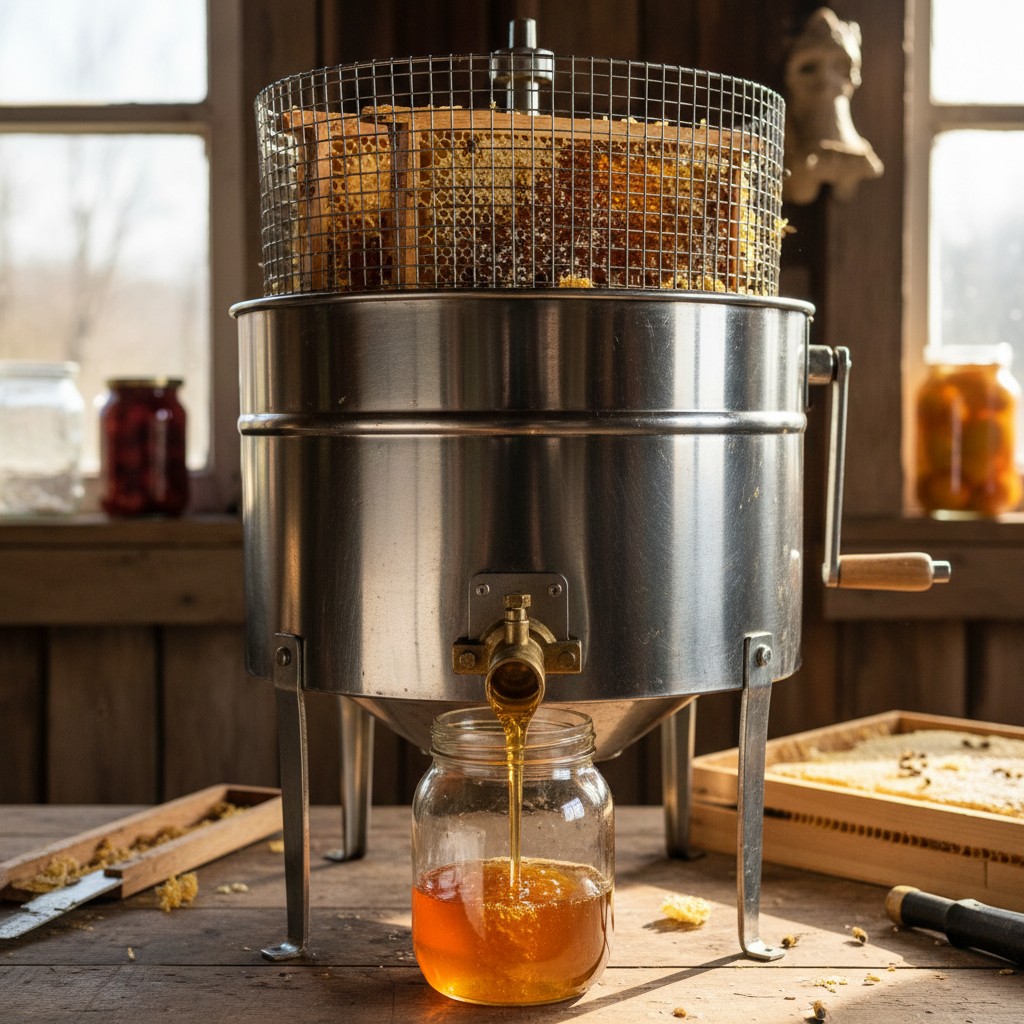
- Harvest honey. Remove fully capped supers using a bee escape board, fume board, or by brushing bees off frames. Extract honey using a centrifugal extractor (many beekeeping clubs have ones you can borrow), strain through a fine mesh, and bottle. That first jar of your own honey is genuinely one of the great homesteading moments.
- Leave enough for the bees. A colony needs 60-90 pounds of honey to survive winter (depending on your climate). For first-year hives, I recommend erring on the side of leaving more and taking less, or not harvesting at all. The colony’s survival is more important than your honey harvest.
- Continue mite treatment if started in July.
- Save your beeswax. The cappings you cut off during extraction are pure beeswax, render them for making beeswax wraps, candles, lip balm, and other homestead crafts.
I didn’t harvest any honey my first year. My mentor told me the bees needed it more than I did, and she was absolutely right. That colony came through winter strong and gave me an incredible harvest the following August. Patience pays off in beekeeping, literally.
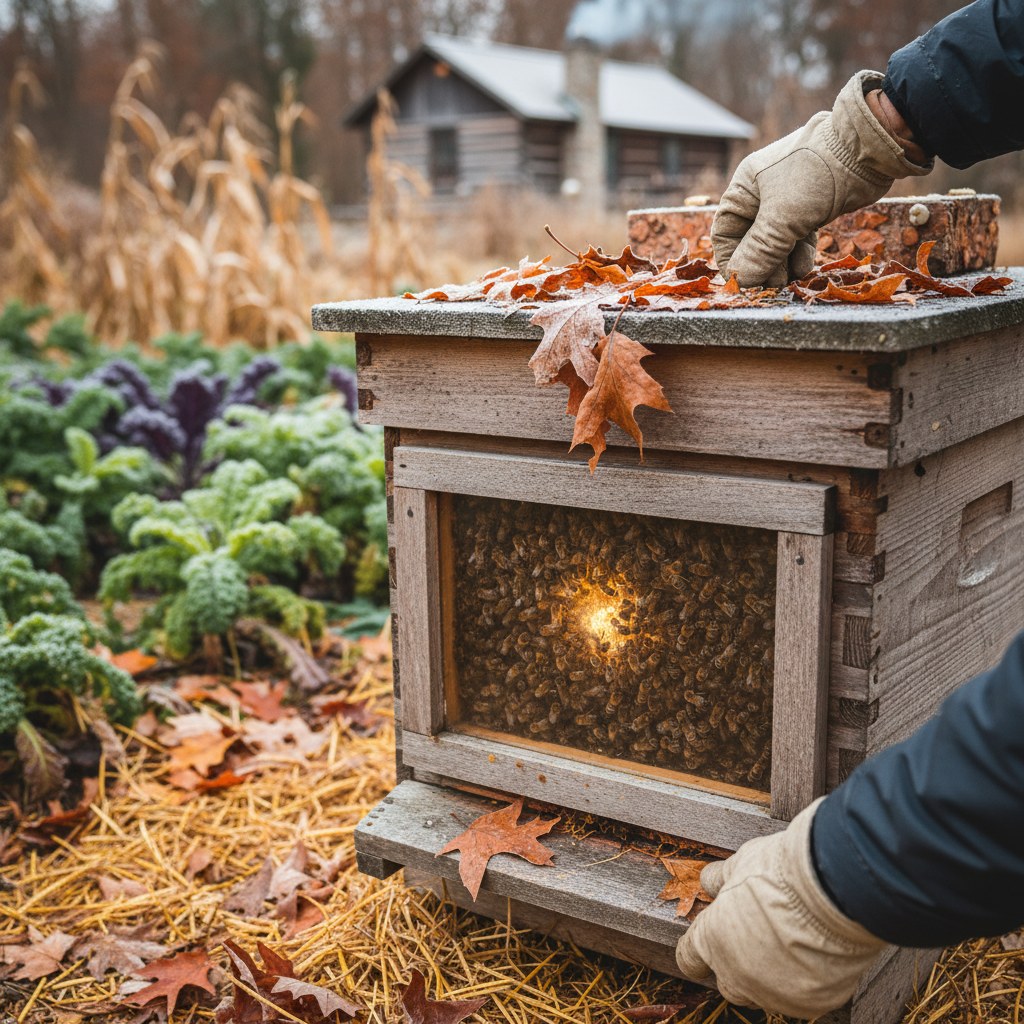
September: Winter Prep Begins
September marks the shift from summer management to winter preparation. What you do this month largely determines whether your bees survive the coming cold months.
- Assess colony strength. A healthy colony going into fall should have 30,000-60,000 bees, a laying queen, and adequate stores. Weak colonies can be combined with strong ones using the newspaper method.
- Fall feeding. If a colony is light on stores after the honey harvest, feed heavy syrup (2:1 sugar to water) to help them build up reserves. Feed aggressively, they need those stores.
- Final mite treatment. If you haven’t treated for varroa yet, September is your last good window. High mite loads going into winter are the number one killer of colonies.
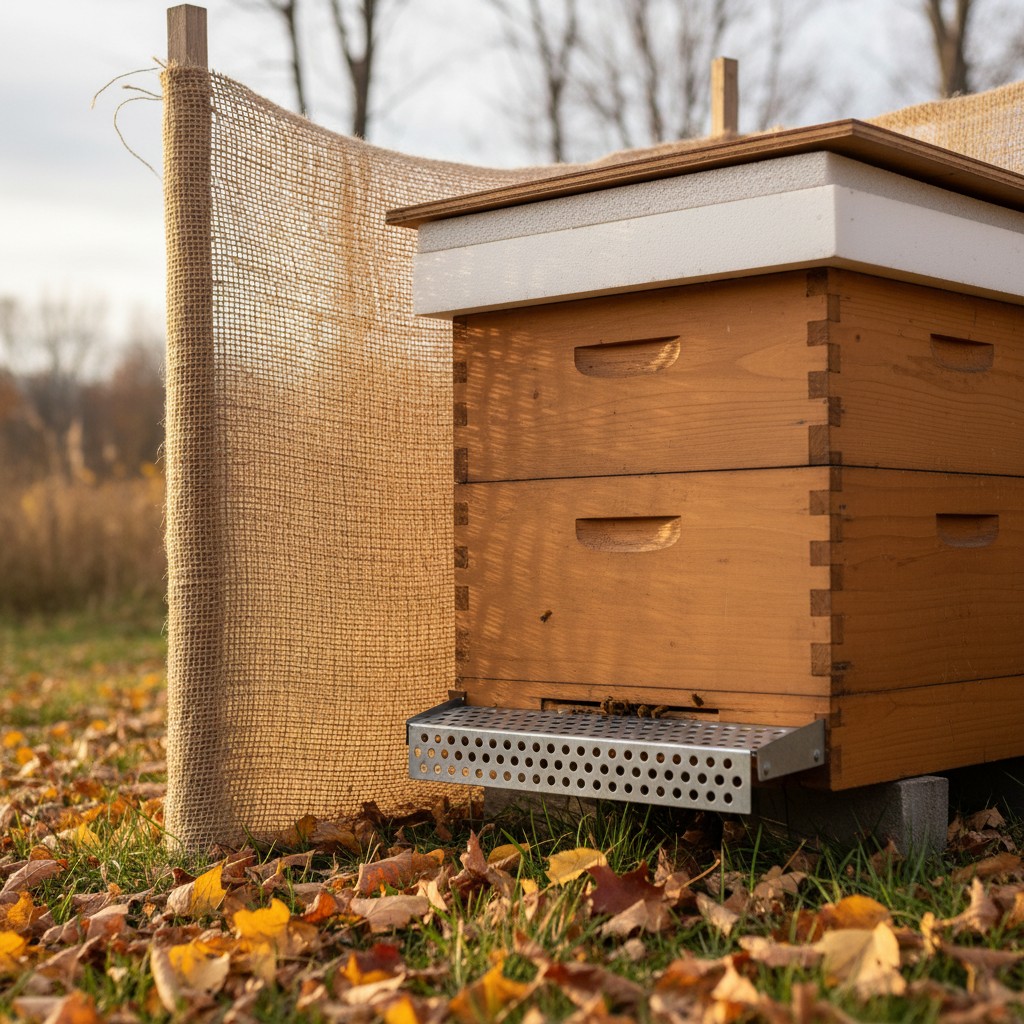
- Reduce entrances. Smaller entrances are easier for guard bees to defend against robbers and keep out mice (which will move into warm hives as temperatures drop).
October: Winterizing
October is your last chance for meaningful interventions before winter settles in.
- Install mouse guards. A strip of metal with holes large enough for bees but too small for mice, placed over the hive entrance.
- Ensure ventilation. Moisture is a bigger winter killer than cold. Make sure there’s upper ventilation, a shim with a notch, a slightly propped inner cover, or a moisture board absorbs condensation that would otherwise drip on the cluster.
- Wind protection. Strap hives down against winter winds. Some beekeepers wrap hives with tar paper or insulation wraps, opinions vary on whether this helps, but it doesn’t hurt.
- Remove queen excluders. If left on over winter, the cluster may move upward to follow food stores but leave the queen trapped below.
- Plant for next year. Fall is an excellent time to plant perennial herbs and wildflowers that will feed your bees next spring and beyond.
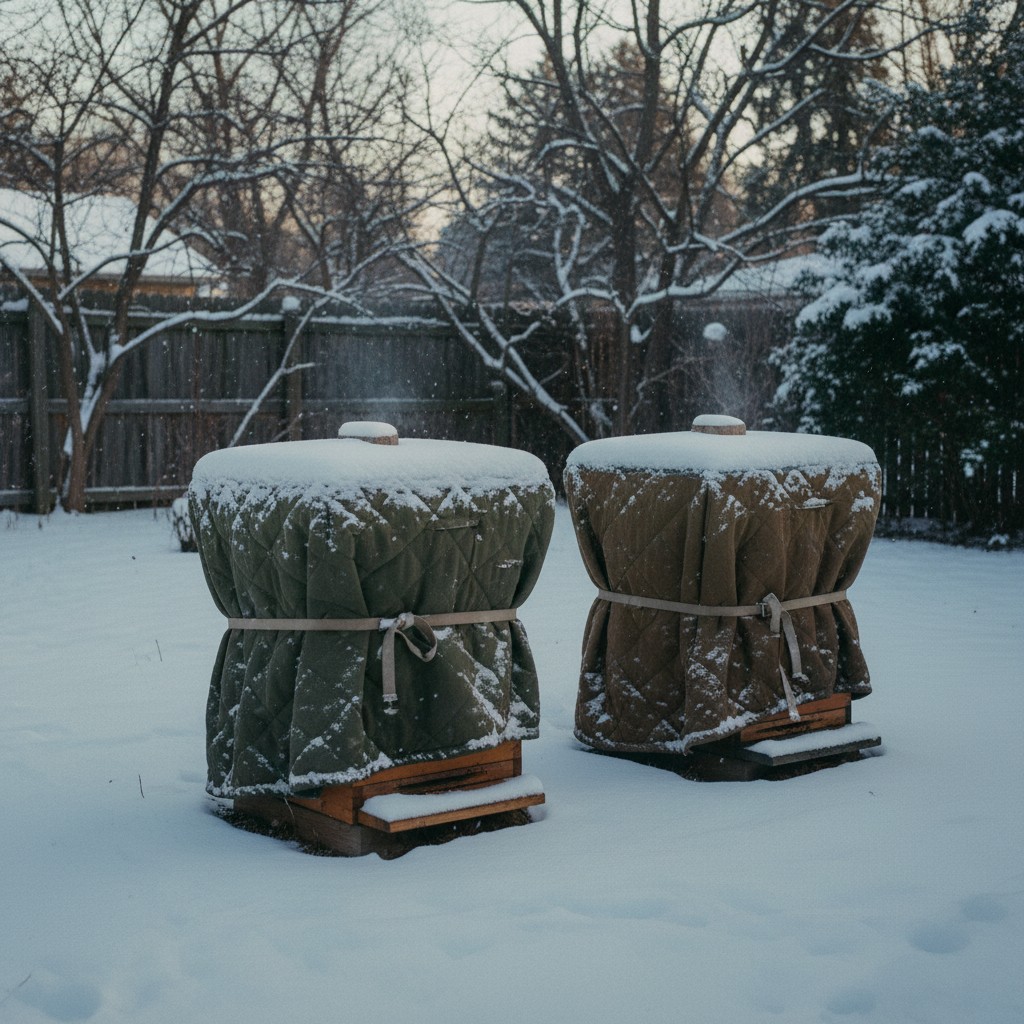
November: Hands Off
By November, the bees are clustered and your interventions should be minimal. The cluster maintains about 94°F at the center and slowly moves through the hive consuming honey stores.
- Don’t open the hive. Cold inspections stress the cluster and break the propolis seal the bees have worked to create.
- External monitoring only. On milder days, watch the entrance. Some activity (cleansing flights) on days above 45°F is normal and healthy.
- Heft the hive. Gently tip one side of the hive to gauge weight. A heavy hive has plenty of stores; a noticeably light hive may need emergency feeding.
- Repair and build equipment for next season while things are quiet.
December: Rest and Reflect
December is the quietest month for both bees and beekeepers. The queen has reduced or stopped laying, and the colony is in deep conservation mode.
- Check hive weight on warmer days. If a hive feels dangerously light, add a fondant candy board or sugar cake as emergency food on the next warm-ish day.
- Review your season. What worked? What didn’t? Keep a hive journal, it’s the single most valuable tool for improving your beekeeping year over year.
- Order supplies for next year. January orders fill up fast for packages and nucs.
- Give honey gifts. Jars of your own honey make incredible holiday gifts. Everyone loves them.
First-Year Expectations
Let me be honest about what to expect in year one. Many first-year beekeepers don’t harvest any honey, and that’s fine. Your goals for the first year should be:
- Keep your colony alive and healthy through the season
- Learn to identify the queen, brood patterns, and common pests
- Build confidence in hive inspections
- Get the colony through winter with adequate stores
If you do all four, your first year is a resounding success, whether you harvest a single drop of honey or not. Year two is when most beekeepers hit their stride and start bringing in a real harvest.
Frequently Asked Questions
How much honey will I get in my first year?
Many first-year beekeepers harvest zero honey, and that’s perfectly normal. New colonies need to build comb, establish brood, and build up stores before there’s surplus to harvest. If conditions are excellent and your colony is strong, you might get 10-30 pounds. Second-year colonies with established comb often produce 30-60+ pounds.
How many hives should a beginner start with?
Two hives is the ideal starting number. Having two allows you to compare colonies (so you can spot problems by contrast), borrow resources from one hive to help another, and gives you a backup if one fails. Starting with just one is workable but riskier.
What’s the biggest mistake first-year beekeepers make?
Not treating for varroa mites. Many new beekeepers want to keep their hives “treatment-free,” but varroa destructor is a devastating parasite that has eliminated most feral honey bee colonies in North America. Without management, most colonies will die within 1-2 years. Start with a proven treatment protocol and adjust as you gain experience.
Do bees sting during inspections?
Occasional stings are part of beekeeping, but a gentle colony inspected calmly and with a smoker will usually leave you unstung. Wear your protective gear (at least a veil) for every inspection, work on warm and sunny days when foragers are out, and move slowly and deliberately. Some beekeepers go entire seasons without a sting.
Can I keep bees in my backyard?
In most areas, yes. Check local ordinances, many cities and suburbs allow beekeeping with some restrictions (setback distances, hive limits, registration requirements). Position hives so the flight path doesn’t cross walkways, and a fence or hedge in front of the hive forces bees to fly up and over at heights above head level.
🌱 From Our Homestead
We got our first two hives last April and I will never forget opening them for the first inspection, thousands of bees humming calmly while we looked for the queen. Beekeeping has taught our whole family patience and respect for these incredible little creatures.